Ciabatta Bread Recipe
I wanted to be able to control the ingredients in my bread. That was a challenge because I wasn’t a baker before deciding to make bread from scratch. Ciabatta Bread rolls are one of the first recipes I learned to practice and make. This recipe takes a bit of hands off time, but it is easy to make for someone who is new to baking. I’m new enough to have recently seen the pitfalls and dealt with them.

Why You’ll Love this Recipe
- Helps you get over the fear of working with dough
- Freezer friendly recipe
- Lets you practice rolling and shaping
What You’ll Walk Away Knowing
- How to make ciabatta dough with a stand mixer
- How to make ciabatta dough by hand with the stretch and fold method
Characteristics of Ciabatta Dough and Bread
High Hydration Dough: Ciabatta dough is a wet dough. The wet dough creates steam in the oven, helping the bread rise and form a light, airy crumb. High hydration doughs can lead to stickiness when working with the dough.
Sticky Dough Tips: To work with a sticky dough, you can wet your hands lightly before touching the dough or dust the dough with flour. Just enough so it’s not sticking to you. I also use a bench scrapper to get under the dough when it’s on the work surface without pulling it up by hand.
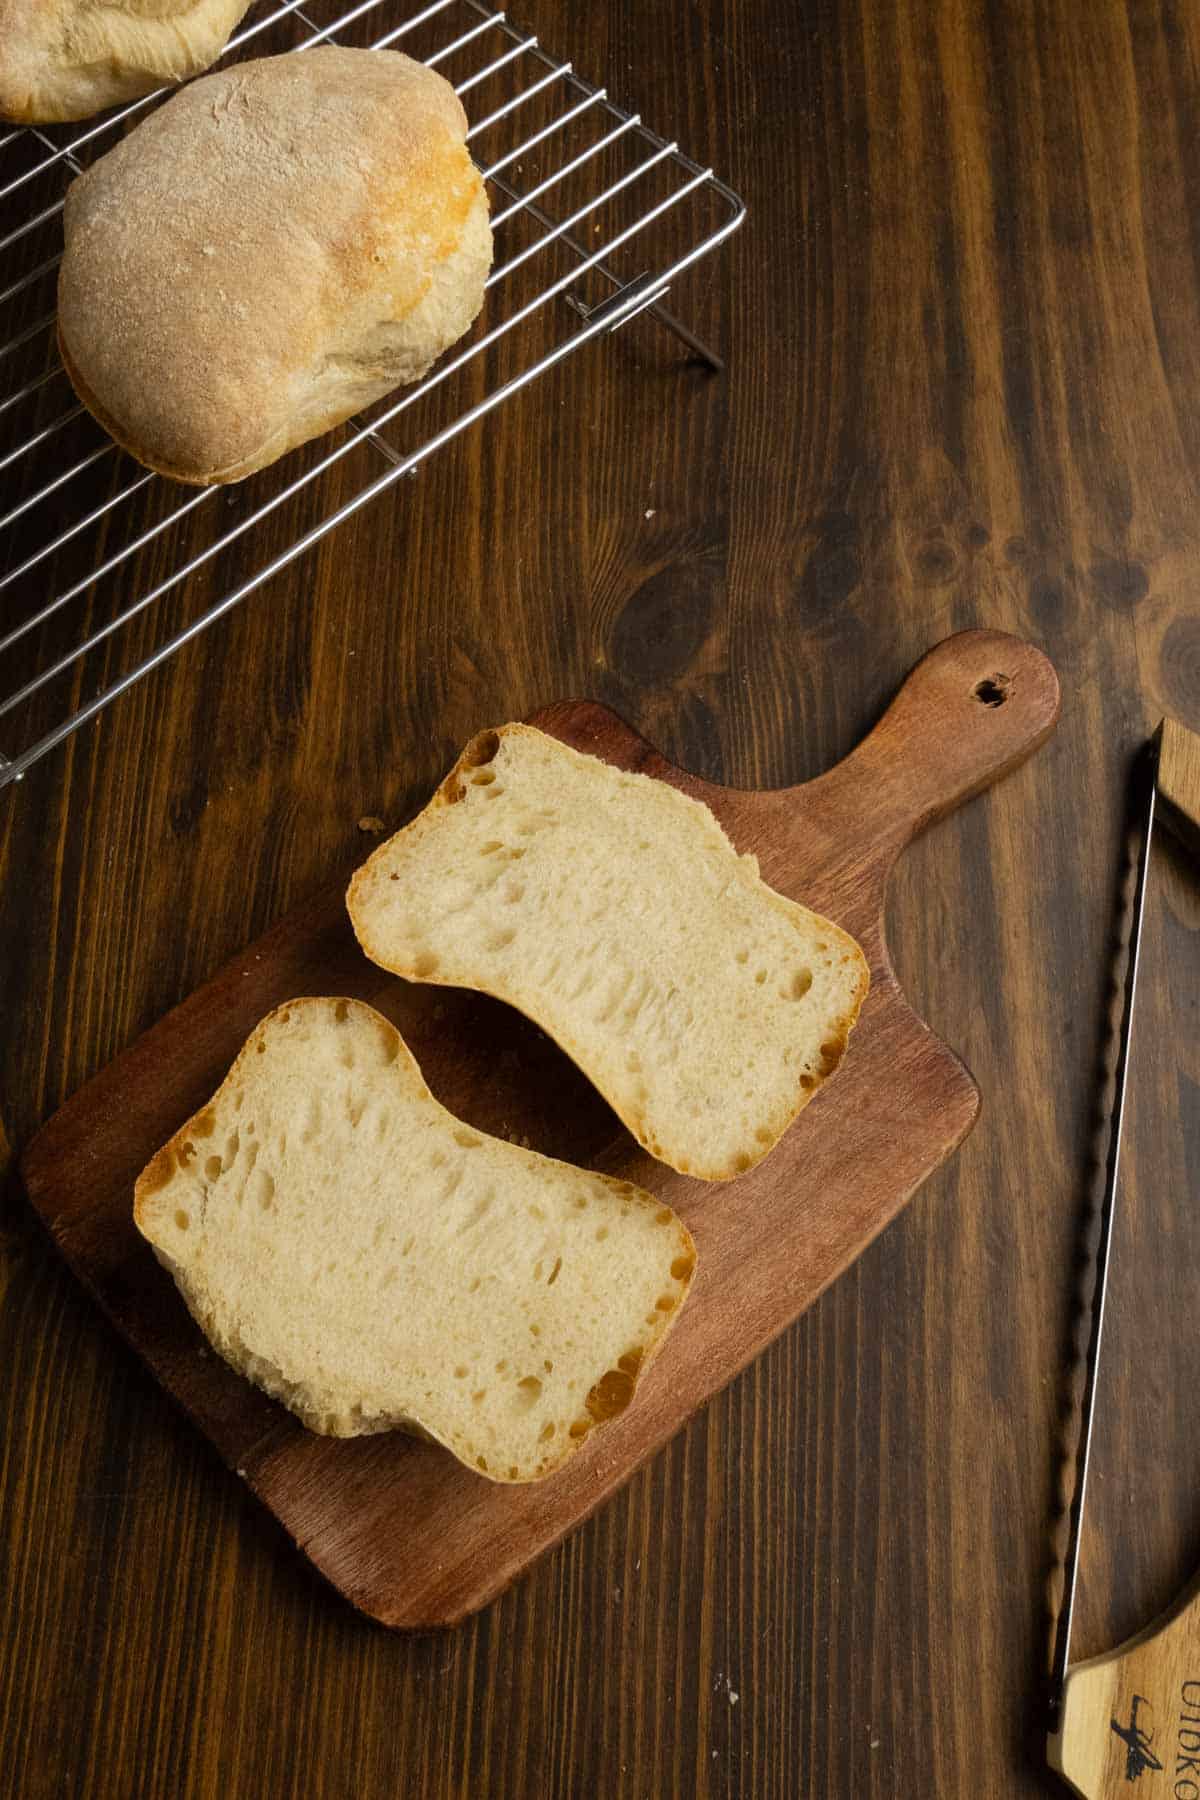
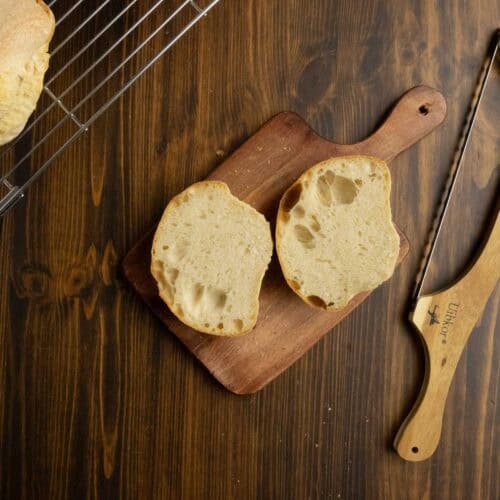
Open Crumb: An open crumb refers to the tightness of the internal bread structure. Ciabatta bread should have large holes. Sandwich breads and cakes have a tight crumb. Ciabattas have large holes in the dough because they puff up in the oven and the steam from the hydrated dough escapes.
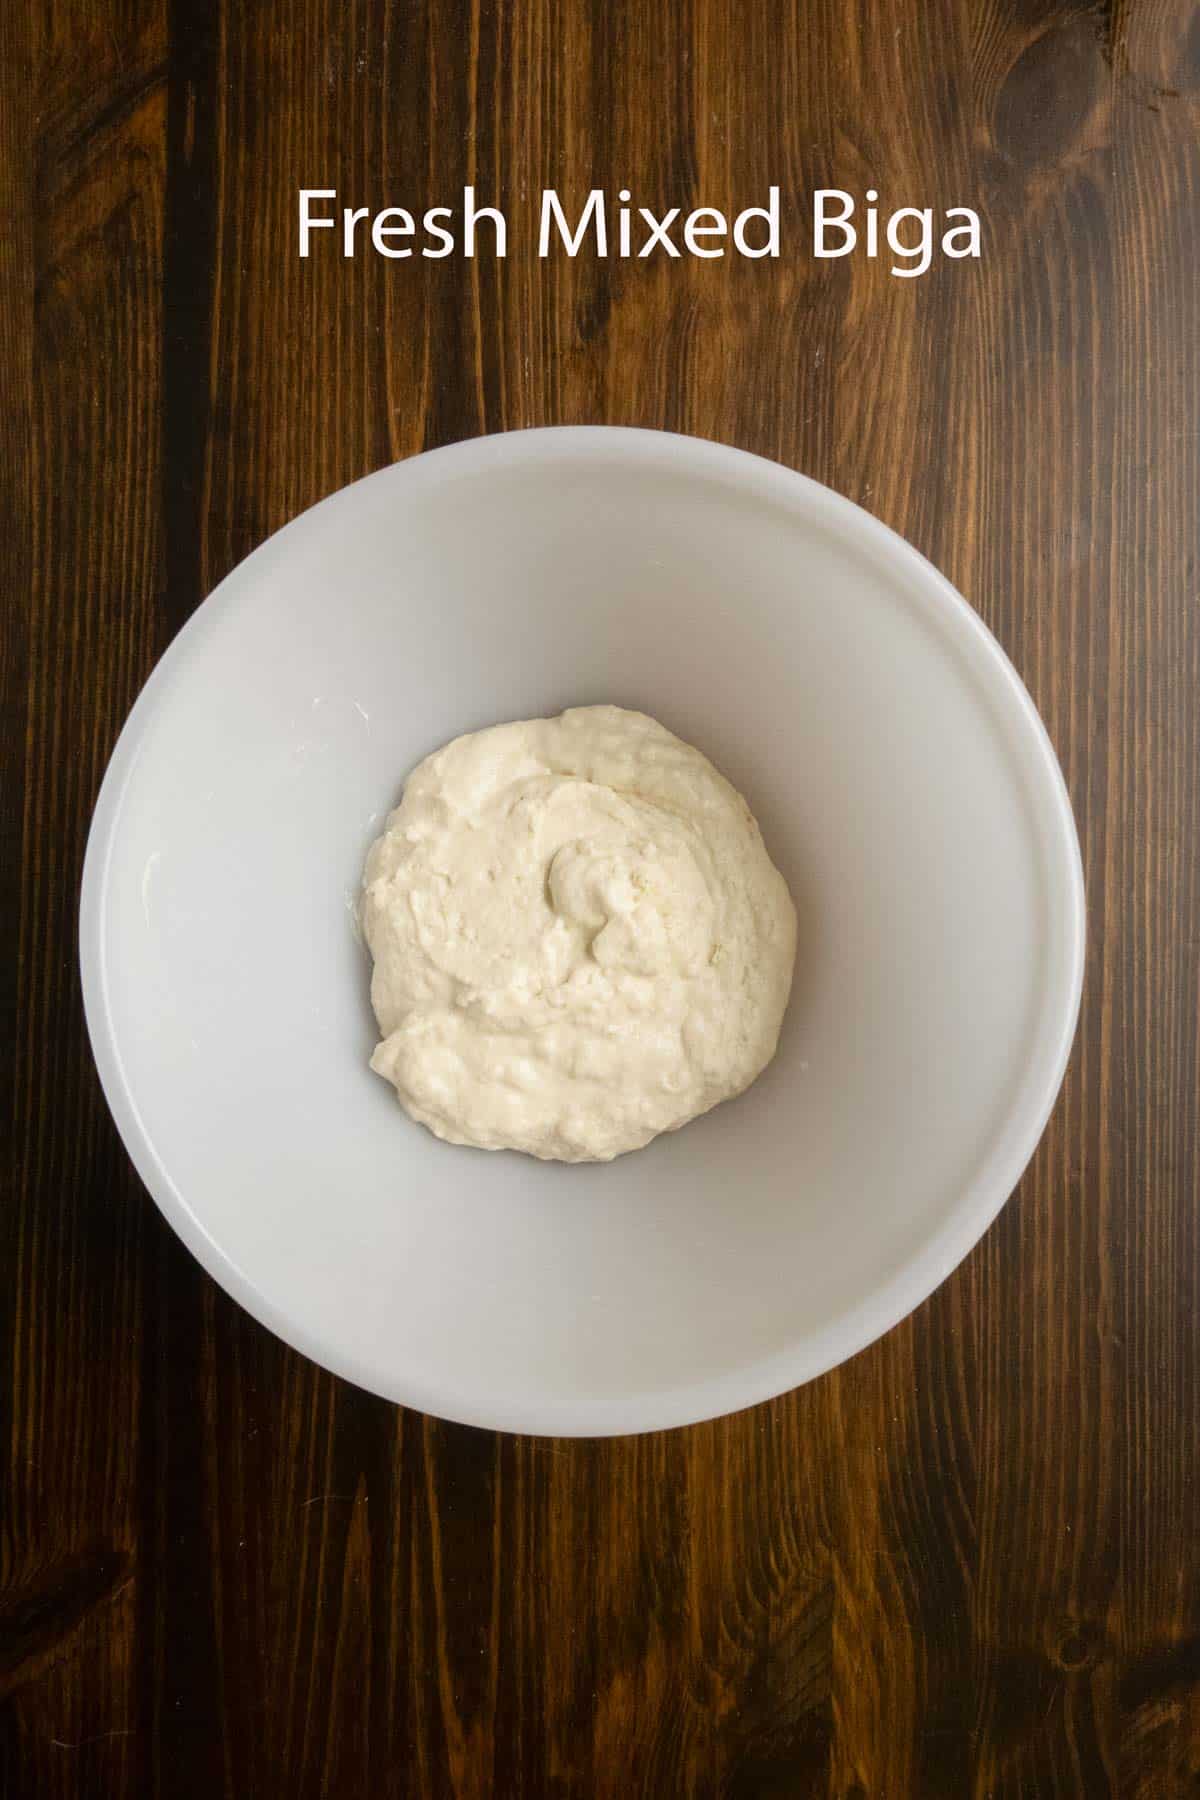
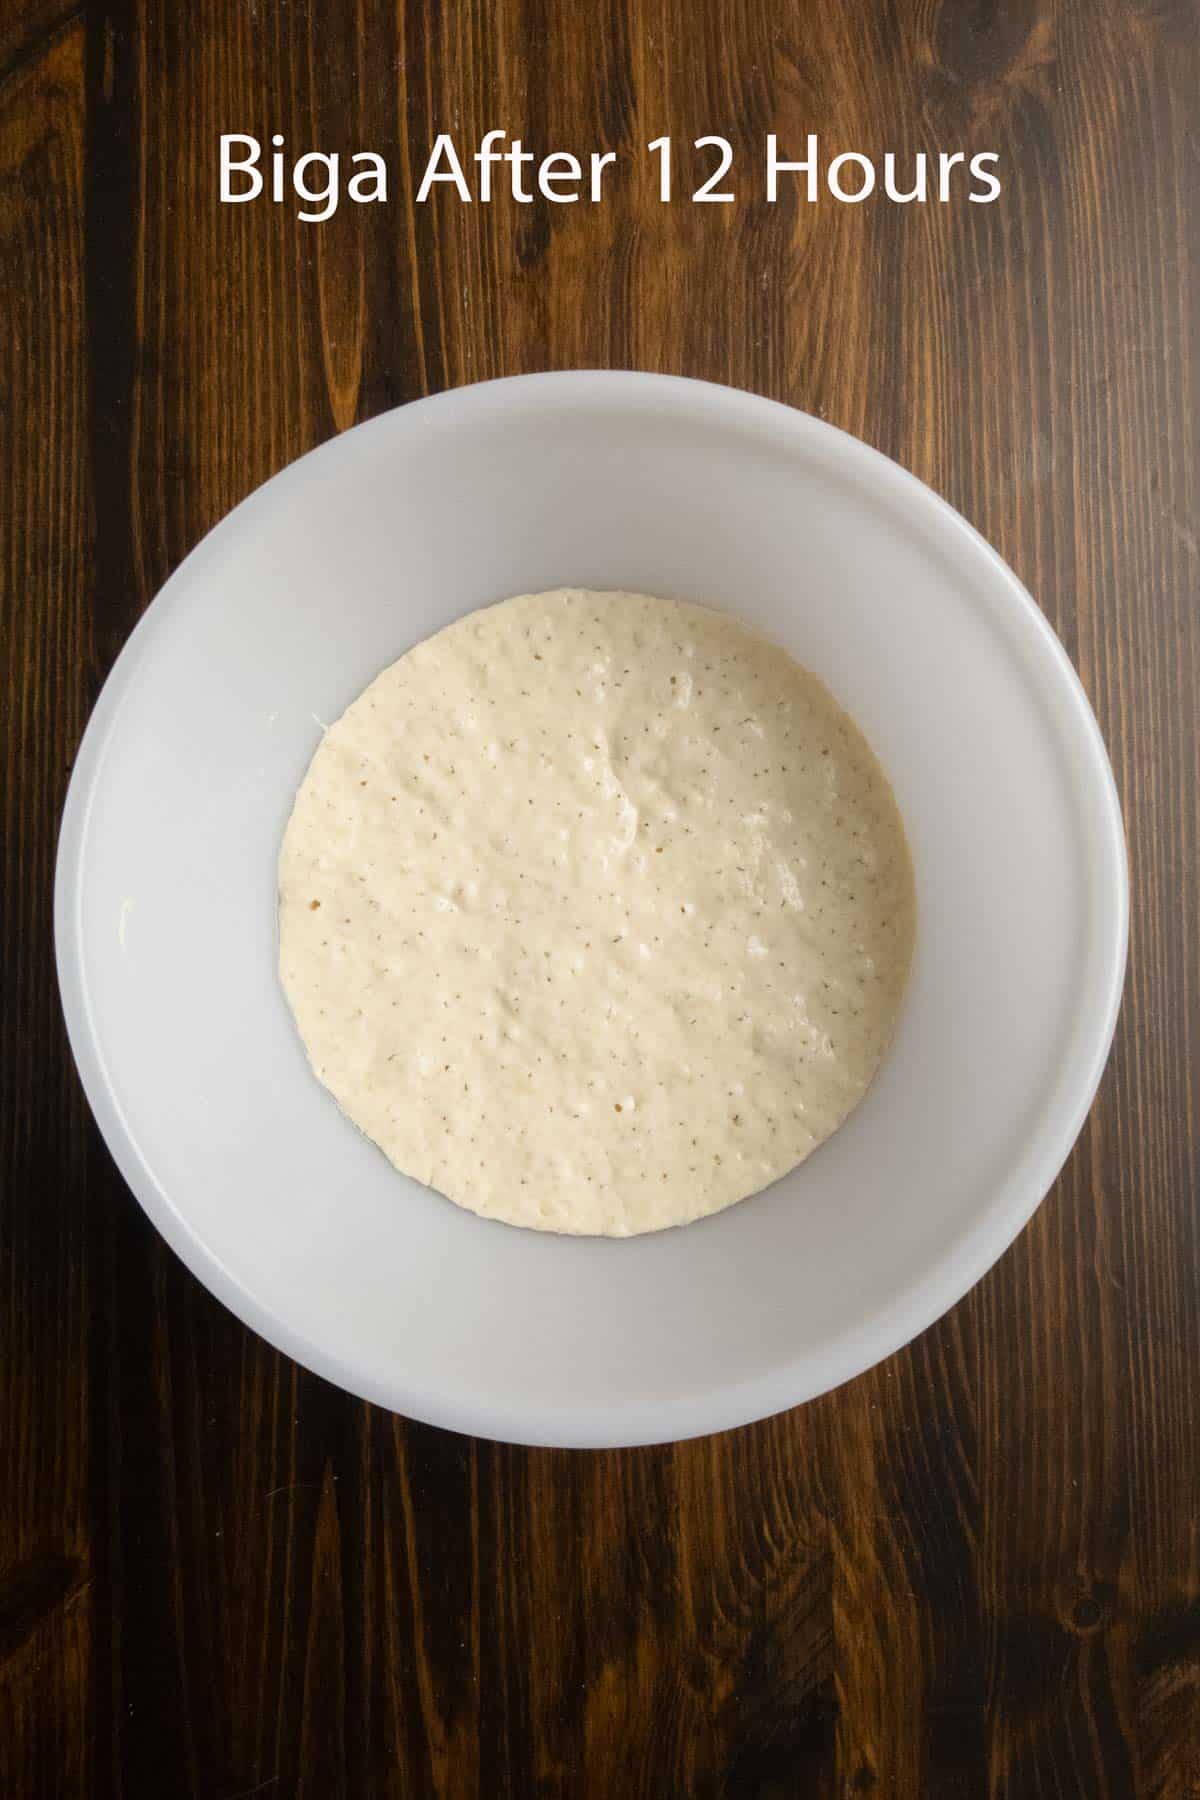
Biga (Yeast Starter): Biga is the Italian world for the yeast starter. It means firm starter dough. We ferment the biga overnight which develops the dough’s flavor and allows for the open crumb by strengthening the dough without making it too elastic or tight.
Oven Spring: This is what happens when you first put your ciabatta into the oven. The ice cubes create steam, which makes the outside chewy, and the yeast puffs up in an effort to escape death by hot oven. The dough expands and puffs up.
Stand Mixer or Hand Mixed
I use my Kitchen Aid stand mixer because I have it. If you have a stand mixer, I would just use that.
This recipe is easily made without one though and you’ll still have great ciabatta bread. You mix the dough ingredients with a dough hook or spatula and then stretch and fold every 15 to 30 minutes, making this a no knead recipe. This produces a shaggy, wet dough that comes together beautifully with time and stretching.
Stretch and Folds for Hand Mixing
Stretch and folds are a technique used to strengthen the dough. After the dough is mixed, you start to stretch and fold.
With the bowl facing you, cup your hand and grab the dough from the top of the bowl. Stretch the dough up and over to the bottom of the bowl. Rotate the bowl a quarter turn and repeat pulling the dough from the top to the bottom. Rotate the bowl again and do the same for a total of 4 stretches and folds. Turn the dough over so the seam is on the bottom. You do these stretches and folds every 15 to 30 minutes for a total of 4 stretch and fold rounds.
The stretching strengthens the gluten. The time in between relaxes the dough so that you can stretch and fold again without the dough tearing and snapping back at you.

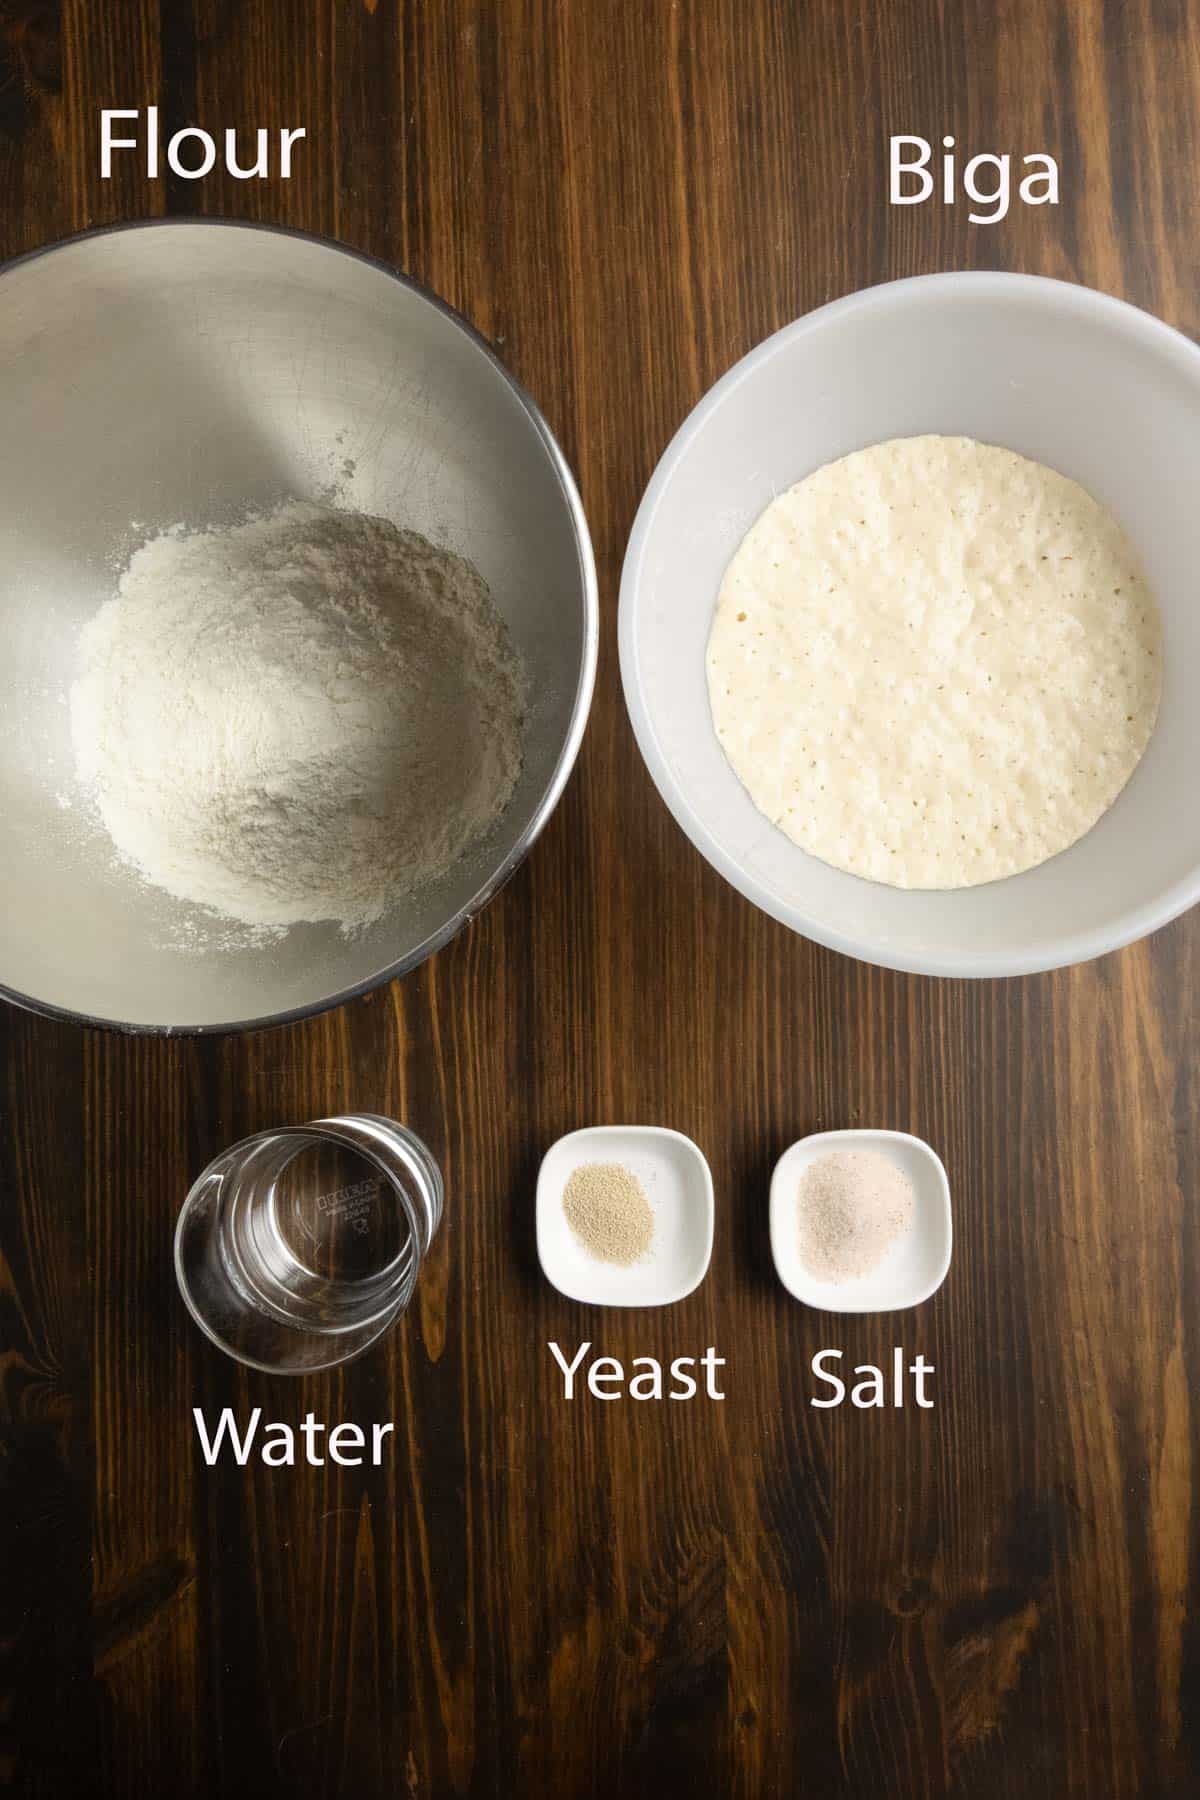
Ingredient List
Flour: Ciabattas are characterized by their chewy and crisp texture. Bread flour has more protein and lends to a chewier texture. You can also use all purpose flour. Bread flour typically has 12–13% protein vs. 10–11% in AP flour.
Yeast: I use active dry yeast because my grocery store had large jars of it. You can also use instant yeast. I keep my yeast in the freezer to preserve it. It perks right up when put in warm water.
Water: Active dry yeast needs to be proofed by adding it to water and letting it foam. The water needs to be warm enough to wake the yeast up, but not too hot to kill it. 100-110°F is the ideal range.
Salt: Necessary for flavor, but also strengthens gluten. It’s best added after the yeast is hydrated.
Step-by-Step Instructions
Biga (Yeast Starter)
The night before making the recipe, mix 1 cup flour, ½ teaspoon yeast, and ¾ cup water. Cover with plastic wrap and ferment overnight for 8-12 hours at room temperature.
Ciabatta Dough
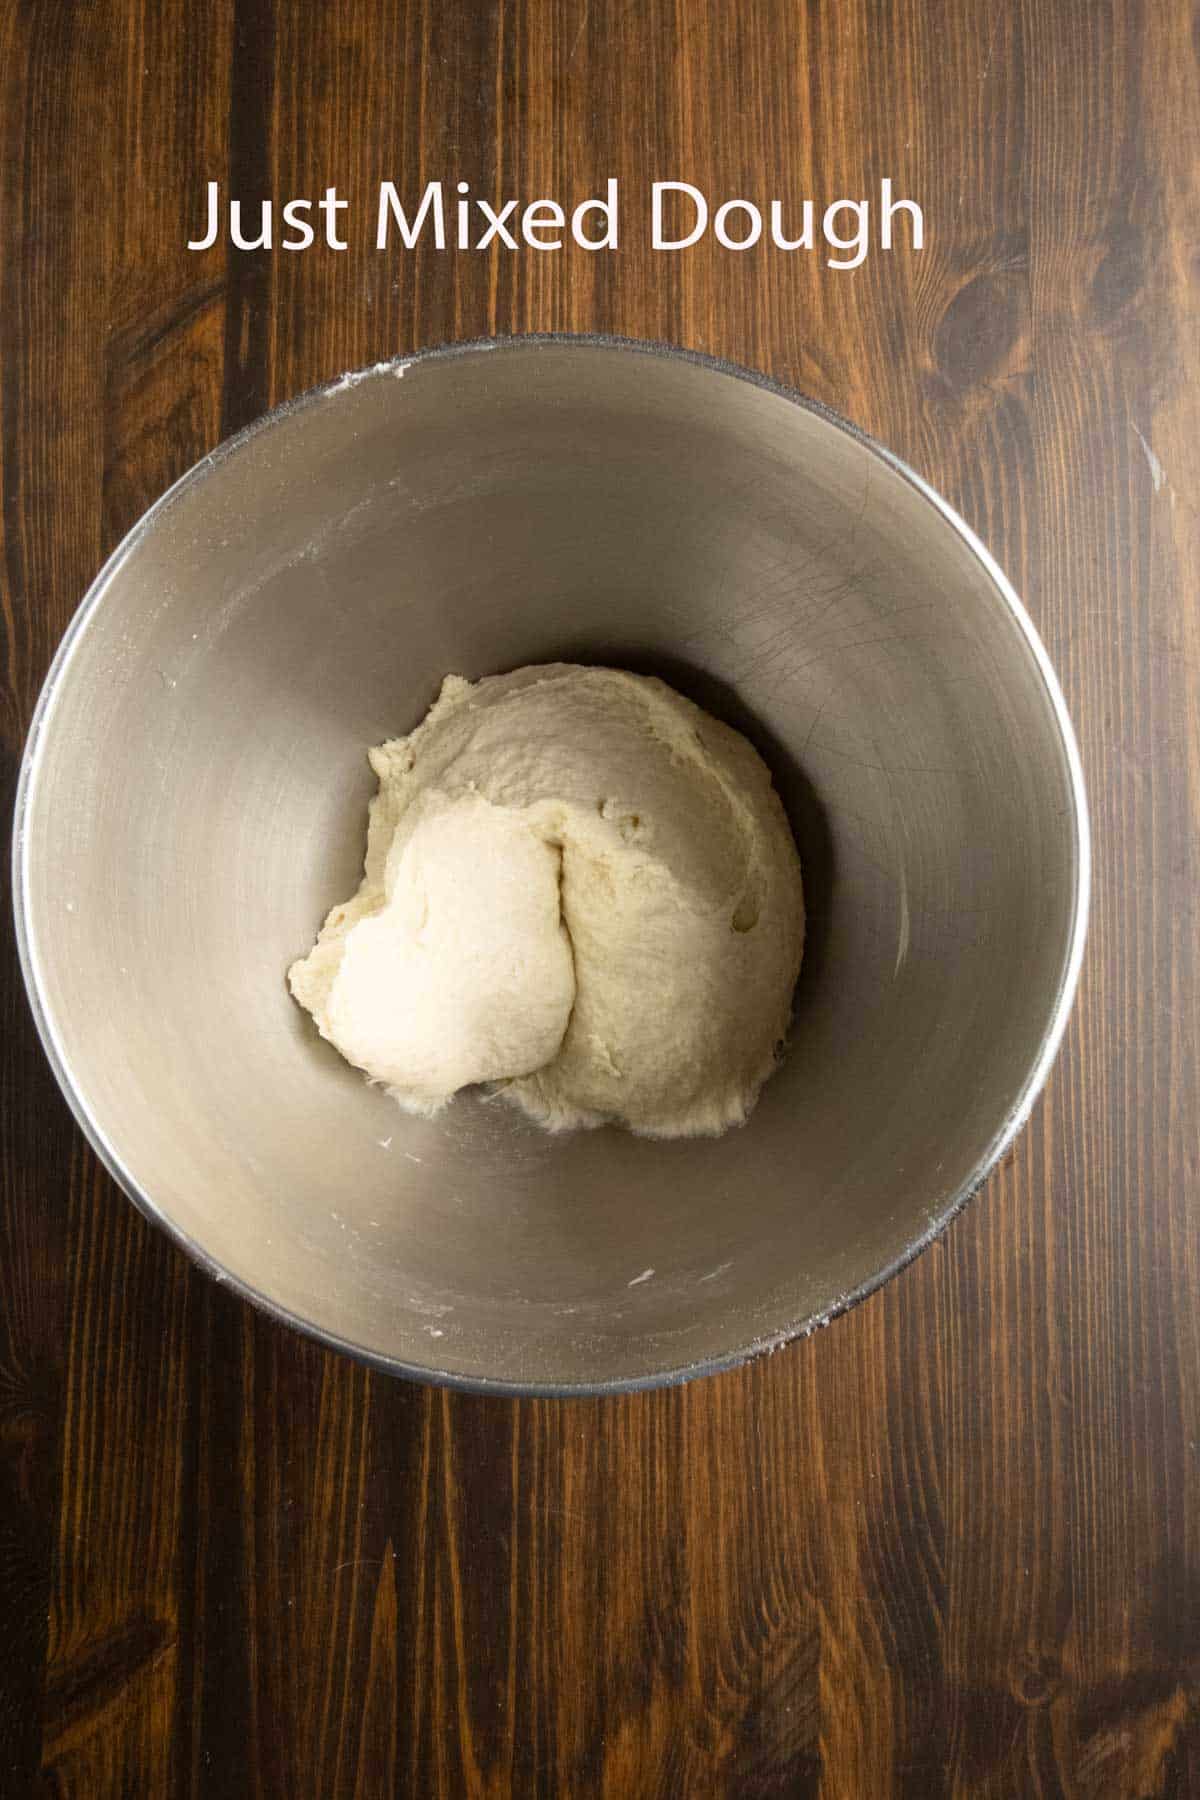
- Mix the Dough: Mix flour and salt in a stand mixer with the dough hook. Add water and yeast to the biga and mix. Then pour into the stand mixer bowl. Mix on 4 for 3 minutes, then let the dough rest for 10 minutes. Mix on 4 for 3 more minutes, cover with a damp towel.
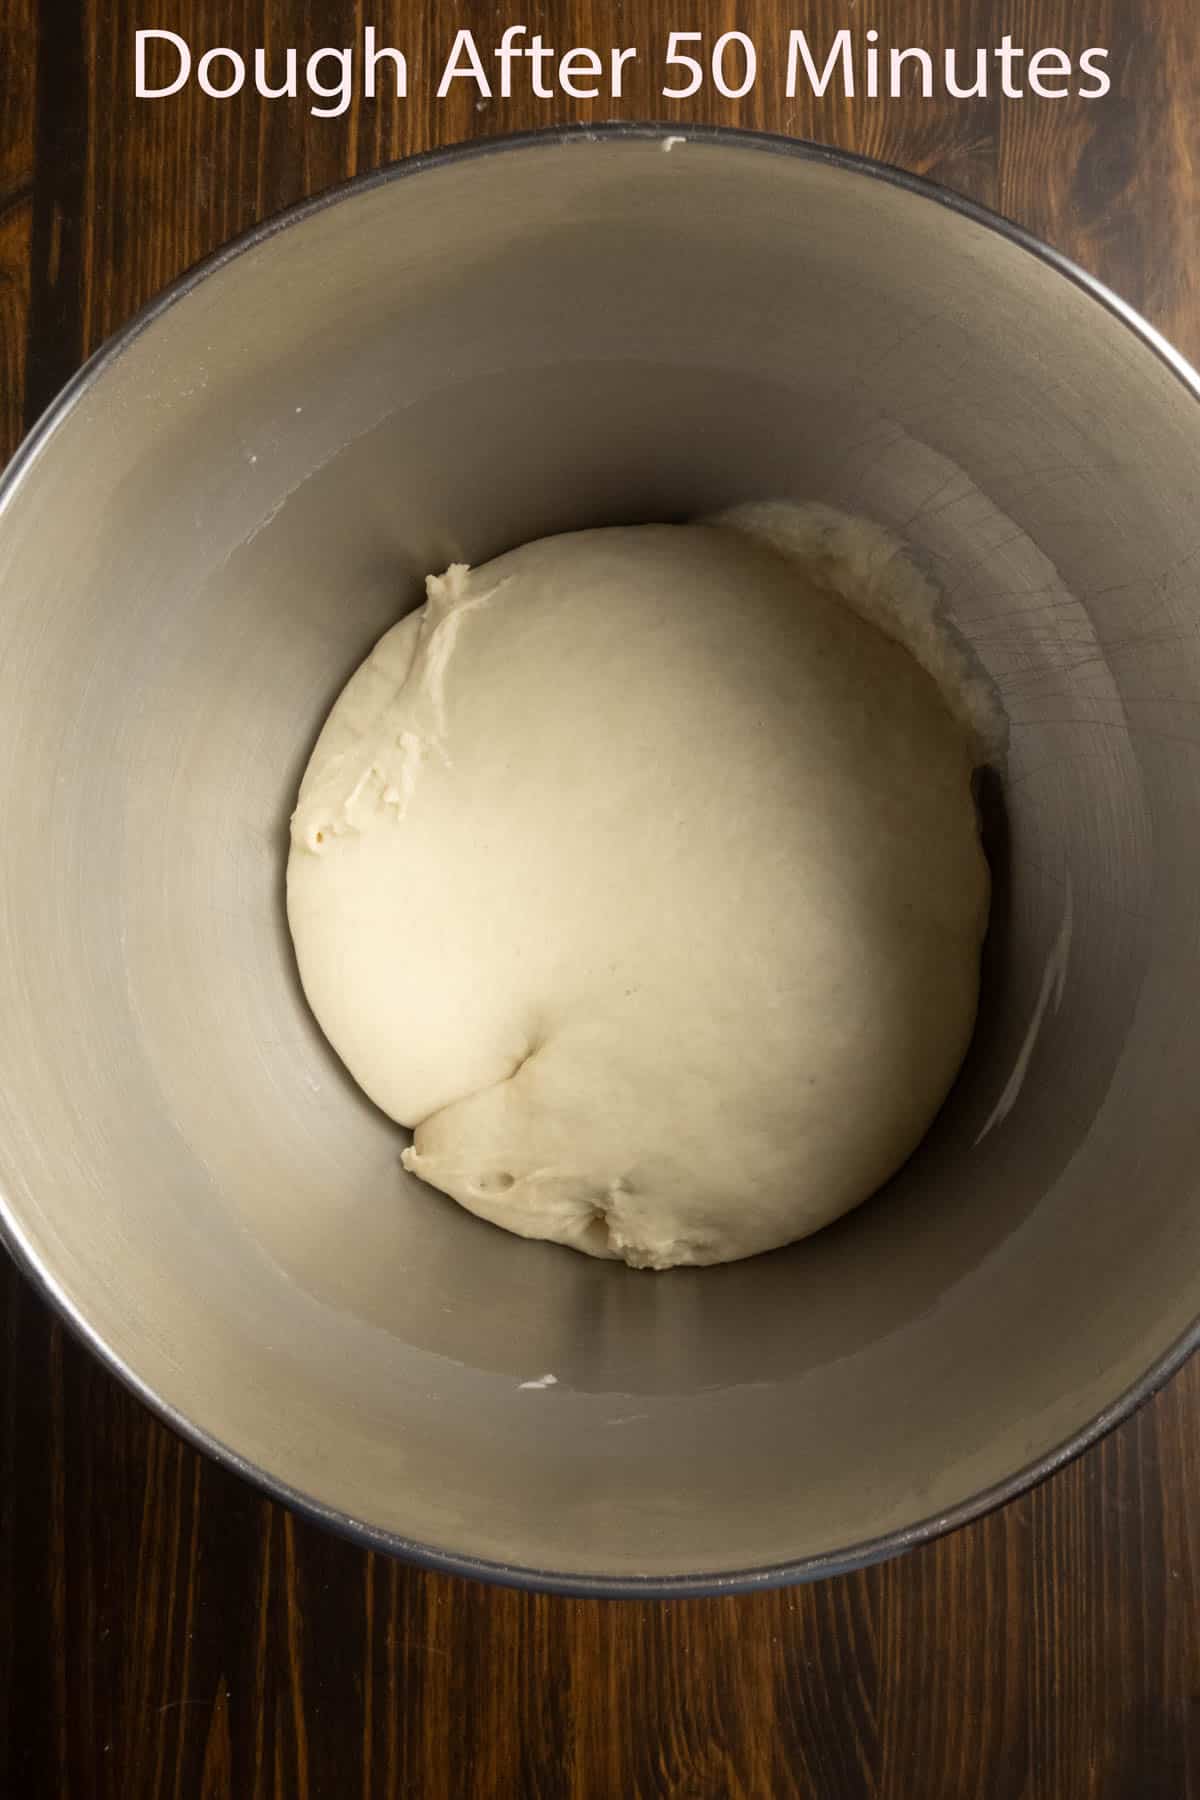
- Proof the Dough: Let the dough proof for its first rise for 45-60 minutes. Spin in the stand mixer to knock out air and collect the dough into a ball. This replaces needing to punch down the dough.
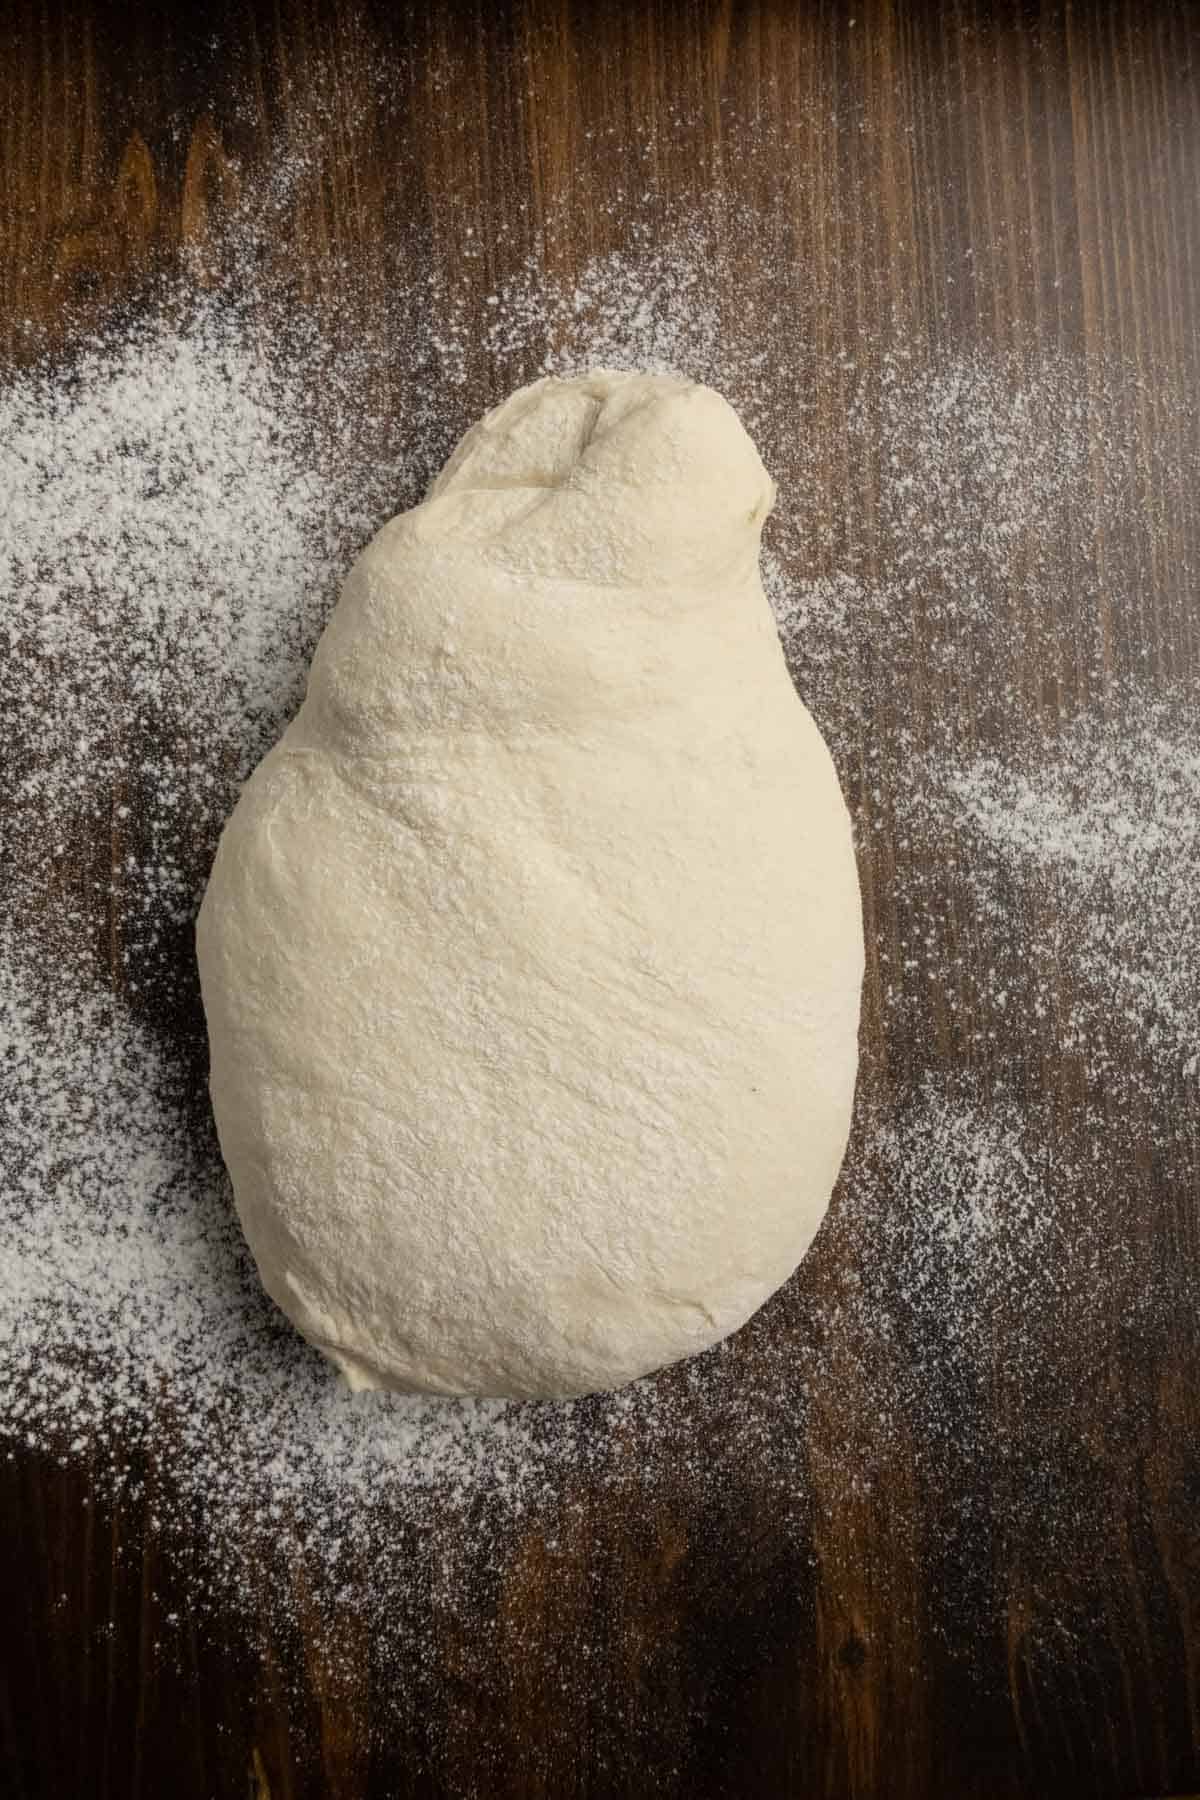
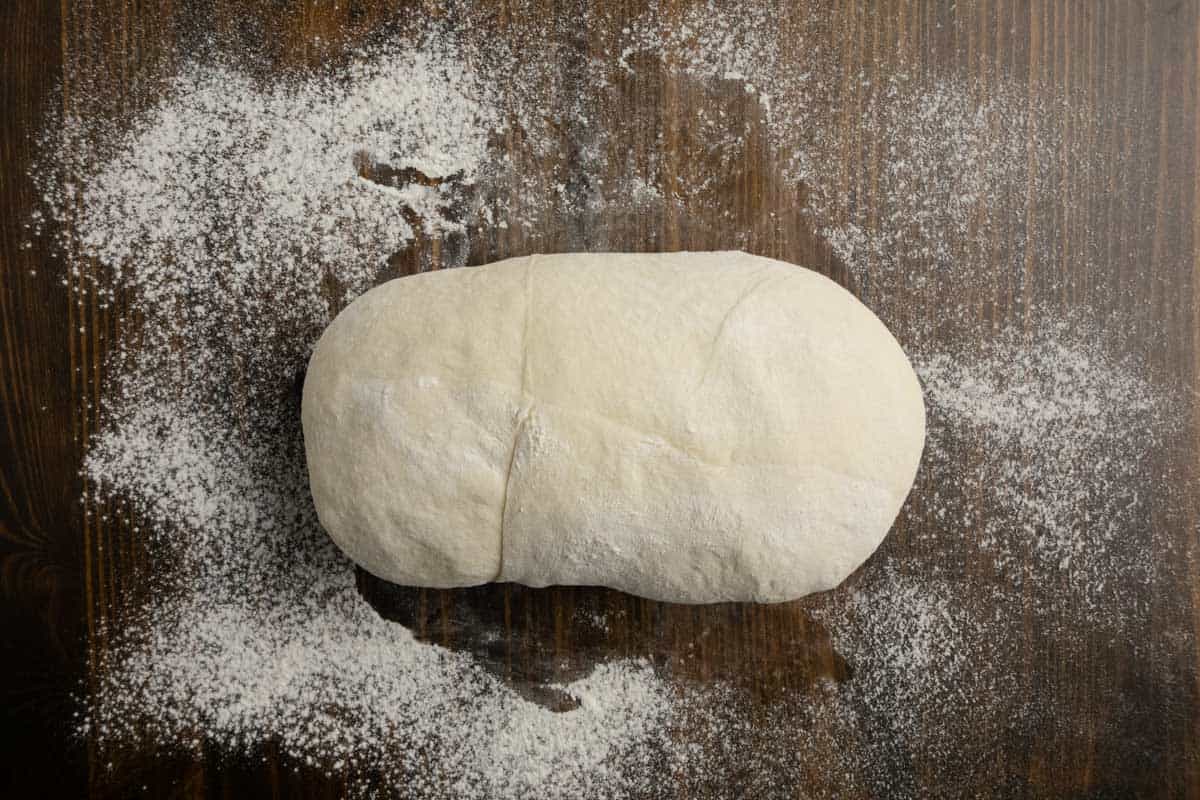
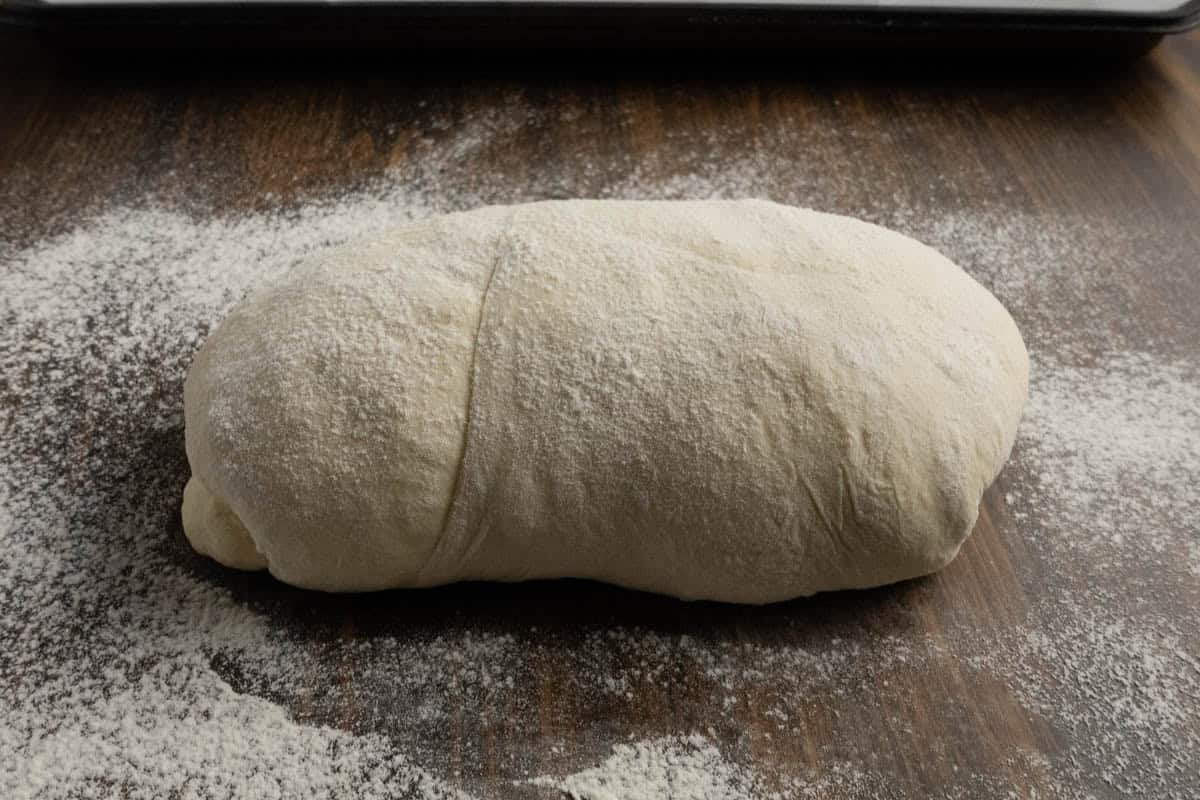
- Shape the Dough: Flour your work surface. Put dough onto the work surface. Fold the bottom half of the dough up then fold the top of the dough down like a letter fold. Let rest for 15 minutes. Rotate dough so it’s long way is vertical. Do a letter fold again. Bottom to the top, top to the bottom. Let rest for 15 minutes. Preheat the oven to 475°
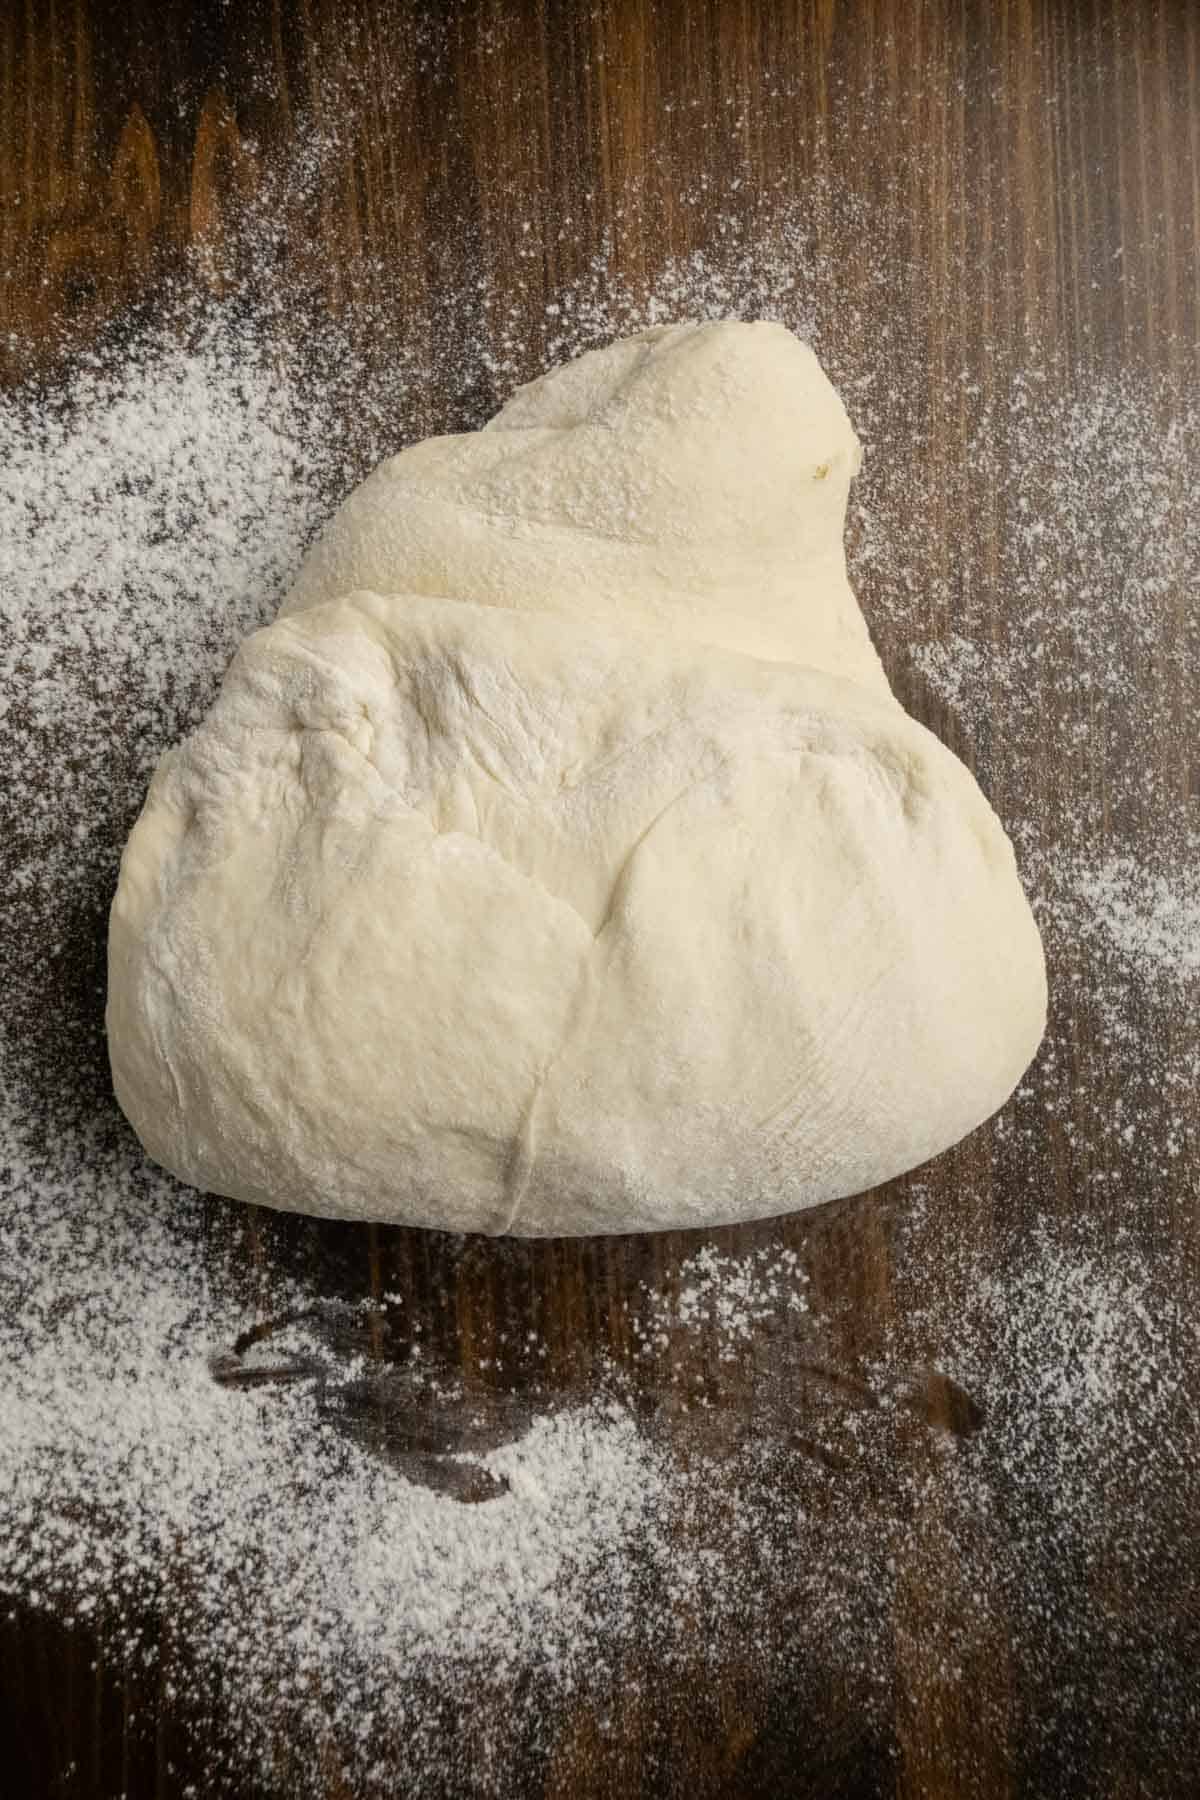
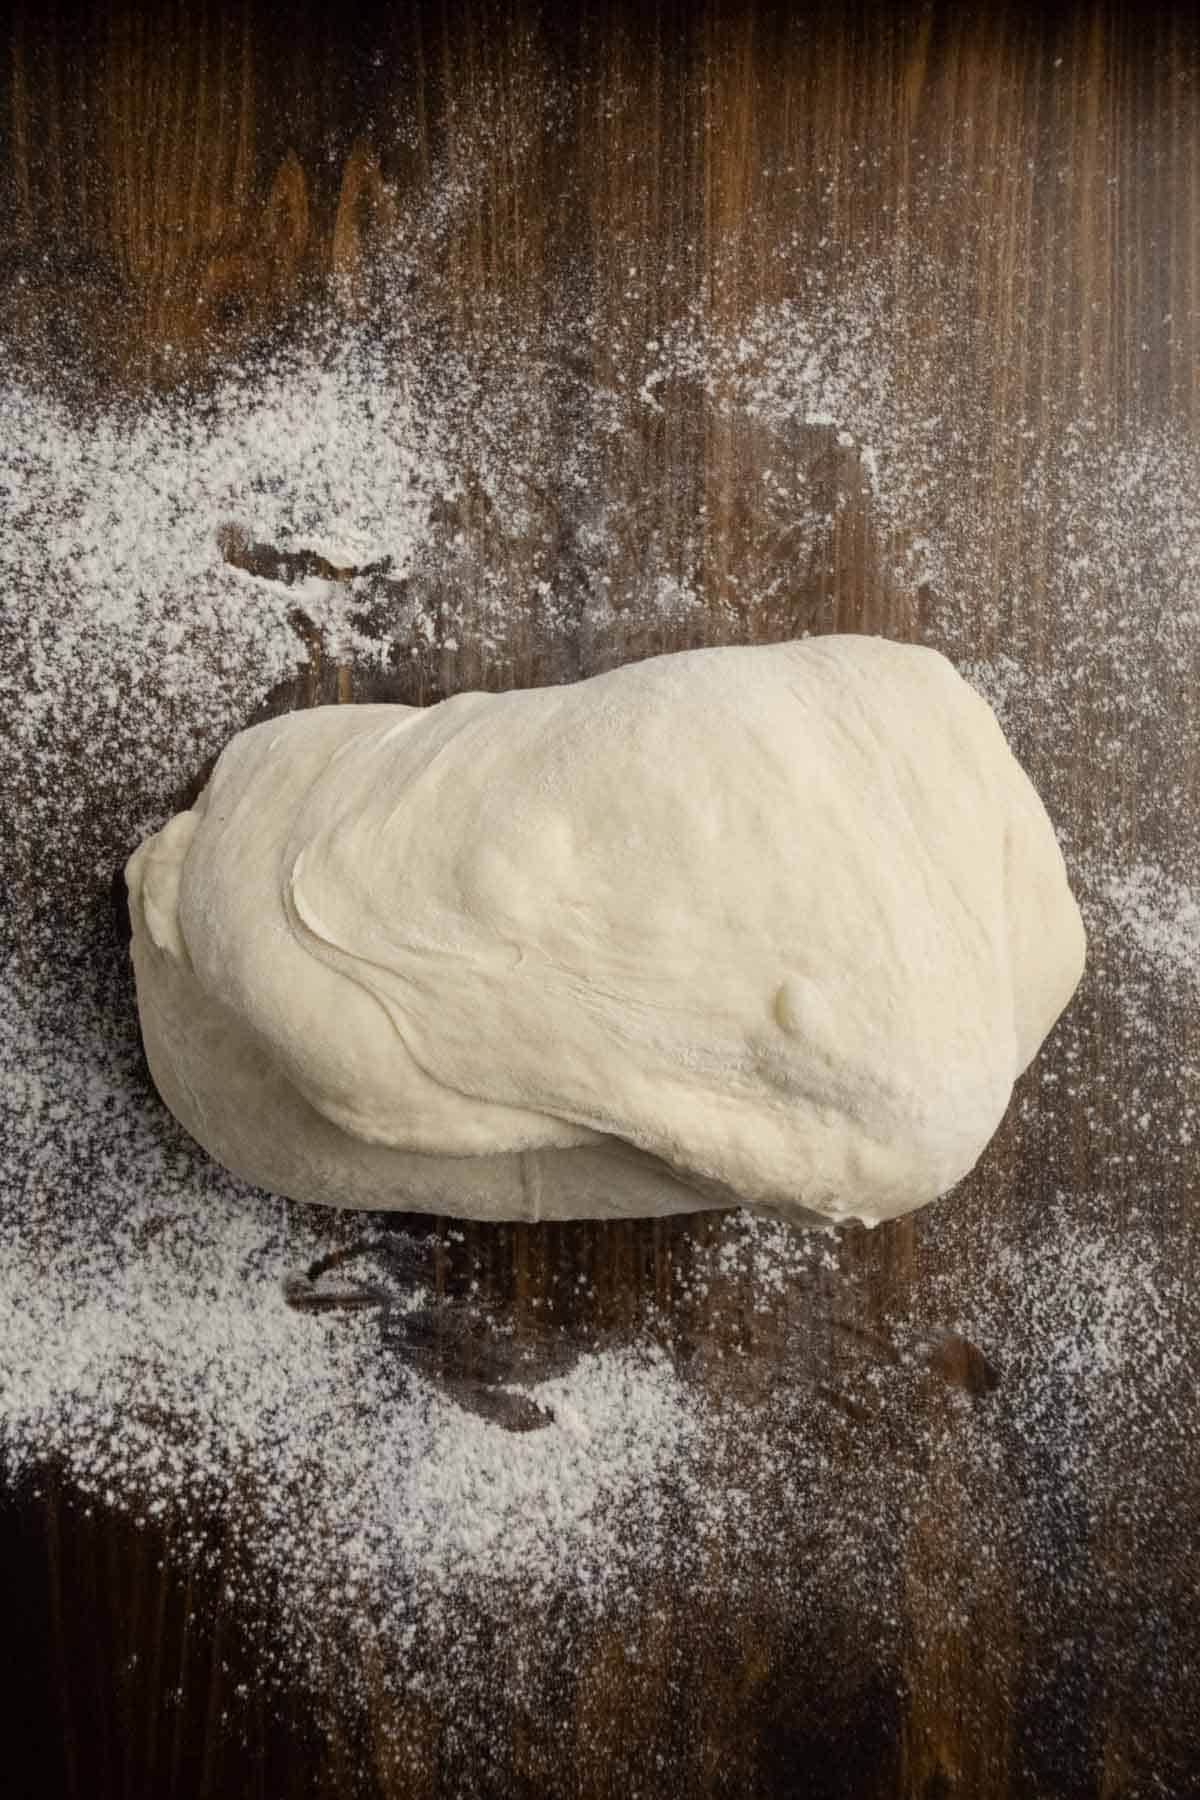
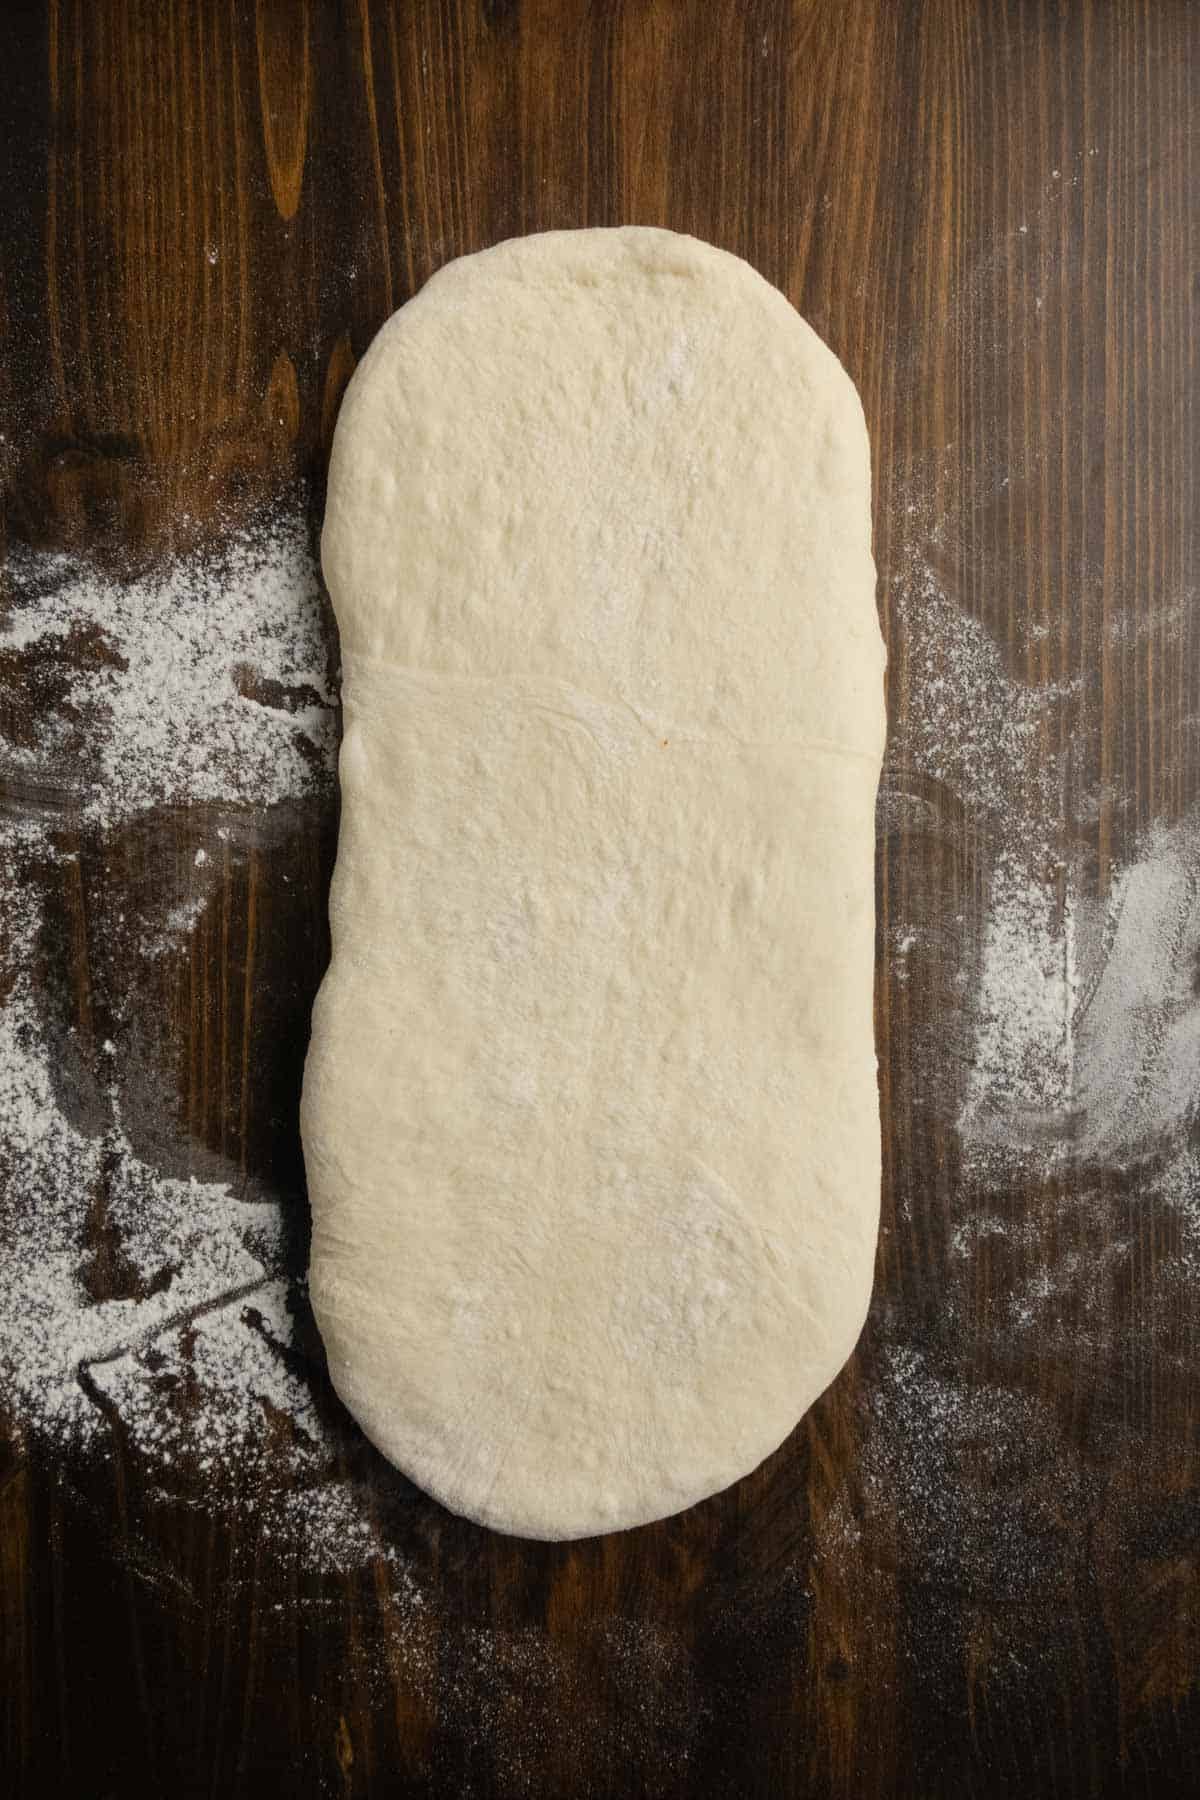
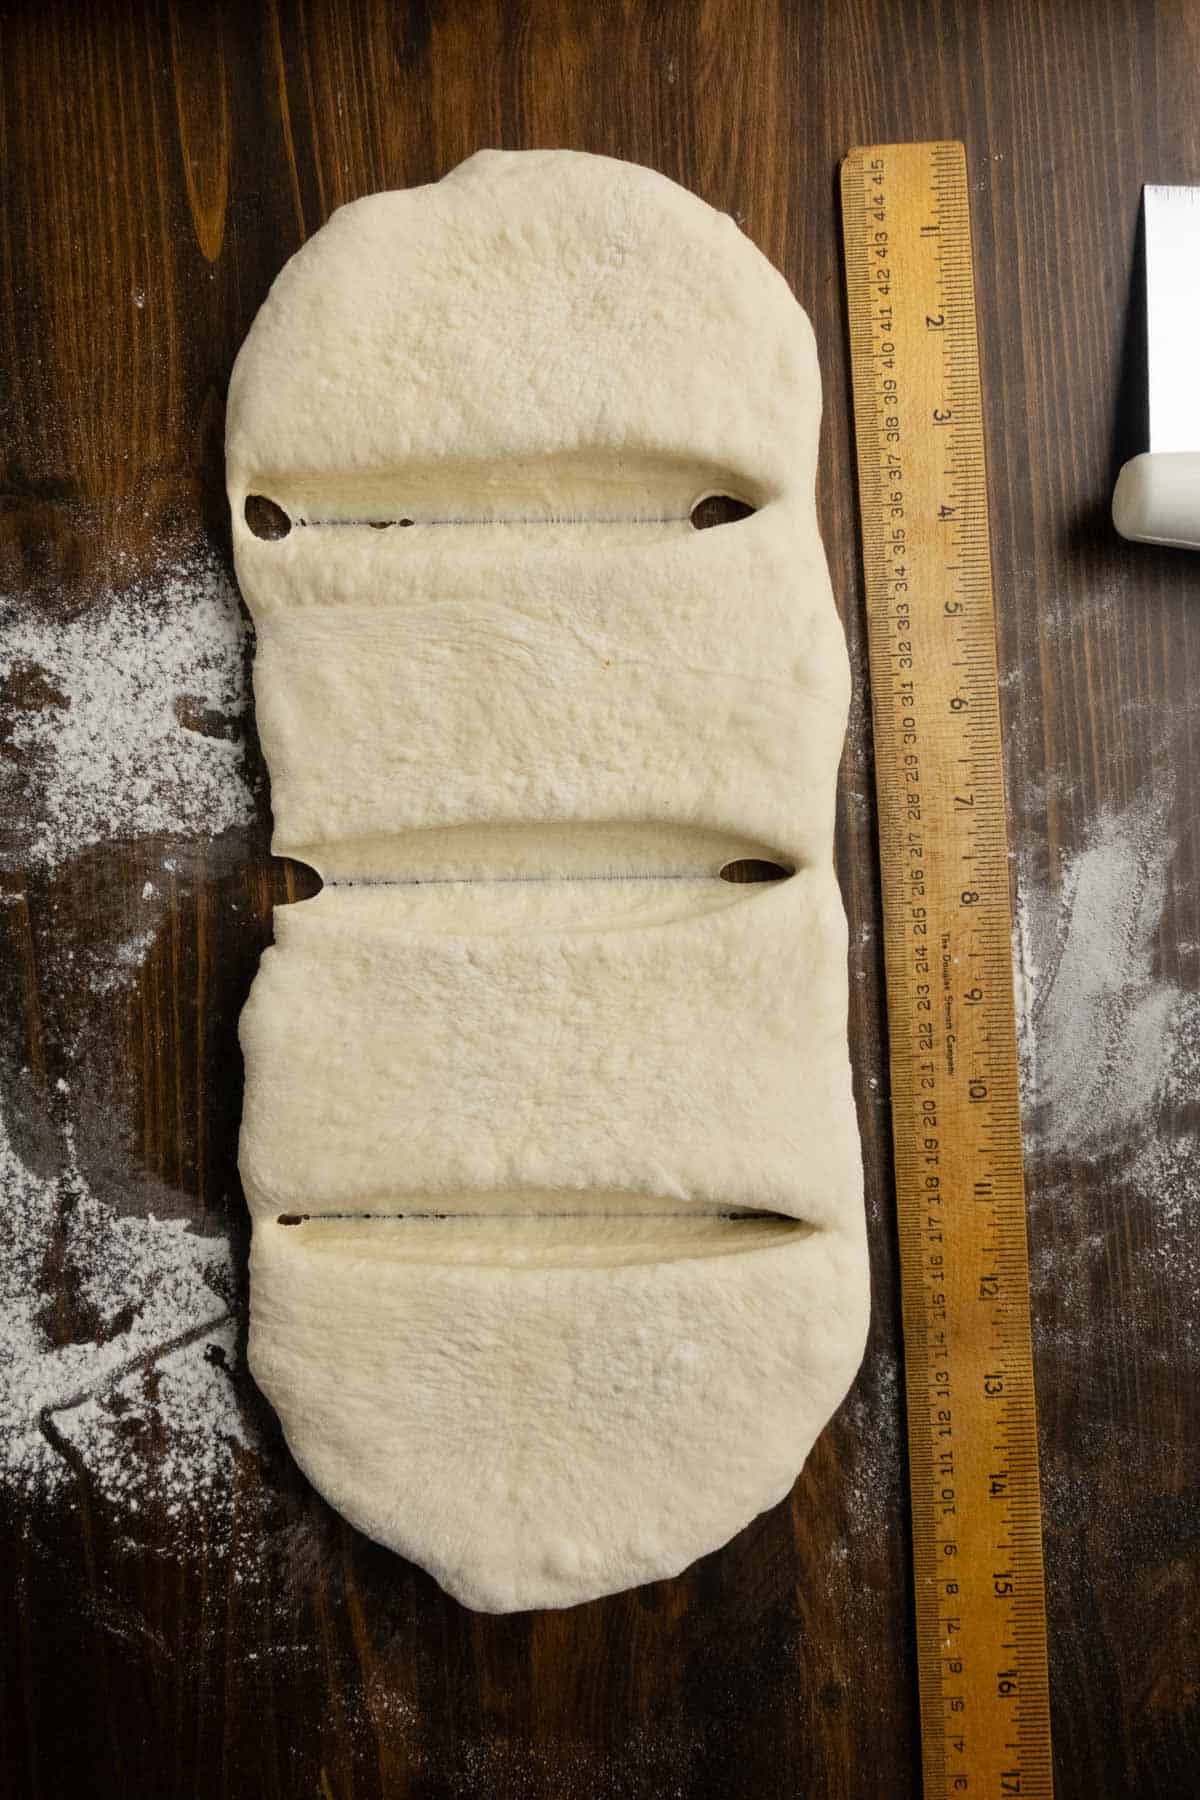
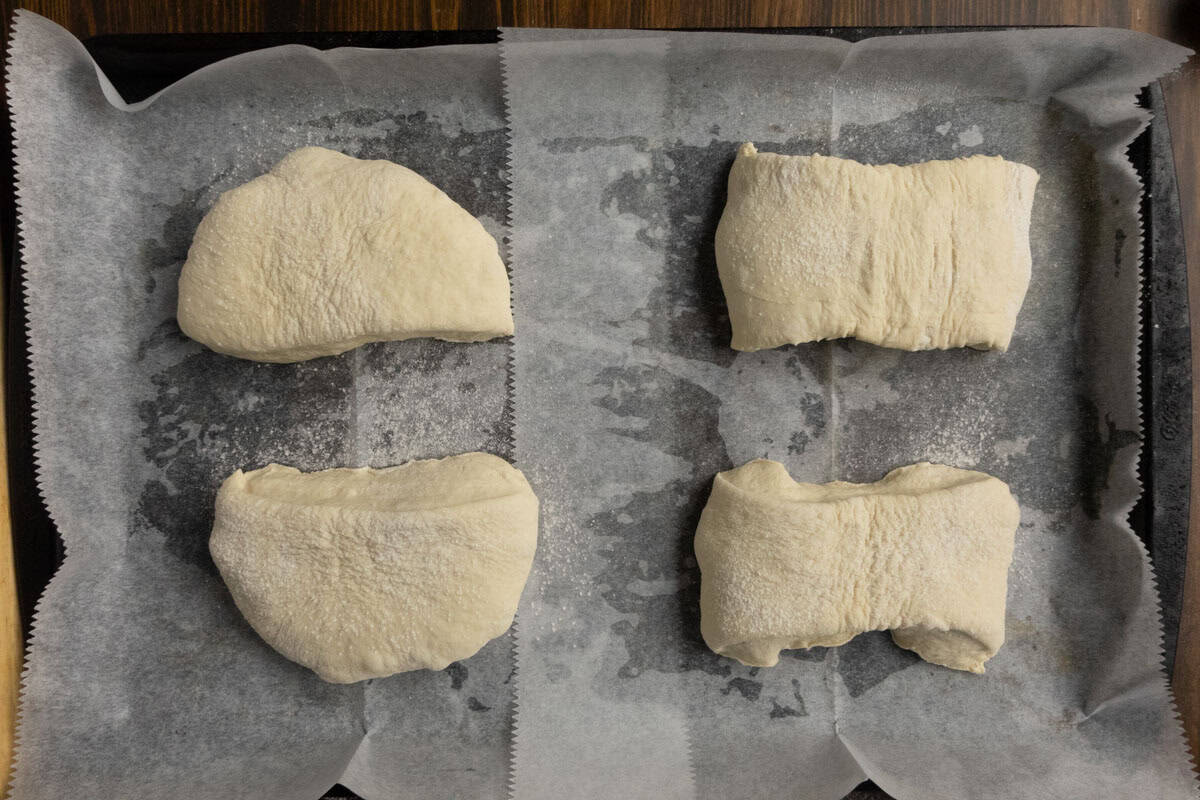
- Shape the Dough into Rolls: Dust the top of the dough with flour. Stretch the dough gently by tugging it longer. If you need to you can use a rolling pin to roll into a 16 inch long by 4 inch wide rectangle. Cut into 4×4 inch squares with a knife or bench scraper. Move the ciabatta rolls to a parchment lined baking sheet. Cover with the damp towel and let proof for its second rise for 30 minutes.
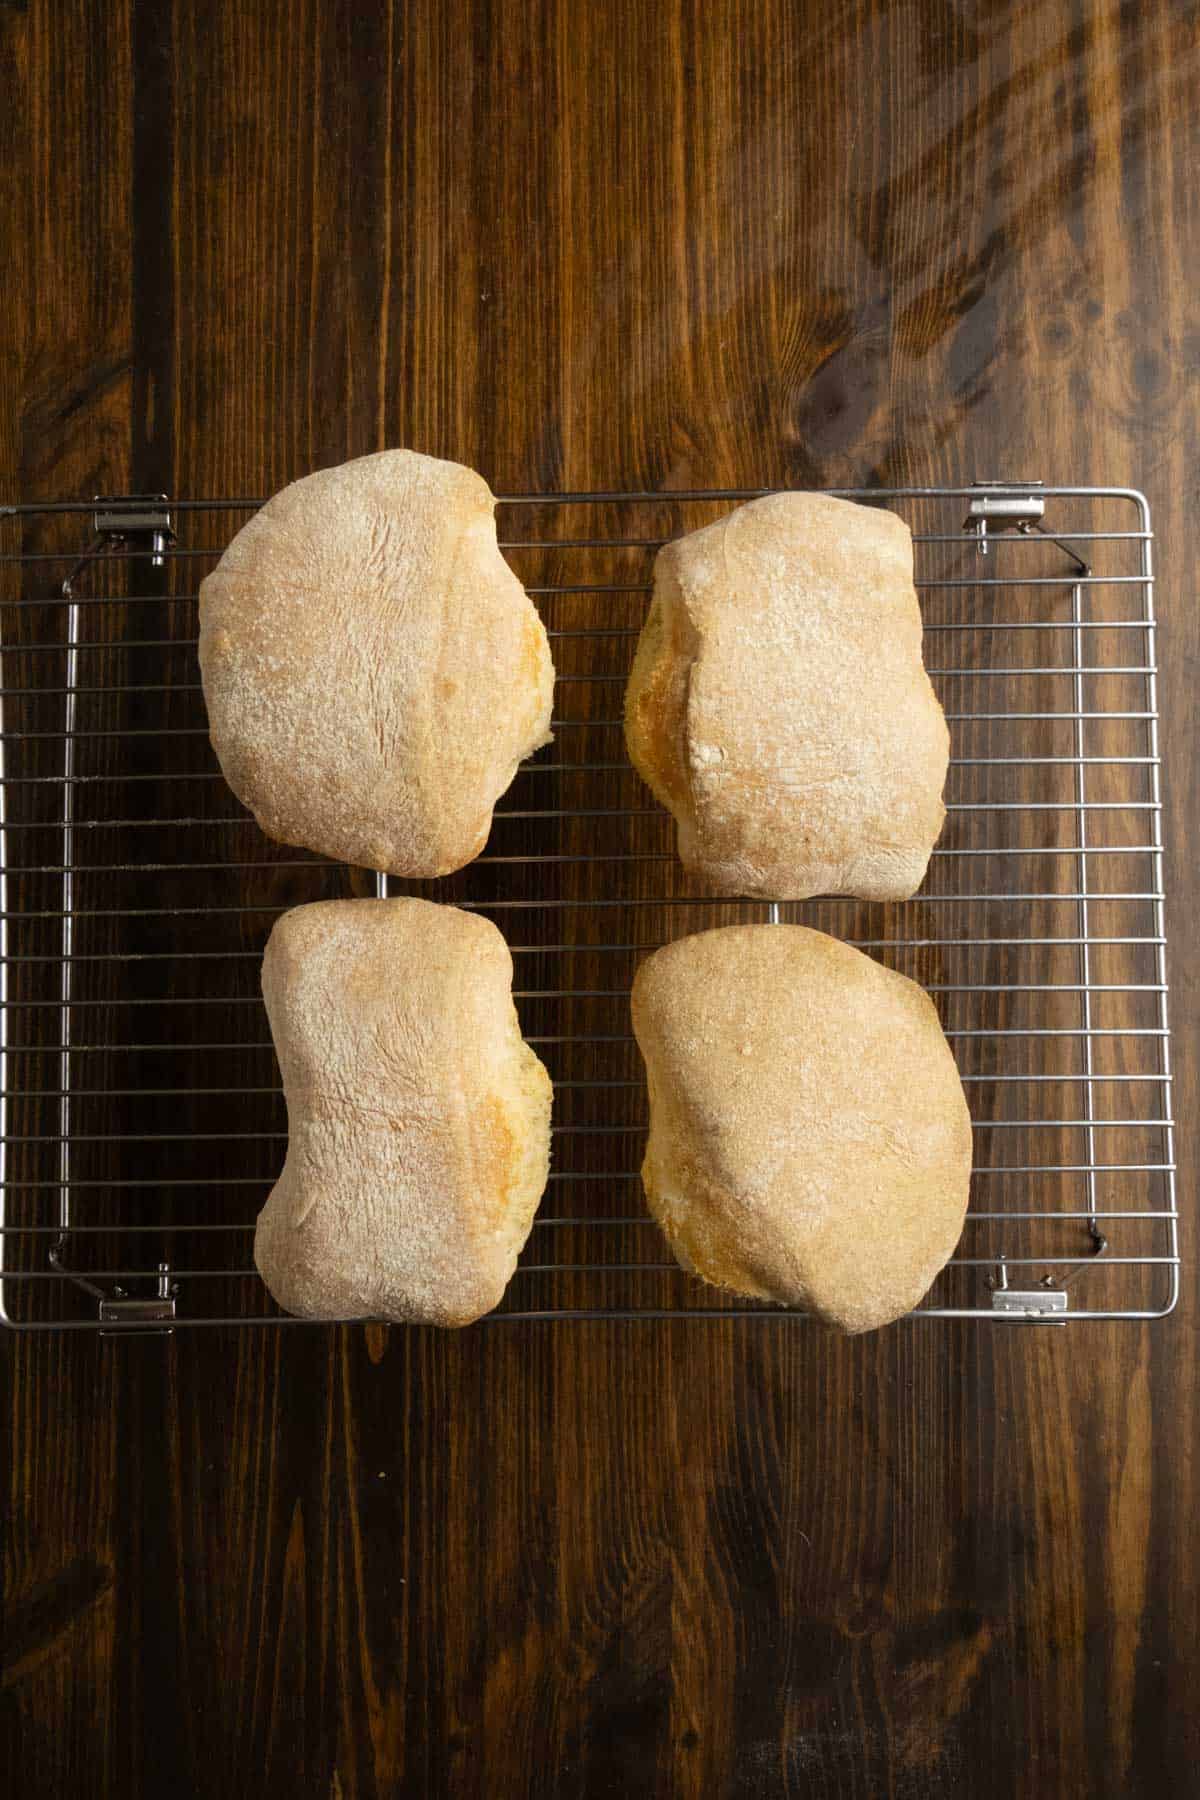
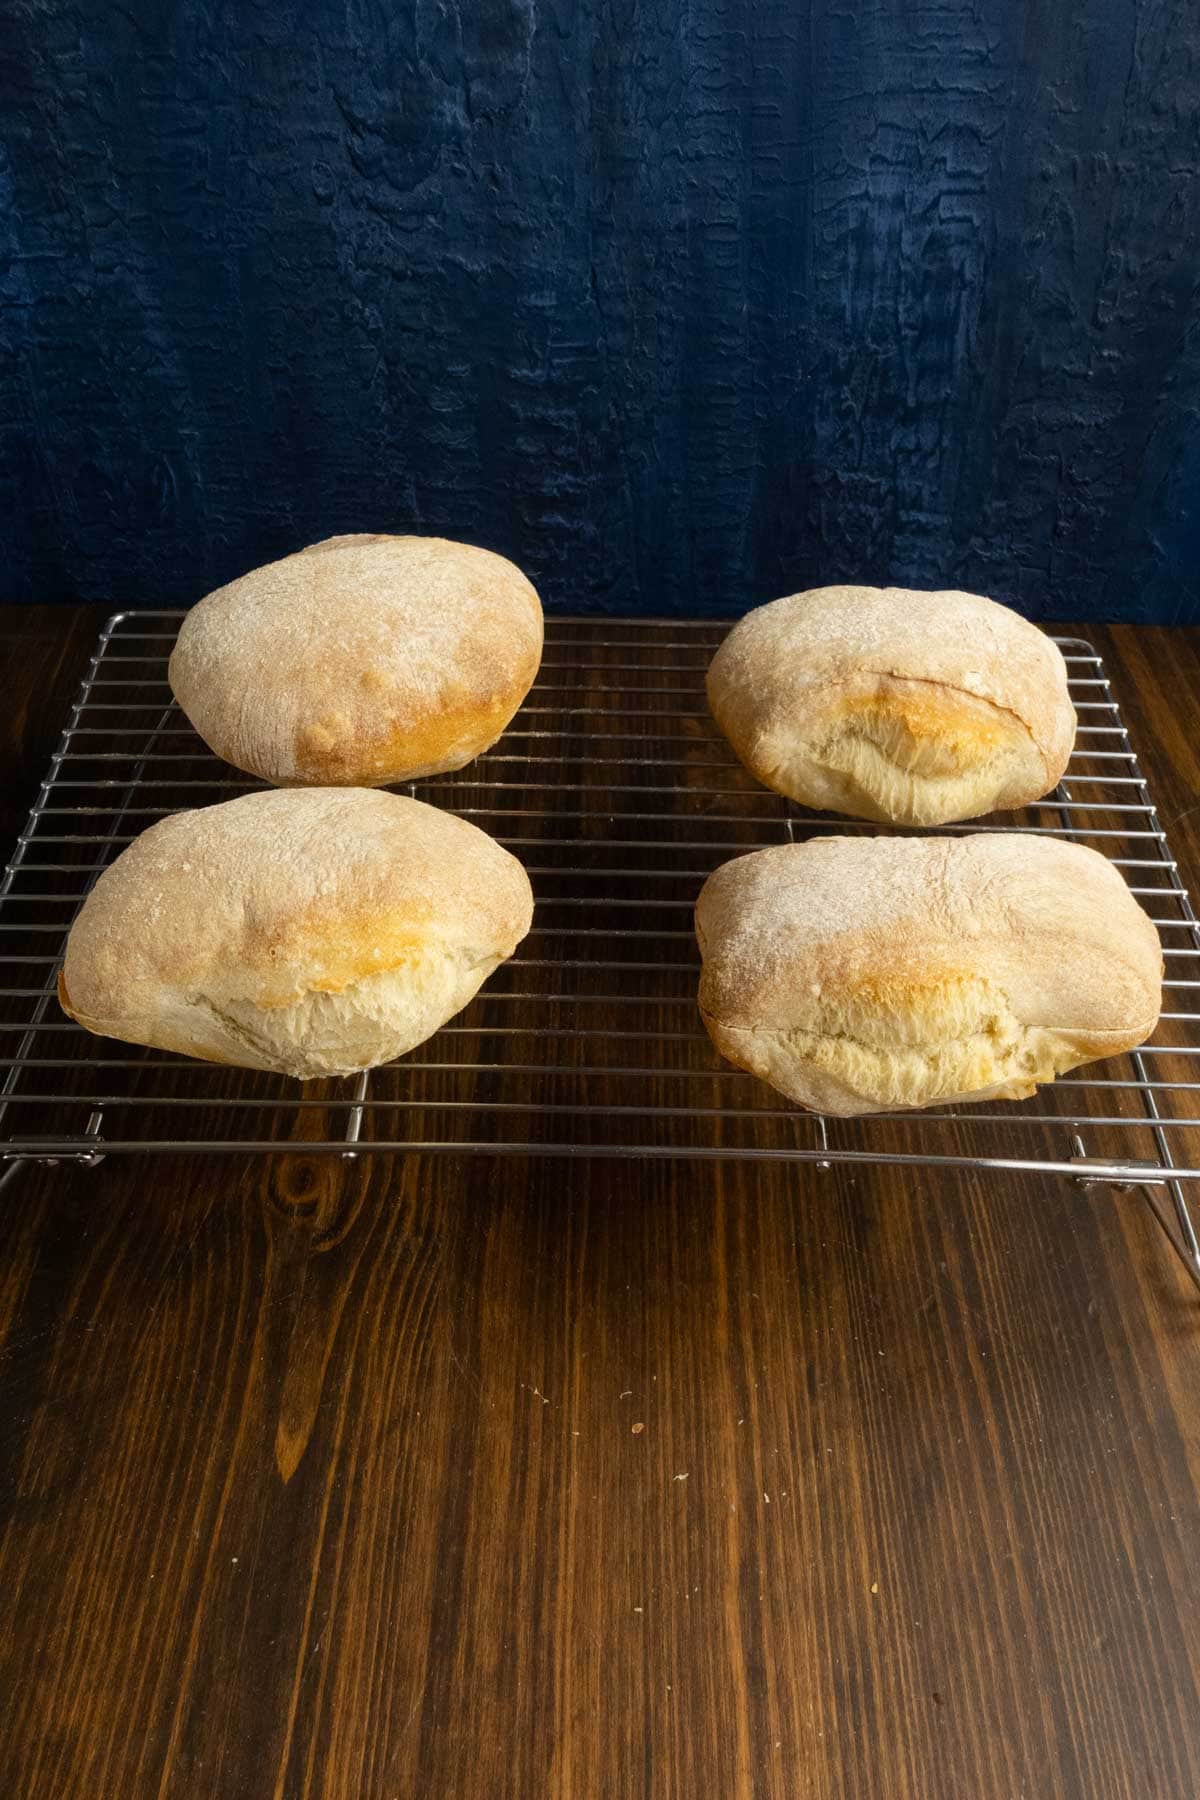
- Bake the Ciabatta: Throw two ice cubes or spray water into the oven, put the ciabattas in, and bake for 15-18 minutes or until the internal temperature is 200°F. Cool on a wire baking rack for an hour for the crumb to set. The interior is still finishing its structure. Cutting it early makes it gummy or collapses.
Expert Tips
I don’t like transferring the dough from the mixing bowl to another bowl. I think it’s a waste of dishes and unnecessary. I keep my dough mixer in the bowl under the stand mixer. When I need to knock out the air to shape the dough, I put the dough hook down and spin it for about 20 seconds to collect the dough. It pulls cleanly from the sides without having to scrape it out of the bowl.
When shaping the dough, do it gently and quickly. We don’t want to knock too much air out.
What to Serve with Ciabatta
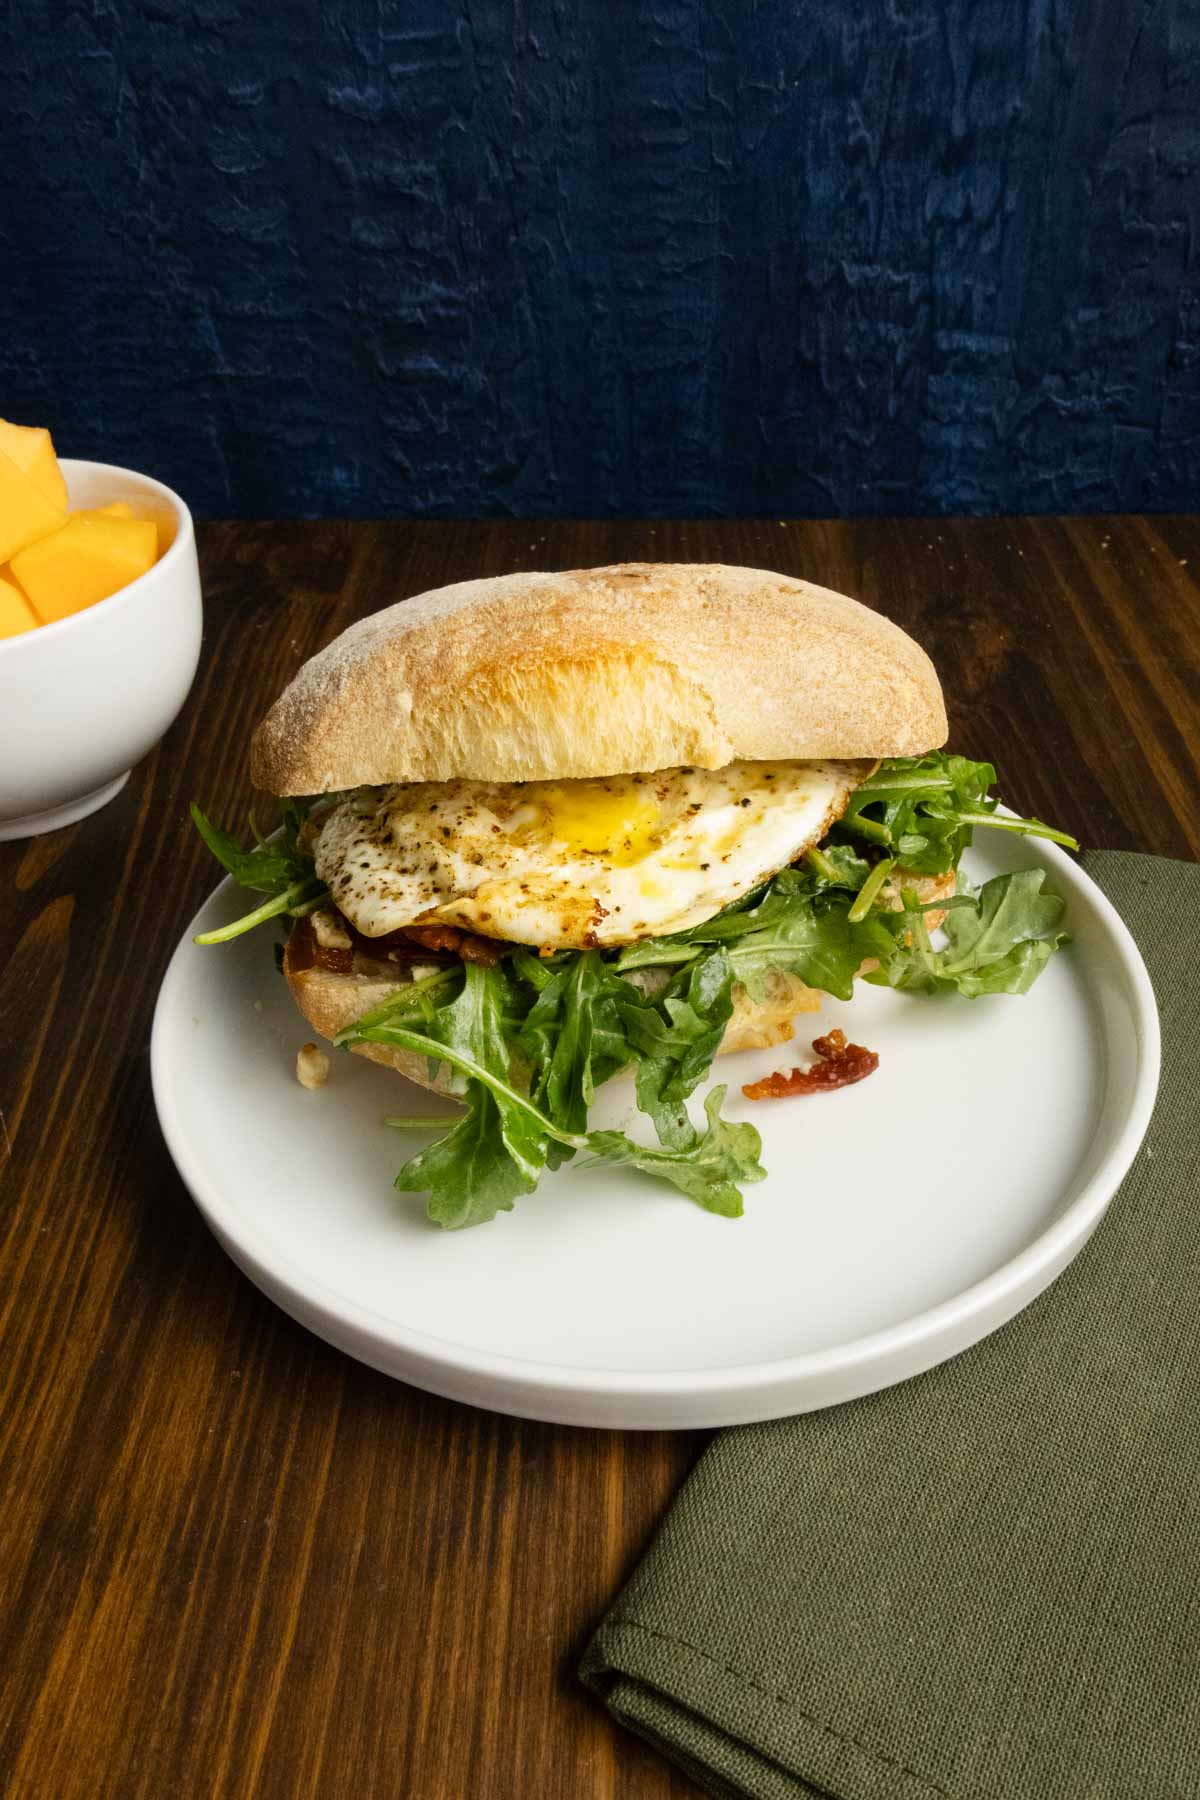
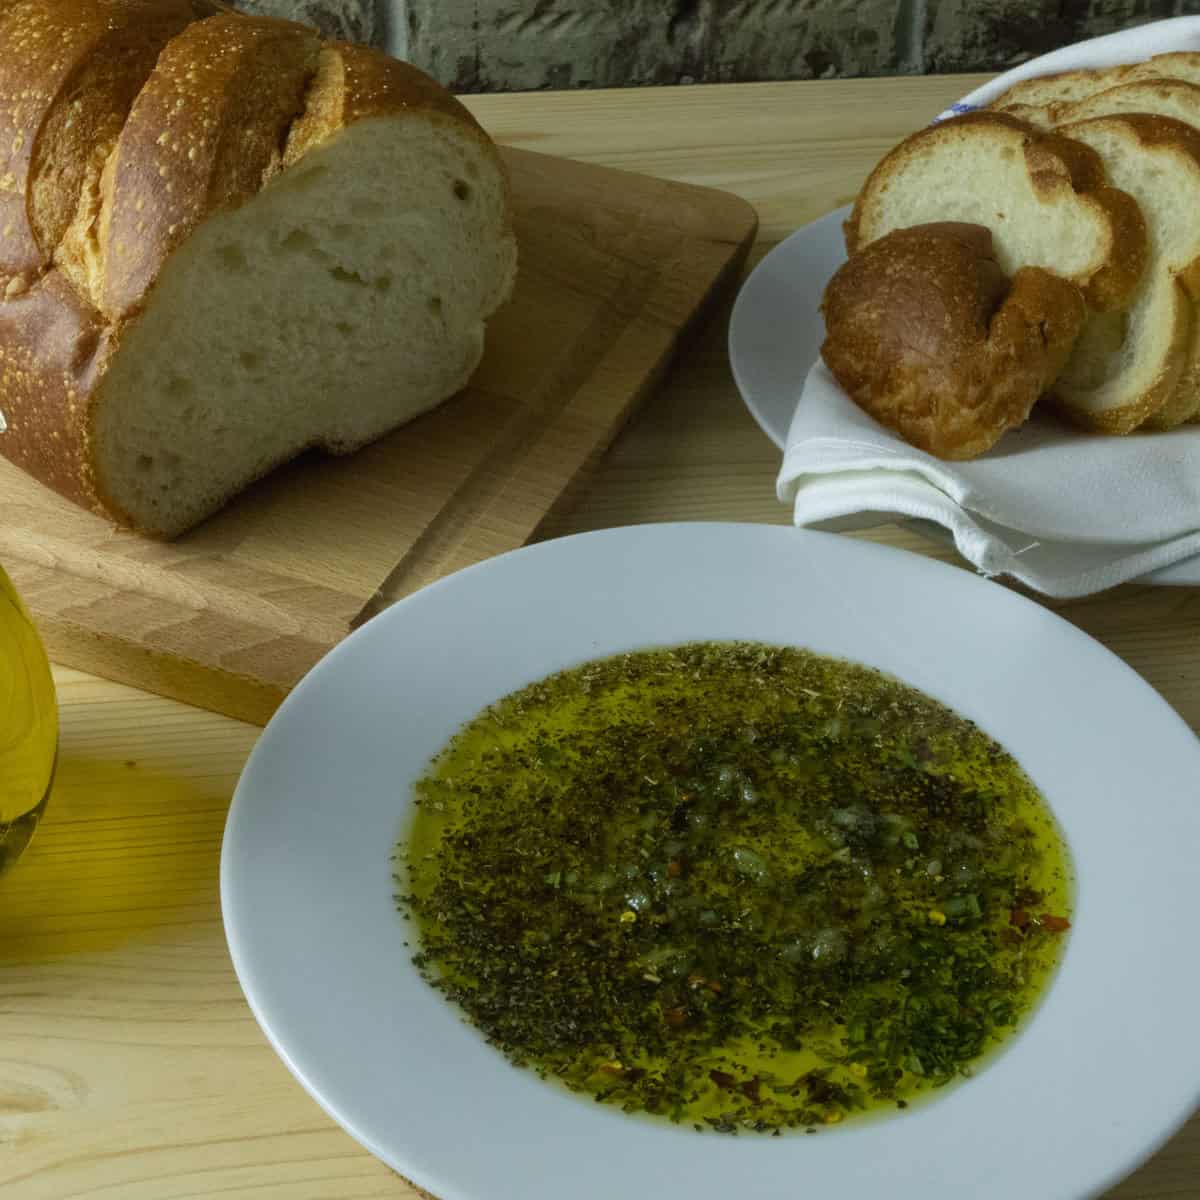
I make the best Fried Egg Sandwich with this ciabatta bread. They’re perfect for any sandwich you normally make. You can also cut or tear it into chunks and eat it with a Garlic and Herb Bread Dip.
Storage
You can store your ciabatta bread on the counter for three days wrapped in a plastic bag or bread box. You can also freeze the ciabattas. That’s what I do. They thaw quickly and can be frozen right away to keep the texture intact. They’ll last in the freezer for 3 months.
Wrap the ciabatta tightly in plastic, then foil or a freezer bag. You can reheat the rolls in a 350°F oven for 8–10 min.
FAQs
Biga is a type of pre-ferment. It develops flavor and improves the dough’s texture without requiring a sourdough starter. It also helps with that open, chewy ciabatta crumb.
Yes, you can. You do stretch and fold instead of kneading in a machine. Look in the above section about stretch and folds.
Use a bench scraper, lightly wet hands, or lightly flour your surface, but don’t over-flour or you’ll toughen the dough. Embrace the stickiness. It’s a sign of great bread.
Ciabatta’s open crumb comes from high hydration and gentle handling. If the dough was overmixed, under-proofed, or manhandled during shaping, the air gets pushed out.
Yes, but make sure your stand mixer can handle it and adjust proofing times slightly.
It should be puffy, jiggly, and leave a slight indentation when pressed.
I hope you give this recipe a try to practice your baking skills. Let me know in the comments if there is anything not clear and I will work to help you have the best ciabatta rolls.
Ciabatta Bread Roll
Equipment
- Stand Mixer Optional
- Bench Scraper
- Rolling Pin
- Cooling Rack
Ingredients
Biga
- ½ teaspoon active dry yeast
- ¾ cup water 100-110°F
- 1 cup bread or all-purpose flour
Ciabatta Dough
- ½ teaspoon active dry yeast
- ¾ cup water 100-110°F
- Yeast Starter
- 2 cups bread or all-purpose flour
- 1 ½ teaspoon salt
Instructions
Biga (Yeast Starter)
- The night before making the recipe, mix 1 cup flour, ½ teaspoon yeast, and ¾ cup water. Cover with plastic wrap and ferment overnight for 8-12 hours at room temperature.
Ciabatta Dough
- Mix the Dough: Mix flour and salt in a stand mixer with the dough hook. Add water and yeast to the biga and mix. Then pour into the stand mixer bowl. Mix on 4 for 3 minutes, then let the dough rest for 10 minutes. Mix on 4 for 3 more minutes, cover with a damp towel.
- Proof the Dough: Let the dough proof for its first rise for 45-60 minutes. Spin in the stand mixer to knock out air and collect the dough into a ball. This replaces needing to punch down the dough.
- Shape the Dough: Flour your work surface. Put dough onto the work surface. Fold the bottom half of the dough up then fold the top of the dough down like a letter fold. Let rest for 15 minutes. Rotate dough so it’s long way is vertical. Do a letter fold again. Bottom to the top, top to the bottom. Let rest for 15 minutes. Preheat the oven to 475°
- Shape the Dough into Rolls: Dust the top of the dough with flour. Stretch the dough gently by tugging it longer. If you need to you can use a rolling pin to roll into a 16 inch long by 4 inch wide rectangle. Cut into 4×4 inch squares with a knife or bench scraper. Move the ciabatta rolls to a parchment lined baking sheet. Cover with the damp towel and let proof for its second rise for 30 minutes
- Bake the Ciabatta: Throw two ice cubes or spray water into the oven, put the ciabattas in, and bake for 15-18 minutes or until the internal temperature is 200°F. Cool on a wire baking rack for an hour for the crumb to set. The interior is still finishing its structure. Cutting it early makes it gummy or collapses.

I hope this recipe helps you on your way to everyday bread baking!