Home Cured Ham
As an Amazon Associate, I earn from qualifying purchases. This post may contain affiliate links. If you purchase through them, I may earn a small commission at no extra cost to you.
This homemade ham proves that ham deserves a place on your table far beyond the holidays. By curing a pork shoulder in a flavorful brine of spices, herbs, and Prague Powder #1, you’ll create a ham that’s richer, more complex, and far more memorable than most store-bought versions.
The process is surprisingly simple, and I’ll show you exactly how to cure a ham safely so you can enjoy restaurant-quality results right at home.
Why You’ll Love this Recipe
- Learn how to safely cure a ham at home
- Enjoy deeper flavor than most grocery store hams
- Save money by making your own ham from scratch
- Make enough for holiday dinners, sandwiches, soups, and leftovers
- Master a traditional technique that will make you a more confident cook
What You’ll Walk Away Knowing
- The science behind curing ham safely at home
- How spices, herbs, and aromatics influence the final flavor
- How long to cure pork for even results
- How to roast and evaluate a homemade ham for the best results
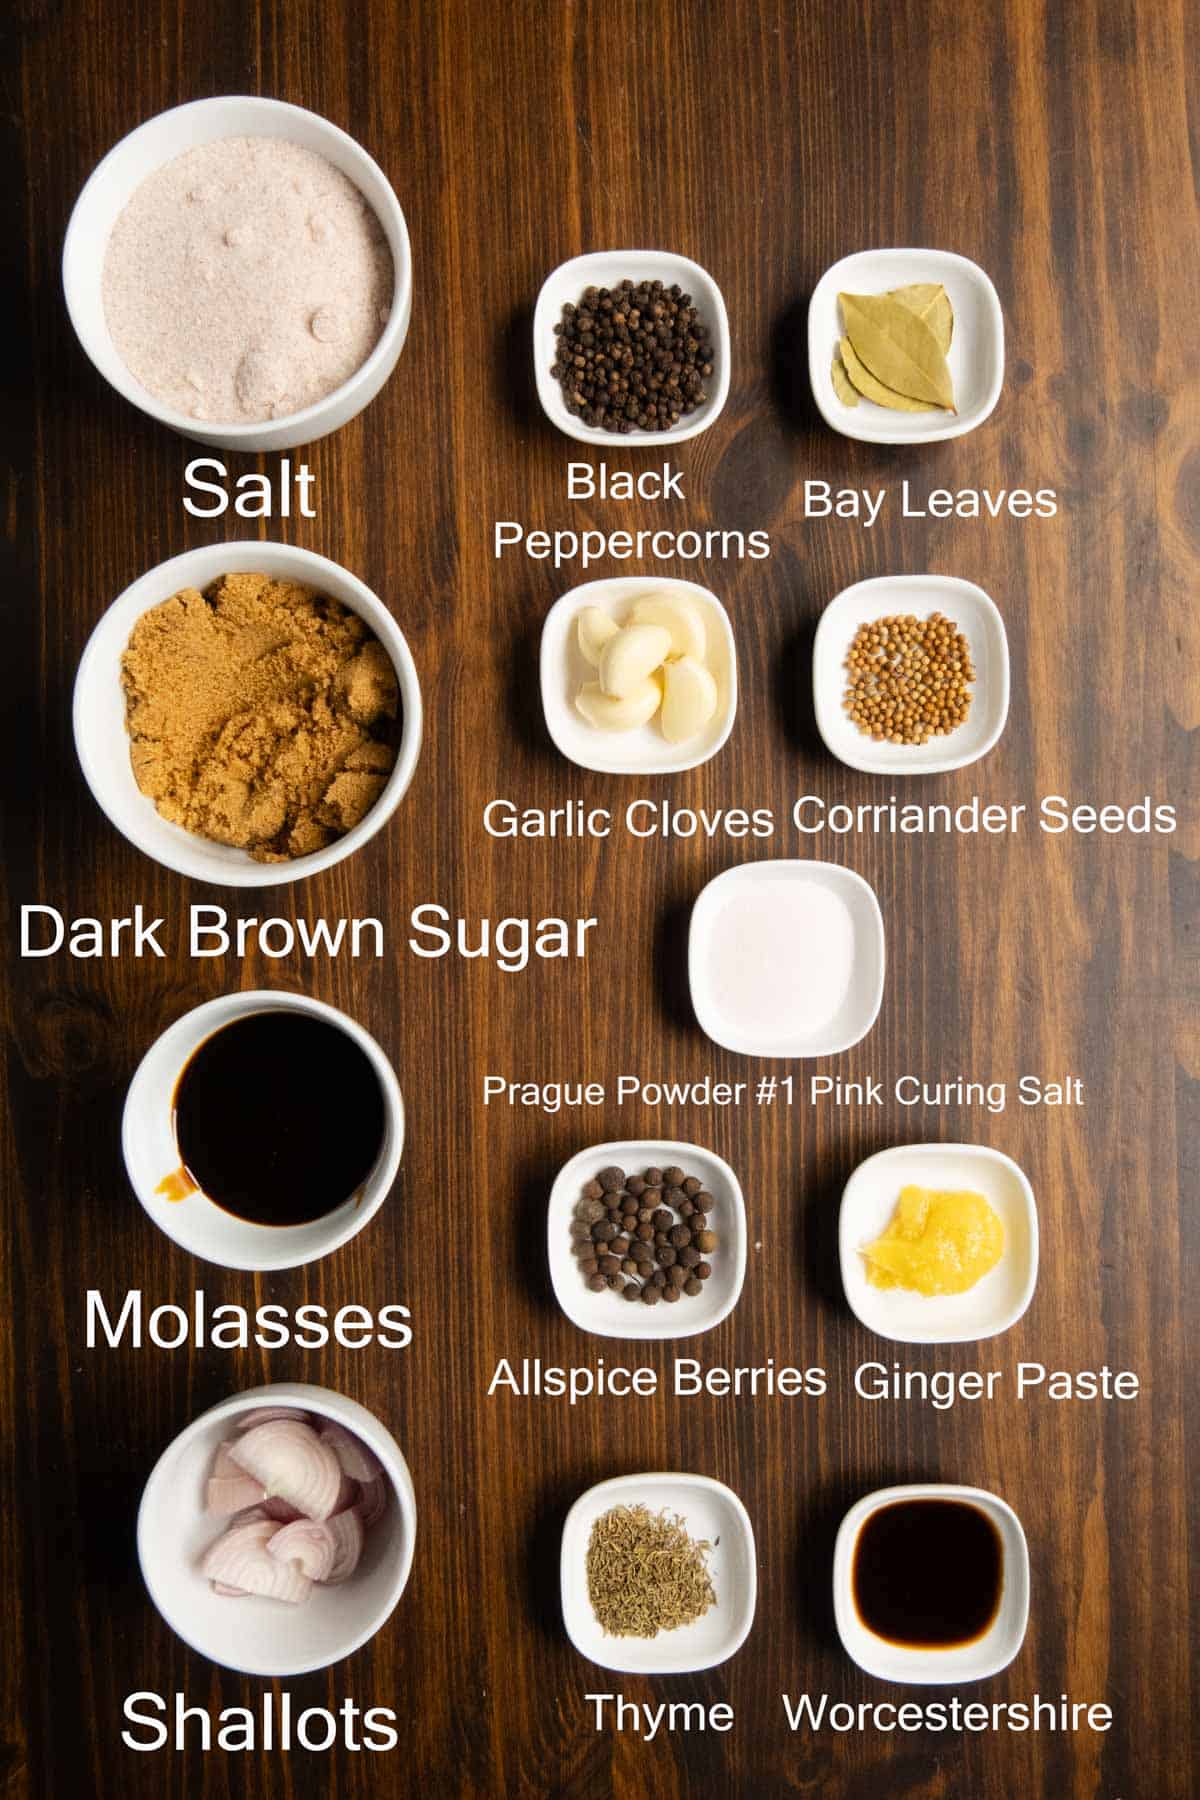
Ingredient List
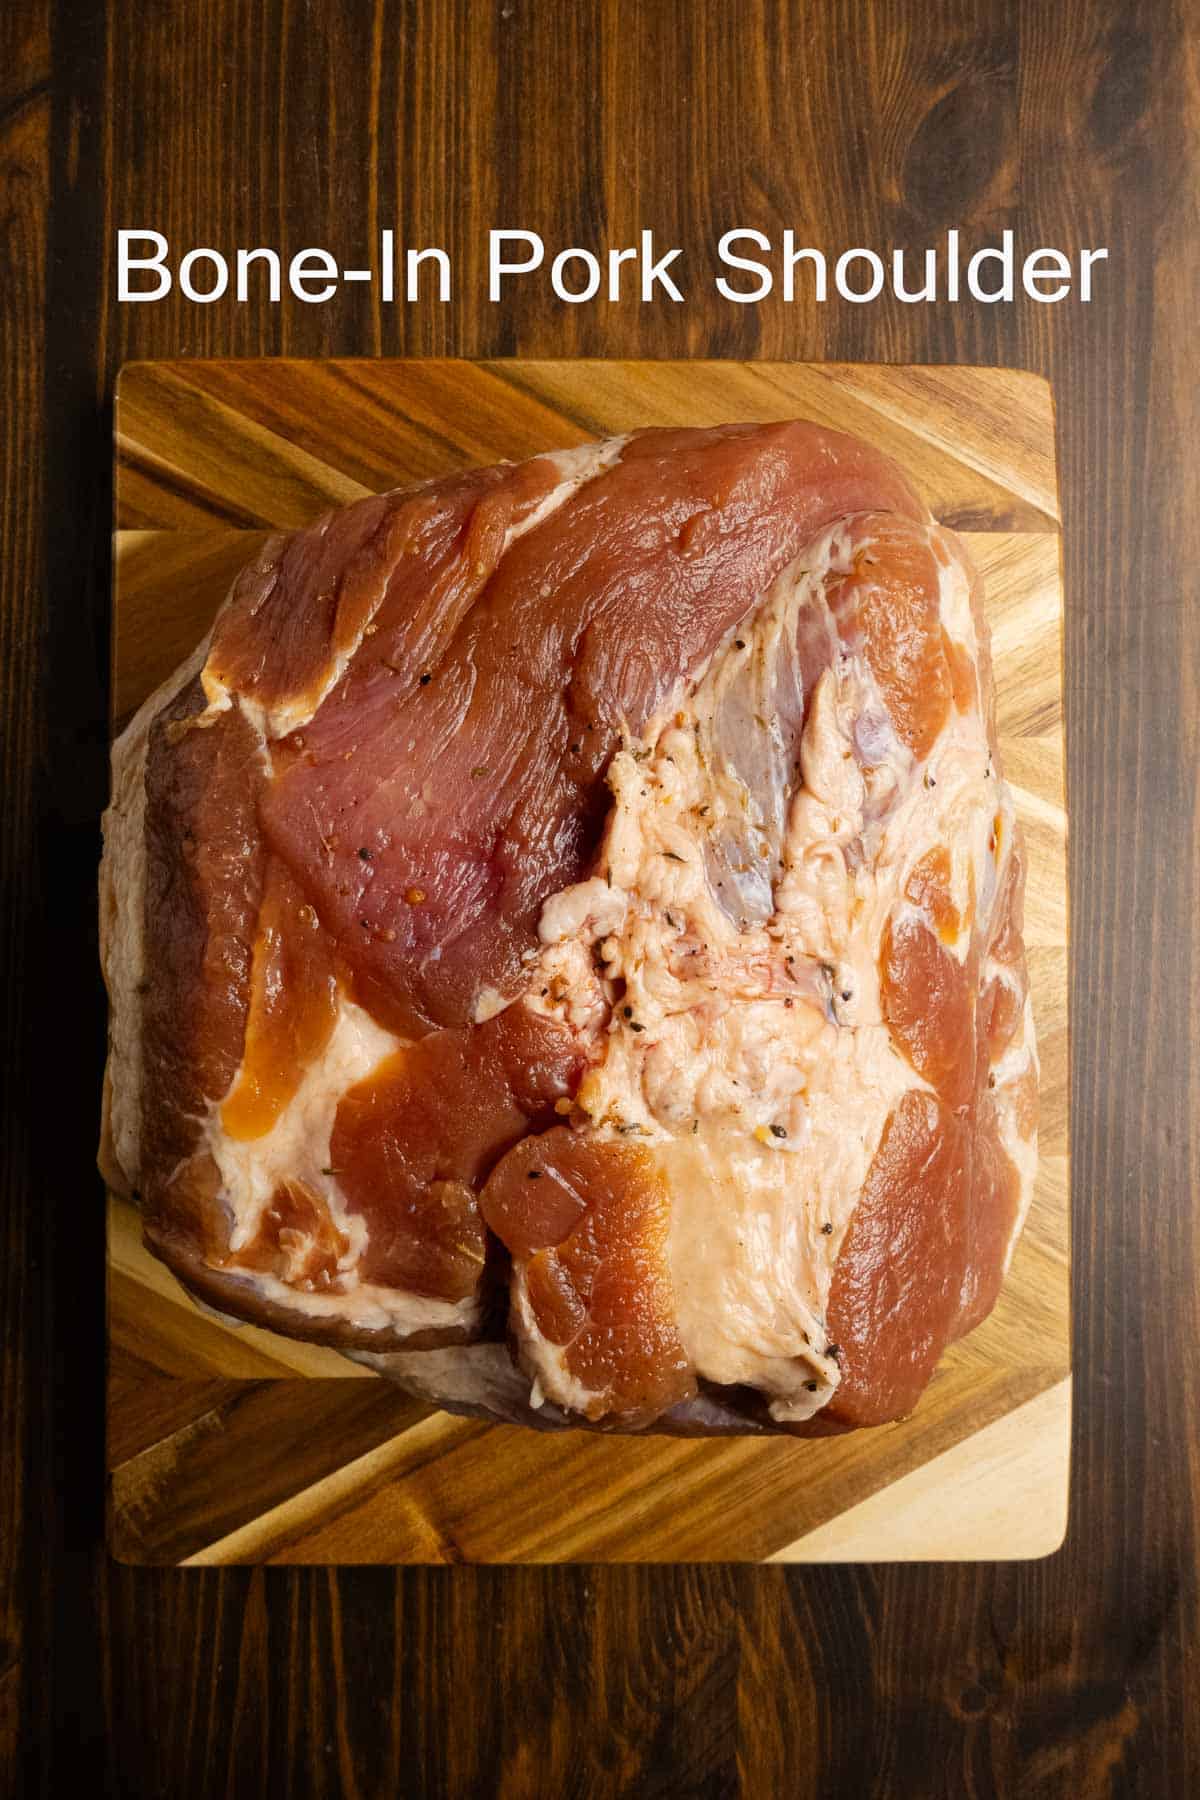
Pork Shoulder (Picnic Roast): I prefer a bone-in picnic roast because it stays juicy during the curing and cooking process while delivering excellent flavor. I usually choose one between 5 and 10 pounds. If you need more ham, I recommend curing two smaller roasts rather than one very large one. Smaller roasts allow the cure to penetrate more evenly.
Prague Powder #1: Also known as pink curing salt. This ingredient is essential for creating a true cured ham. It contributes the characteristic cured flavor and rosy color. Do not substitute Prague Powder #2.
Salt: Salt seasons the meat all the way to its center while helping create the environment needed for curing. I prefer Redmond Real Salt, but sea salt, Himalayan pink salt, or gray salt work beautifully as well.
Dark Brown Sugar: Adds sweetness while balancing the saltiness of the cure. The molasses content creates a deeper flavor than white sugar alone.
Molasses: Brings notes of caramel, toffee, and dark sweetness that complement pork exceptionally well.
Allspice Berries: One of the signature flavors found in traditional cured hams. Allspice contributes warmth and depth with hints of clove, cinnamon, and nutmeg.
Whole Coriander: Adds subtle citrus and floral notes that brighten the richness of the pork and keep the spice profile from feeling too heavy.
Fresh Ginger: Provides gentle warmth and aromatic freshness. It helps the finished ham taste lively and balanced.
Dried Thyme: Adds an earthy, savory backbone that complements the pork and supports the other spices.
Worcestershire Sauce: Contributes umami, acidity, and complexity. It doesn’t make the ham taste like Worcestershire sauce; it simply makes the pork taste richer and more complete.
A Note on Safety When Curing Ham
Curing a ham isn’t difficult, but it does require precision. Unlike most recipes where you can adjust ingredients to taste, curing relies on specific amounts of salt and curing salt to safely preserve the meat. Follow these guidelines and the process becomes straightforward and repeatable.
Measure Your Curing Salt Exactly
Use 1 level teaspoon of Prague Powder #1 for every 5 pounds of meat. Curing salt is formulated to be used in precise amounts and should never be estimated or substituted.
Use the Correct Curing Salt
This recipe requires Prague Powder #1, sometimes called pink curing salt. Do not substitute Prague Powder #2, table salt, sea salt, or any other curing product, as they are designed for different purposes.
Keep Everything Cold
The ham should remain refrigerated throughout the curing process. Aim for a temperature between 34°F and 40°F to keep the meat safe while it cures.
Keep the Ham Fully Submerged
The pork should stay completely beneath the brine for the entire curing period. If needed, use a plate or food-safe weight to keep it submerged and ensure an even cure.
Store Curing Salt Safely
Keep Prague Powder #1 clearly labeled and stored separately from your everyday salts and seasonings. It should never be used as a direct substitute for regular salt.
Rinse and Cook After Curing
Once the curing period is complete, rinse the ham and cook it thoroughly before serving. The cure prepares the meat; proper cooking finishes the process.
Follow these guidelines and the rest is simply patience. The brine slowly works its way through the pork, transforming an ordinary pork shoulder into a richly flavored homemade ham.
How to Cure a Ham
- Prepare the Pork: Remove the pork shoulder from its packaging and pat it dry. Record the weight of the roast, as you’ll use this to determine the curing time and the amount of Prague Powder #1 needed.
- Toast the Spices: Place the allspice berries and coriander seeds in a dry skillet over medium heat. Toast for about 60 seconds, or until fragrant. Lightly crush them with a mortar and pestle or the bottom of a heavy pan.
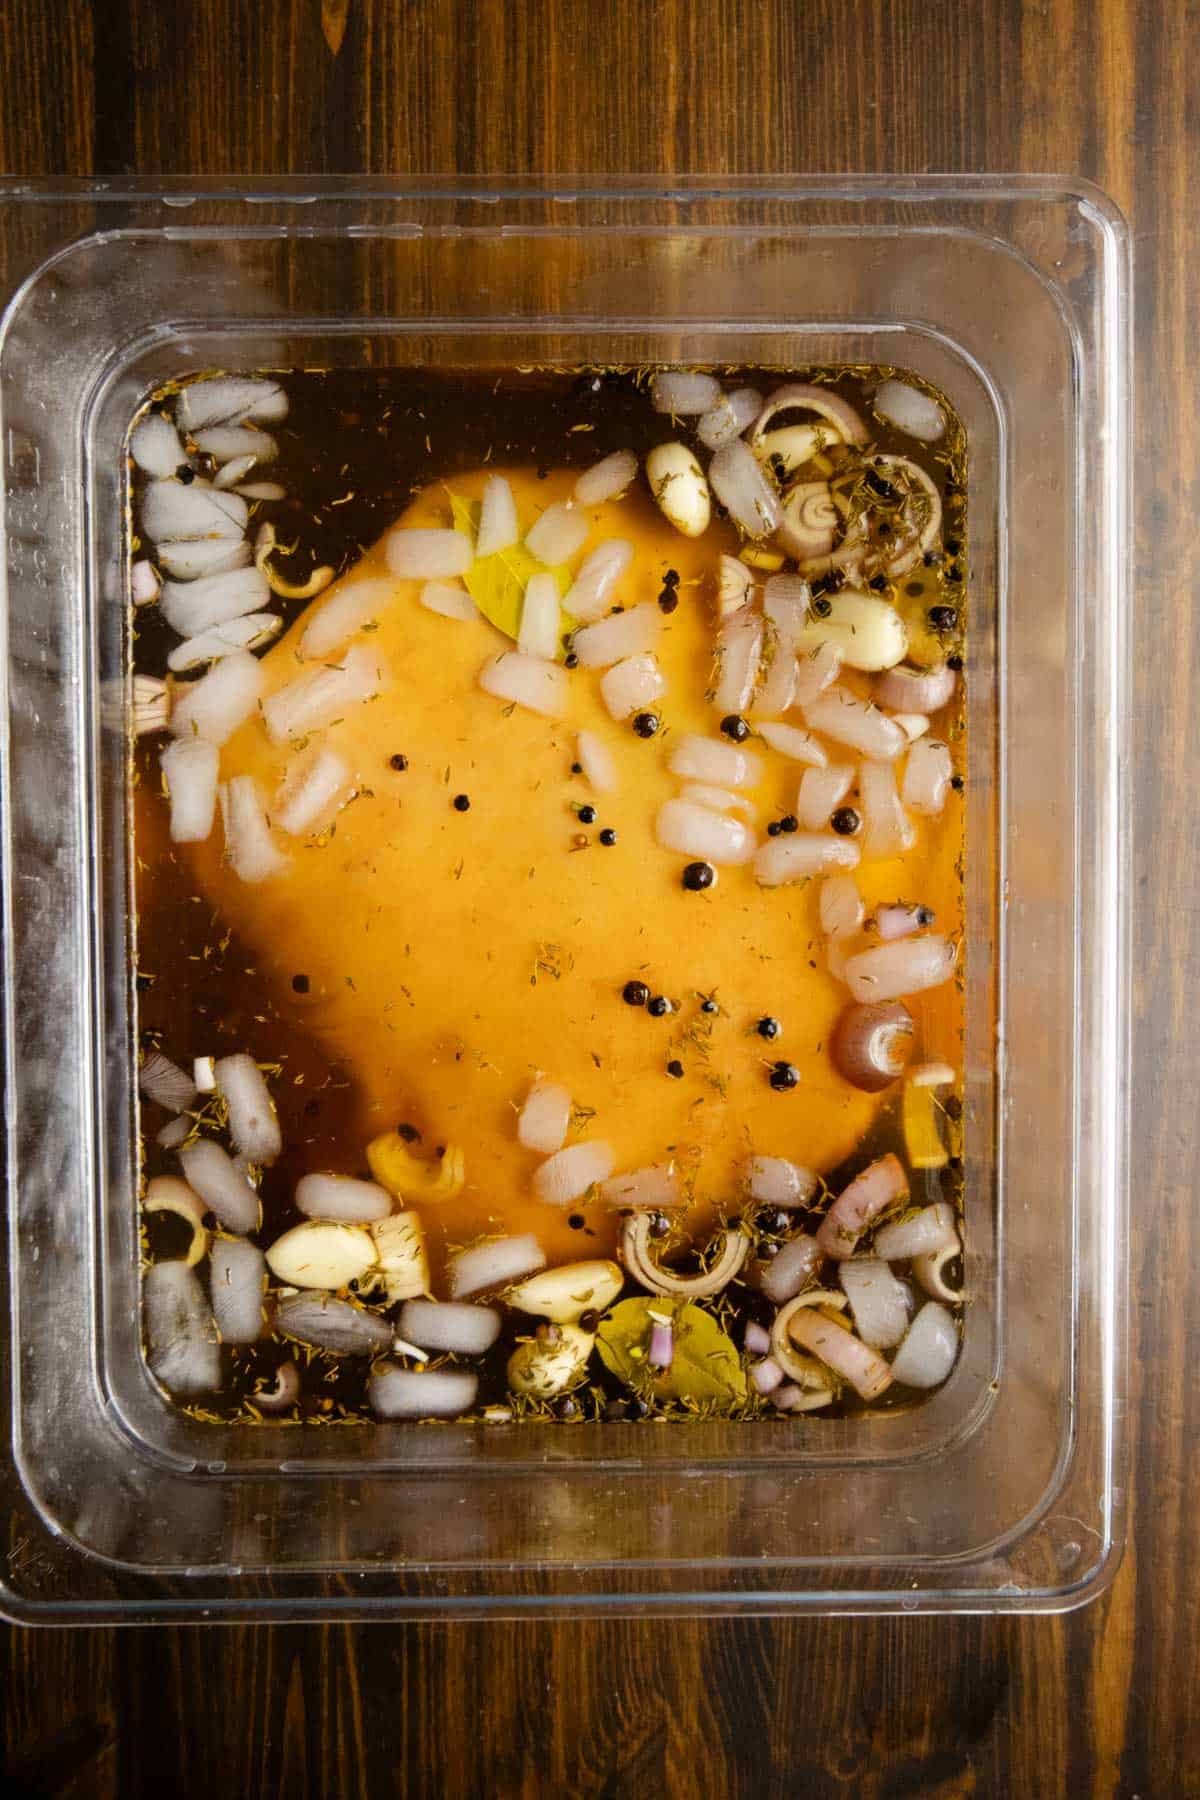
- Make the Brine: In a large pot, heat 1 quart of the water. Add the salt, brown sugar, and molasses, stirring until completely dissolved. Add the toasted allspice and coriander along with the bay leaves, black peppercorns, garlic, shallots, thyme, Worcestershire, and ginger. Remove from the heat and allow the mixture to steep for 5 to 10 minutes, like a savory tea.
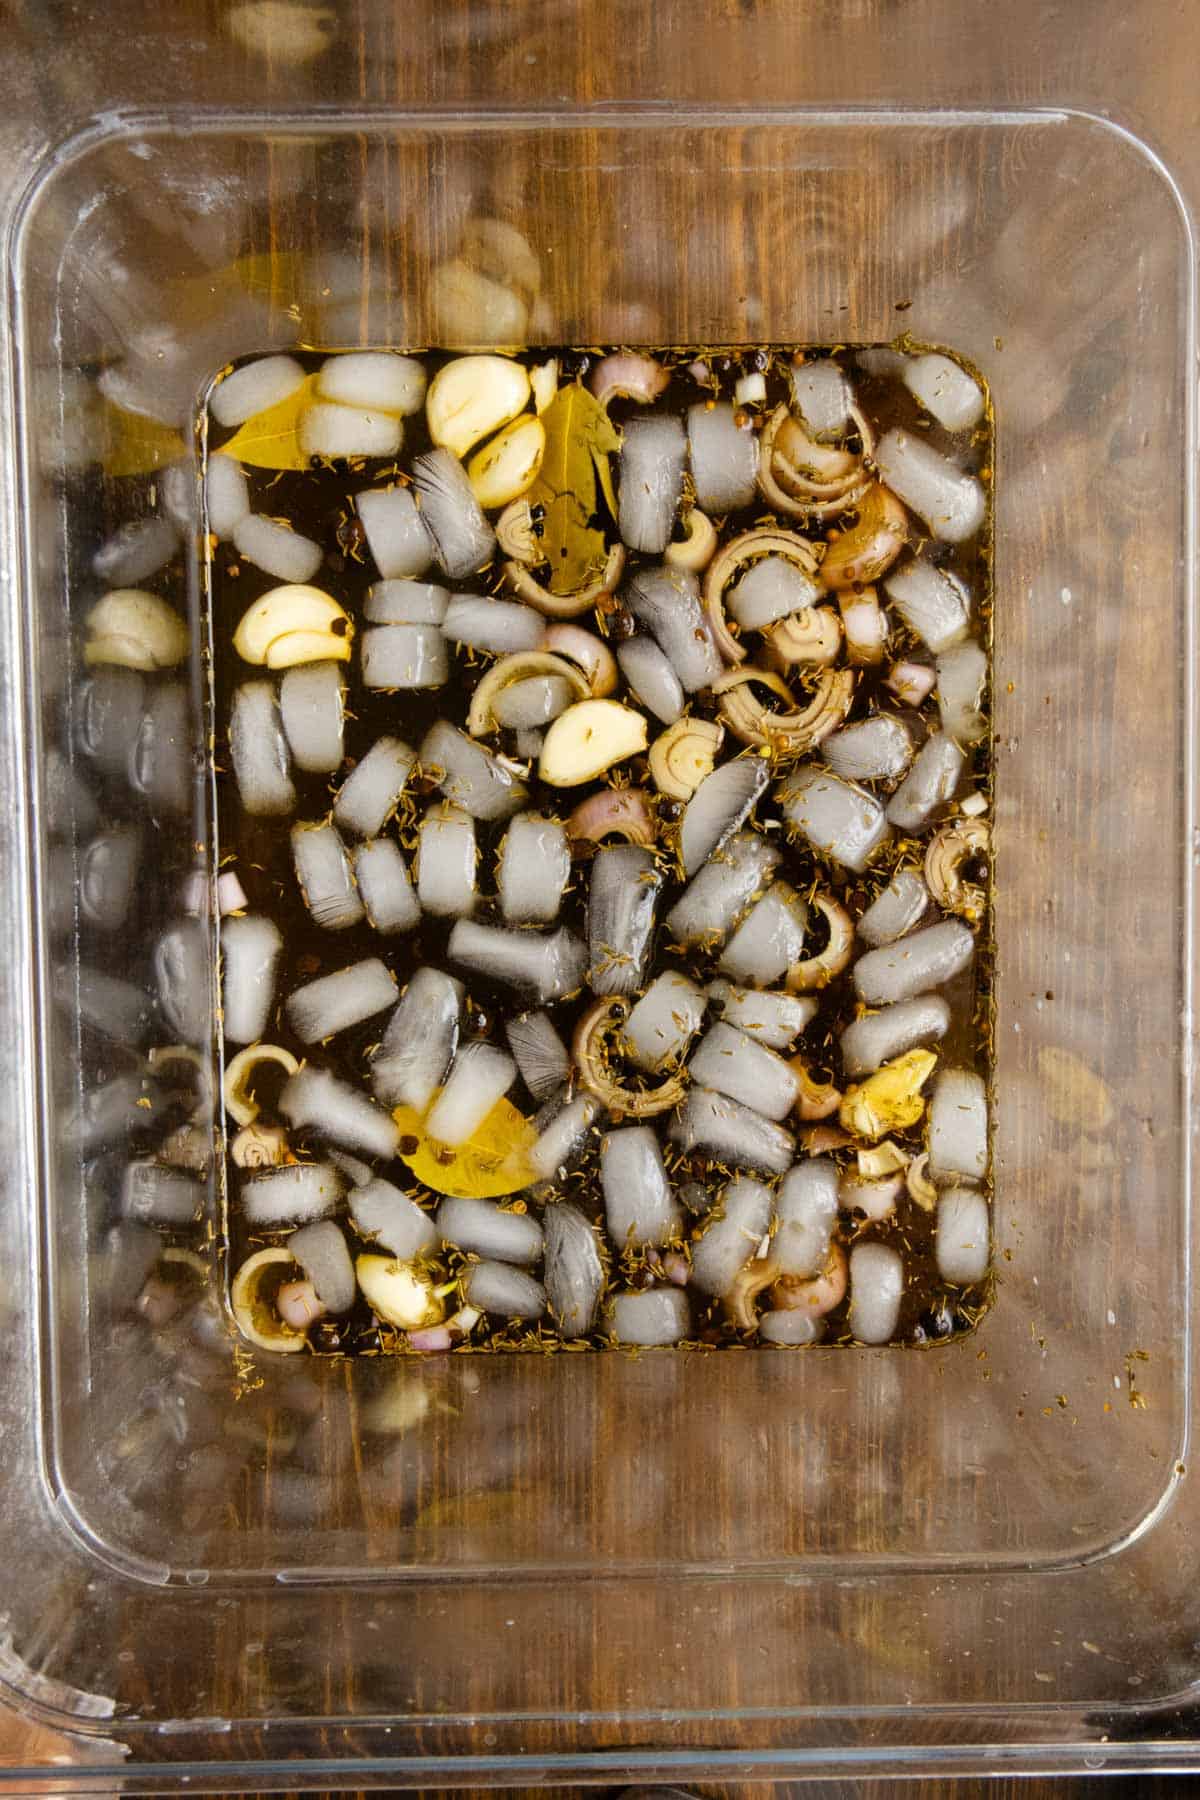
- Chill the Brine: Add the remaining cold water and ice, if needed, to quickly cool the brine. The brine must be completely cold before it comes into contact with the pork.
5. Add the Curing Salt: Once the brine has cooled, stir in the Prague Powder #1 until fully dissolved. Adding it after cooling helps ensure accurate measurements and prevents unnecessary heat exposure.
6. Cure the Ham: Place the pork shoulder into a large food-safe container and pour the brine over the top. The meat should be completely submerged. If needed, place a plate or food-safe weight on top to keep it beneath the surface. Cover and refrigerate.
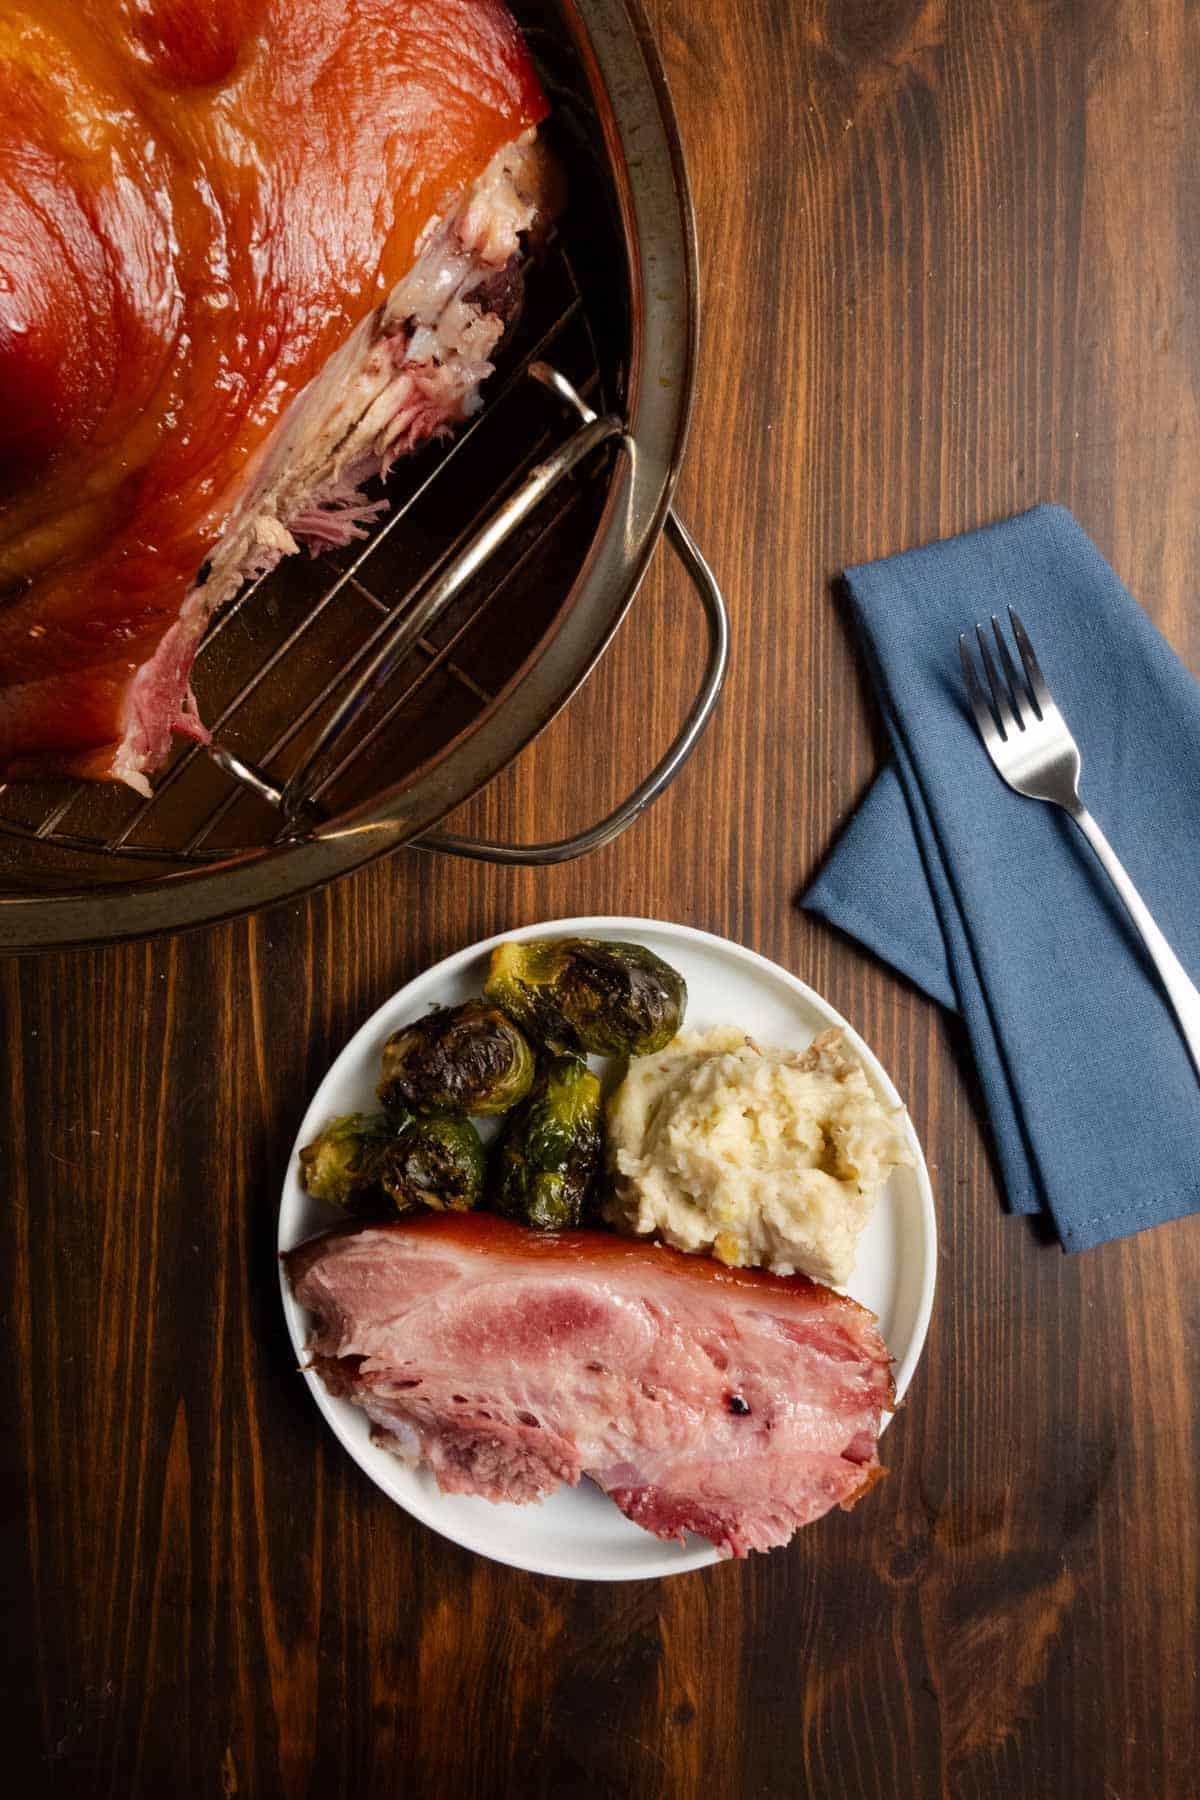
7. Allow Time for the Cure to Work: A common recommendation is to cure pork for approximately 1 day per 2 pounds of meat. For the ham pictured here, I chose to cure it for 1 day per pound. My pork shoulder weighed 9 pounds, so I cured it for 9 days.
I prefer the longer curing time because it gives the cure ample opportunity to reach the center of the roast, resulting in more even flavor, color, and texture throughout the finished ham.
Every 2 to 3 days, flip the ham over in the brine. This helps ensure all sides receive equal exposure to the curing liquid and promotes a more even cure.
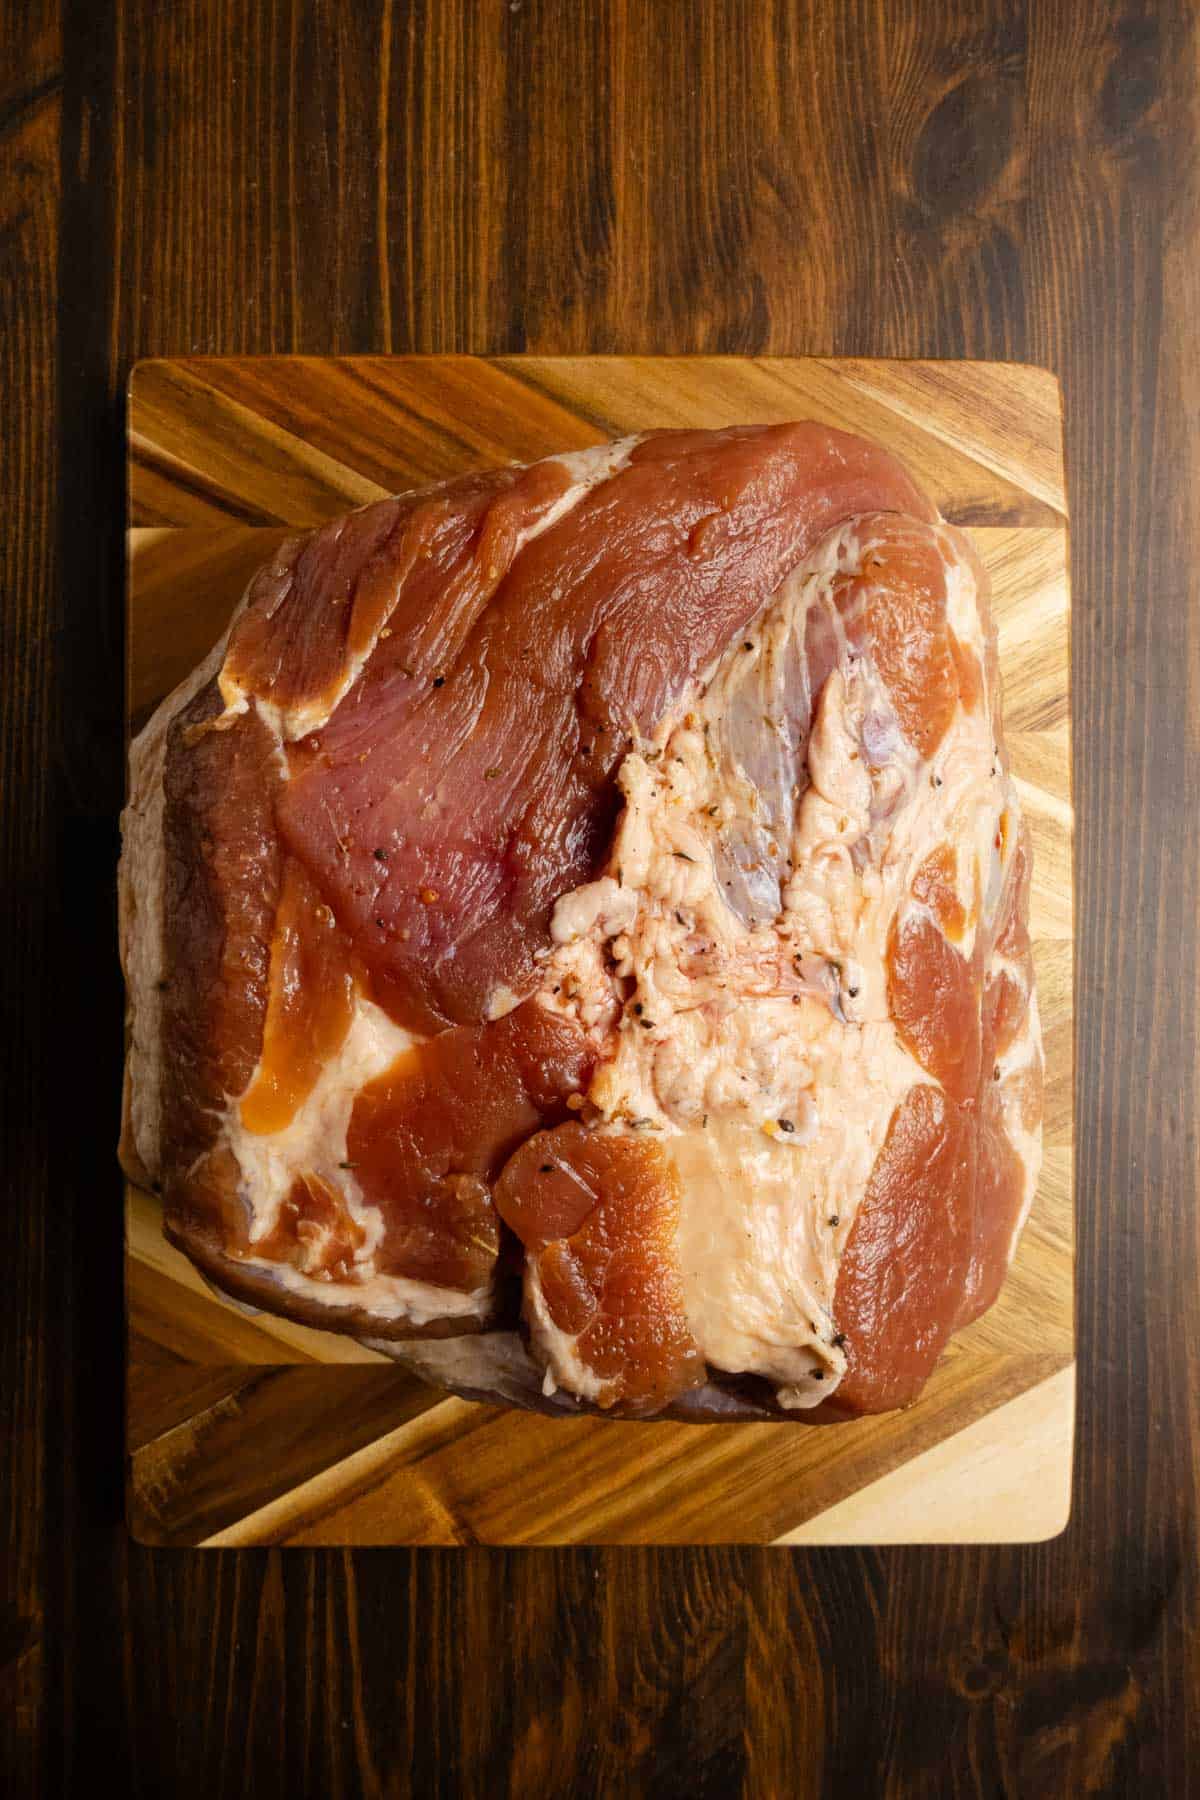
8. Rinse and Cook: Once the curing period is complete, remove the ham from the brine and rinse it under cold water. Pat dry and proceed with your preferred cooking method.
At this point, the pork will already look noticeably different, with a firmer texture and darker color than when you started.
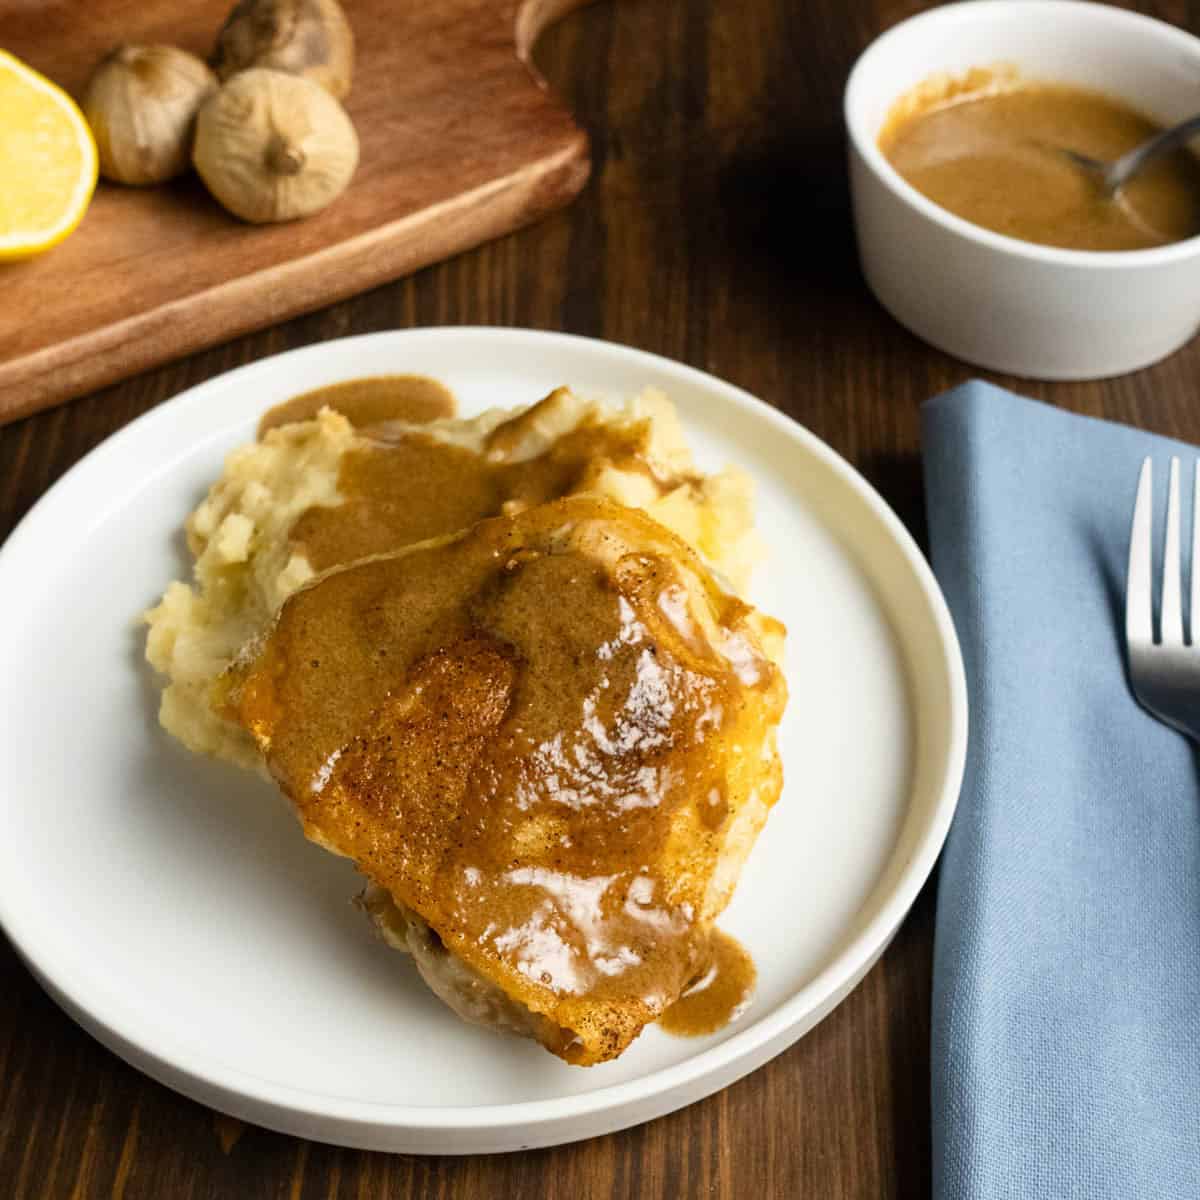
How to Cook the Ham
After curing and rinsing the ham, it’s time to transform it into the centerpiece of your meal. A covered roasting method keeps the meat moist while allowing the fat to slowly render and baste the roast as it cooks.
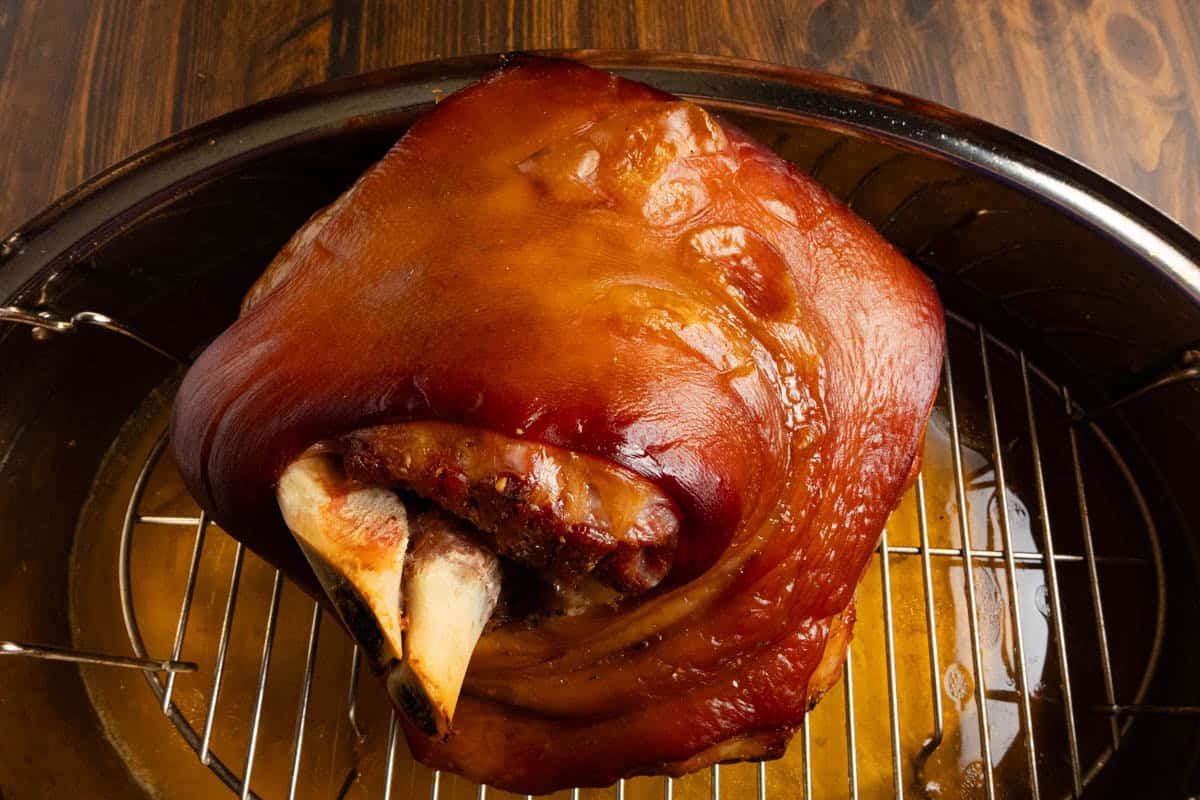
1. Roast the Ham: Remove the cured ham from the refrigerator and place it in a roasting pan fat-side up. Add 3 cups of water to the bottom of the pan and cover with a lid or tightly with foil.
Covering the ham during roasting traps moisture inside the pan, helping the meat stay juicy while the fat slowly renders. The final blast of high heat browns the exterior and develops deeper flavor without drying out the interior.
Roast at 325°F for approximately 22 minutes per pound. My 9-pound ham took about 3½ hours, but cooking time can vary depending on the size and shape of your roast.
Rather than relying solely on time, begin checking the internal temperature as the estimated cooking time approaches. Insert an instant-read thermometer into the thickest part of the ham, avoiding the bone. You’re looking for an internal temperature of 150°F.
2. Crisp the Exterior: Once the ham reaches 150°F, increase the oven temperature to 400°F and continue roasting for about 20 minutes, or until the exterior develops a beautiful deep golden-brown color.
3. Rest Before Slicing: Remove the ham from the oven and allow it to rest for 15 to 20 minutes before slicing. Resting gives the juices time to redistribute throughout the meat, resulting in cleaner slices and a juicier finished ham.
How to Slice the Ham
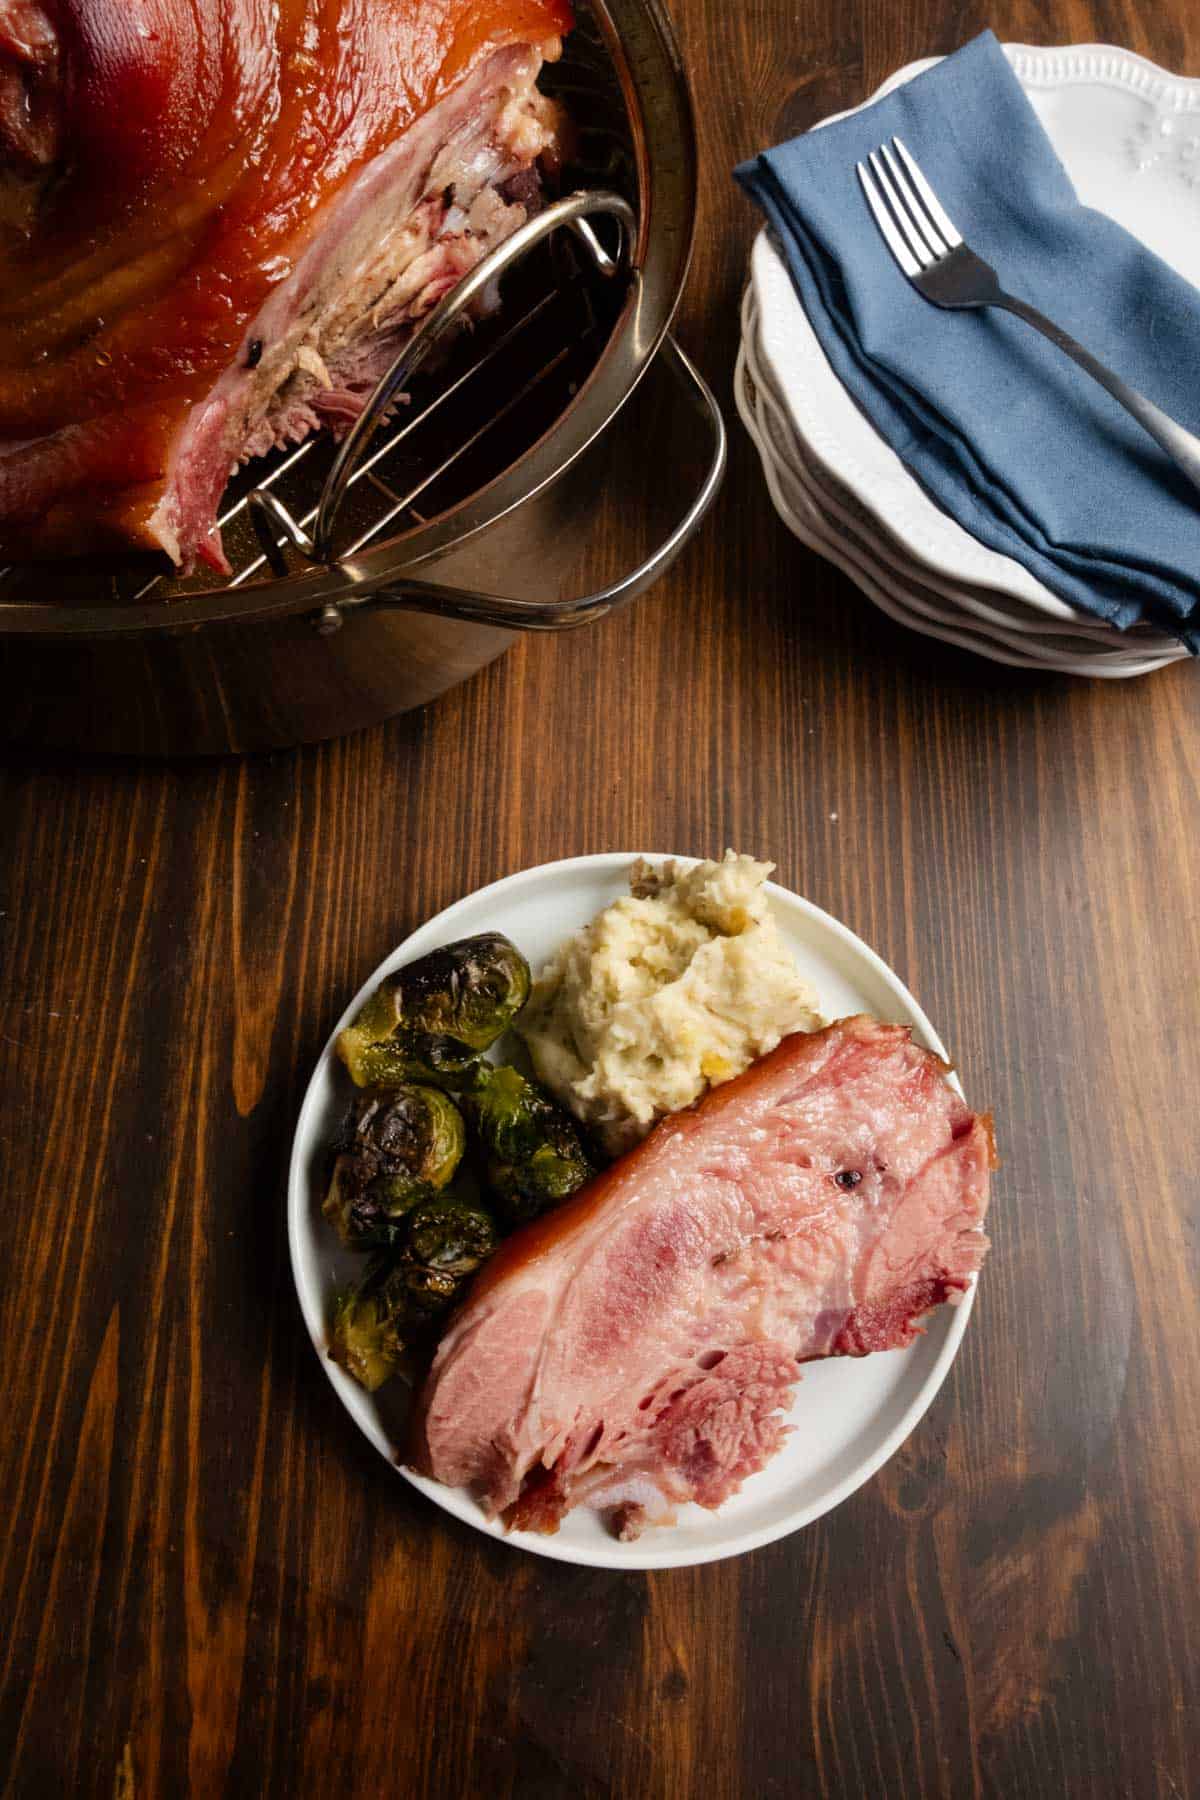
Once the ham has rested for 15 to 20 minutes, transfer it to a cutting board and locate the bone. Using a sharp carving knife, slice against the grain into your desired thickness.
For dinner portions, I prefer slightly thicker slices that stay juicy and showcase the ham’s texture. For sandwiches, thinner slices work beautifully.
As you slice, look for a consistent rosy-pink color throughout the meat. The texture should be firmer than a fresh pork roast, but still tender and juicy. This is a sign that the cure had sufficient time to penetrate the roast and develop the characteristic flavor and appearance of ham.
The aroma should be distinctly ham-like, with notes of spice, savory pork, and the aromatics from the brine. It should smell noticeably different from a fresh pork roast, signaling that the curing process has transformed both the flavor and texture of the meat.
Don’t worry if you notice a slightly darker ring near the exterior. The most important thing is that the center of the roast has cured evenly and doesn’t contain large gray areas of uncured meat.
If your ham has a thick fat cap, leave some of it attached to each slice. The rendered fat carries much of the flavor from the curing process and helps keep the meat moist.
For a holiday presentation, arrange the slices on a platter in slightly overlapping layers so guests can easily serve themselves. For everyday meals, slice only what you need and store the remainder as a larger piece. Larger pieces tend to stay moist longer than pre-sliced ham.
Expert Tips
Start with a Smaller Roast
A 5- to 10-pound pork shoulder is easier to cure evenly than a very large roast. If you need more ham, consider curing two smaller roasts rather than one giant one.
Cool the Brine Completely
Never pour warm brine over the pork. The brine should be fully chilled before the meat is added to maintain food safety and ensure the cure works properly.
Don’t Rush the Cure
Time is one of the most important ingredients in this recipe. A longer cure allows the flavor, color, and texture to develop all the way to the center of the roast.
Cook to Temperature, Not Time
Ovens vary. Use the suggested cooking time as a guide, but rely on an instant-read thermometer for accuracy. The ham is ready when the thickest part reaches 150°F.
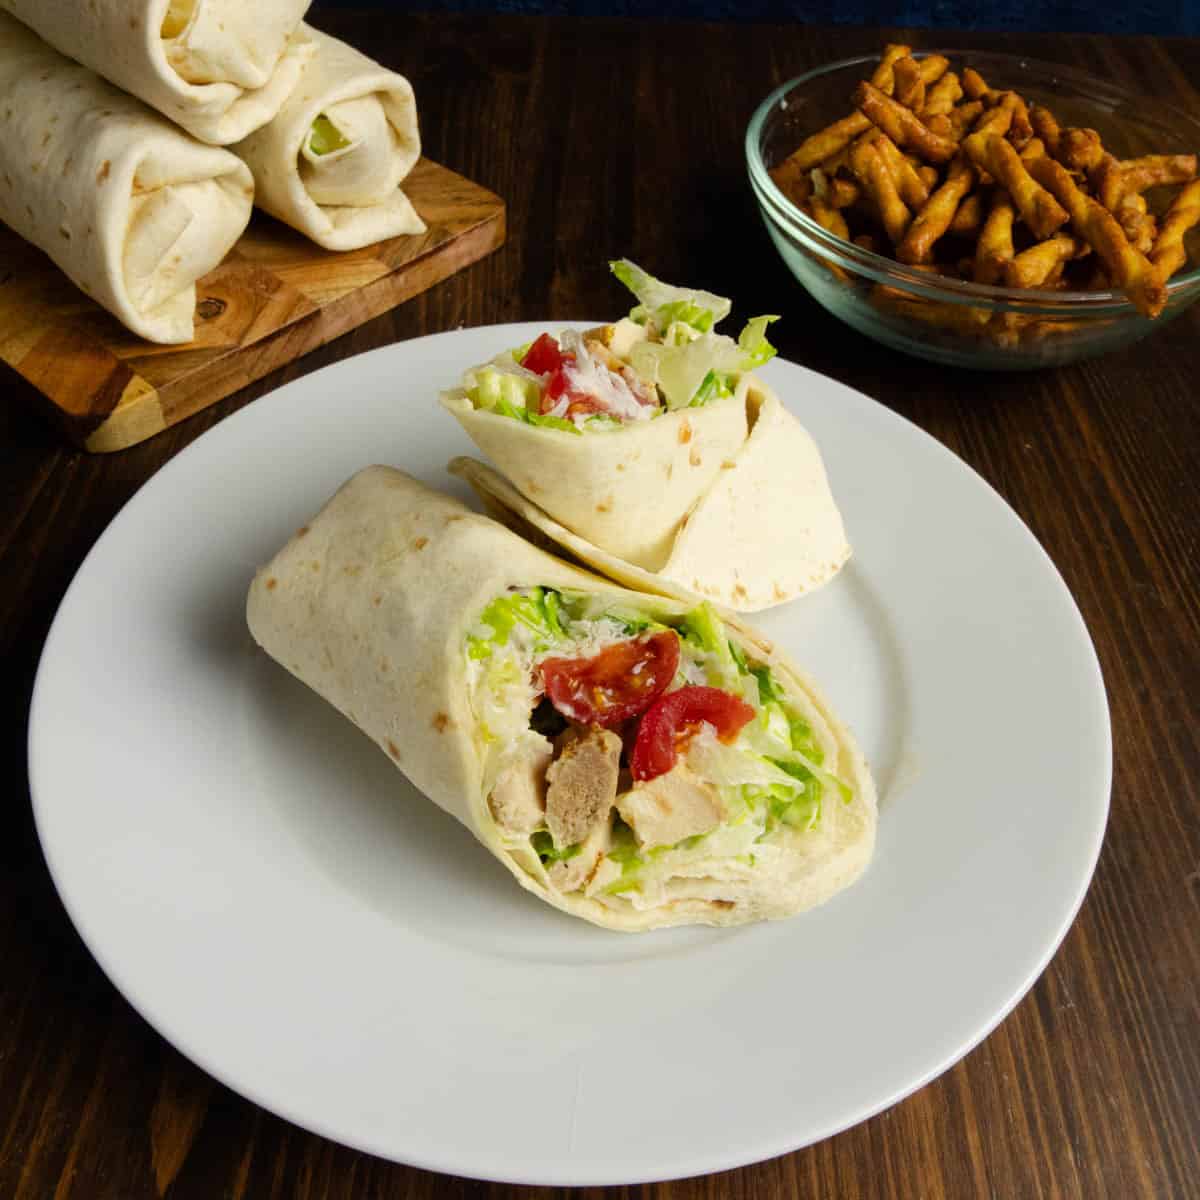
Save the Leftovers
One of the best parts of making a homemade ham is enjoying it all week. Use leftover ham in sandwiches, breakfast scrambles, omelets, soups, bean dishes, quiches, and casseroles.
Don’t discard the ham bone. Simmer it with beans, split peas, lentils, or stock for an incredible smoky, savory broth.
Storage
Refrigerator: Store leftover ham in an airtight container in the refrigerator for up to 5 days.
Freezer: For longer storage, slice the ham and freeze it in freezer-safe bags or containers for up to 3 months. Thaw overnight in the refrigerator before reheating.
Reheating: To keep the ham moist, add a splash of water or stock, cover, and warm gently in a 300°F oven until heated through.
Plating and Finishing Touches
Arrange the sliced ham on a large platter, slightly overlapping the slices so guests can easily serve themselves. Spoon a few tablespoons of the pan juices over the meat just before serving to add moisture and shine.
For a simple finishing touch, tuck a few sprigs of fresh thyme or rosemary around the platter. Their aroma complements the spices in the ham while adding a touch of color.
If serving for a holiday meal, surround the ham with roasted vegetables, baked potatoes, or rolls to create a warm and inviting presentation.
For everyday dinners, serve thick slices family-style on a platter and let the ham be the star of the table.
Serving Suggestions
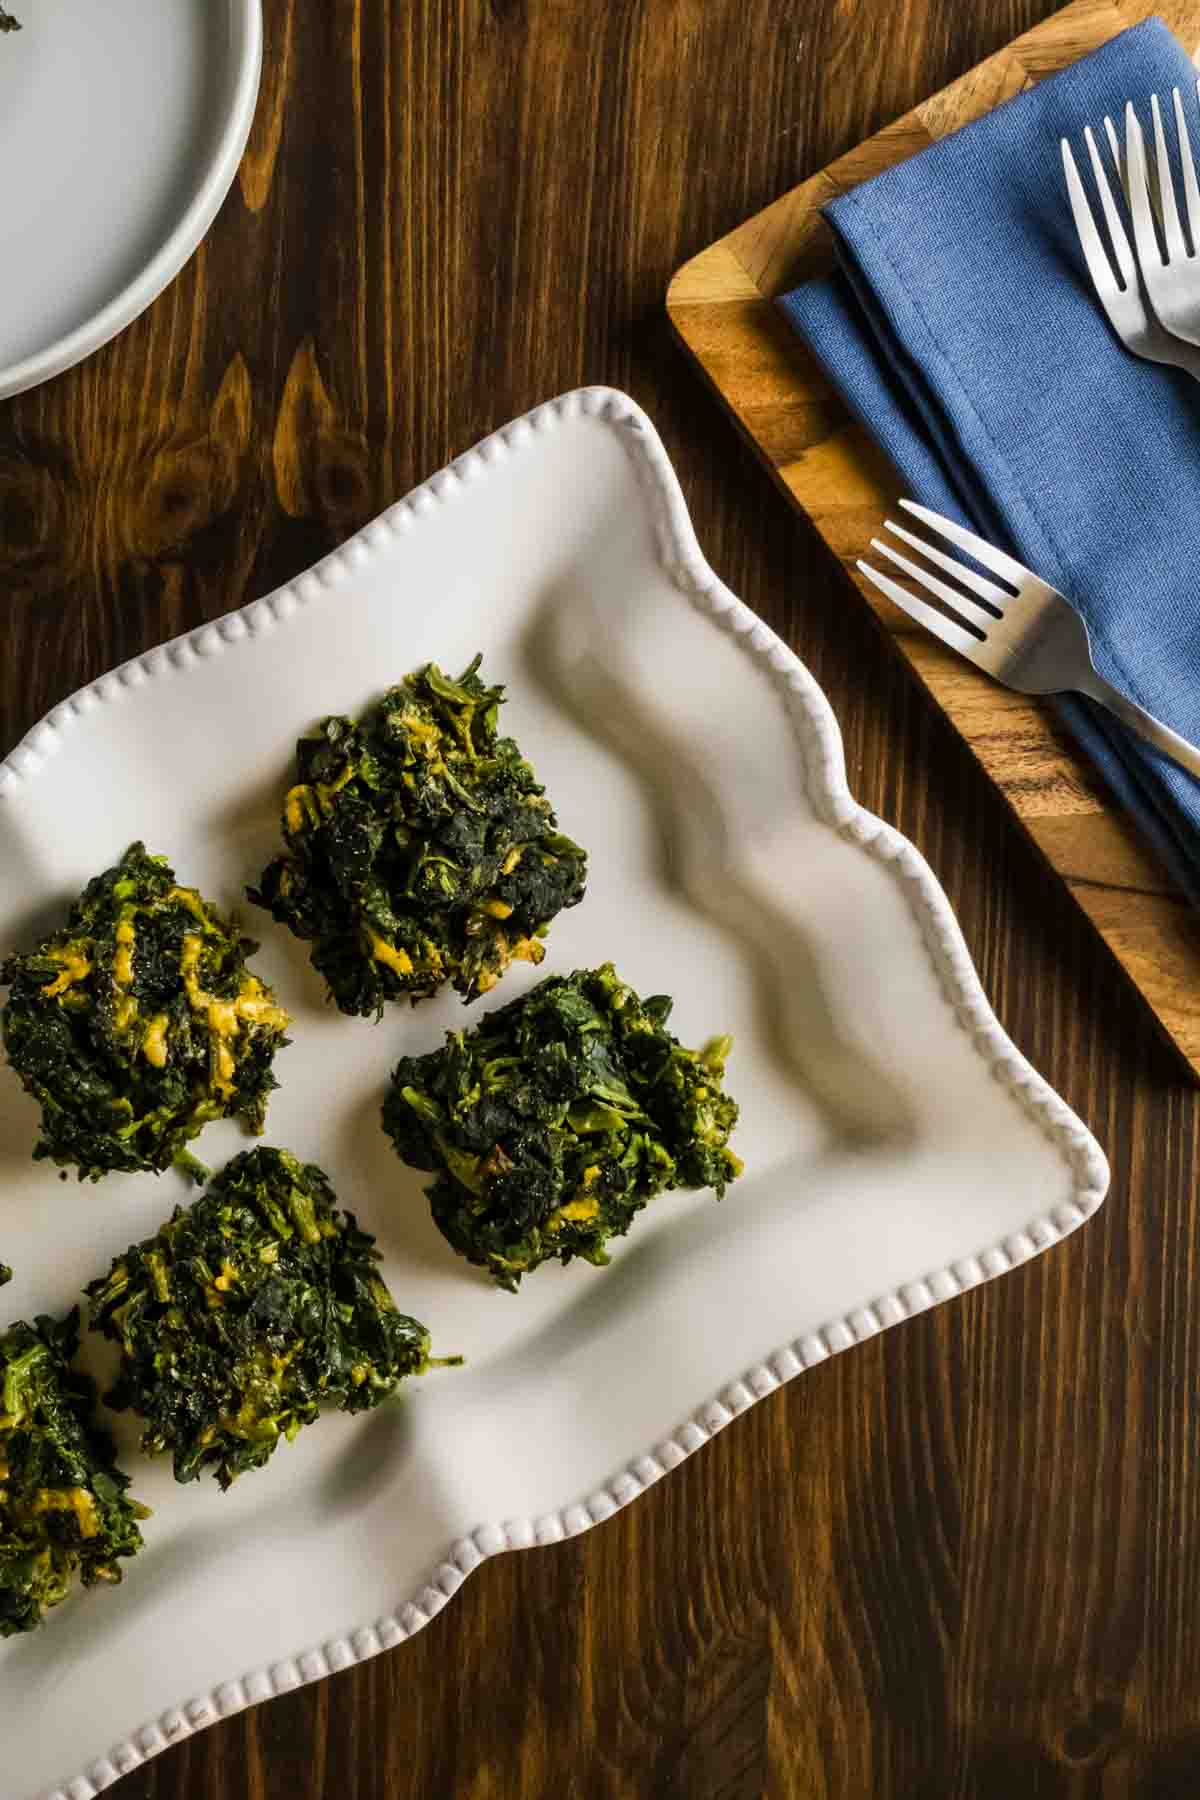
Spinach Squares
These savory squares add a soft, custardy contrast to the rich, meaty ham while bringing a welcome pop of green to the plate.
The tender spinach and cheesy interior pair beautifully with slices of warm ham. Together they create the kind of comforting meal that feels equally at home on a holiday table or a quiet Sunday dinner.
Ginger Coconut Rice
The subtle sweetness of coconut and the gentle warmth of ginger complement the spices in the ham brine without overpowering them.
Each forkful offers fluffy grains scented with ginger and coconut, creating a beautiful balance between savory, sweet, and aromatic flavors.
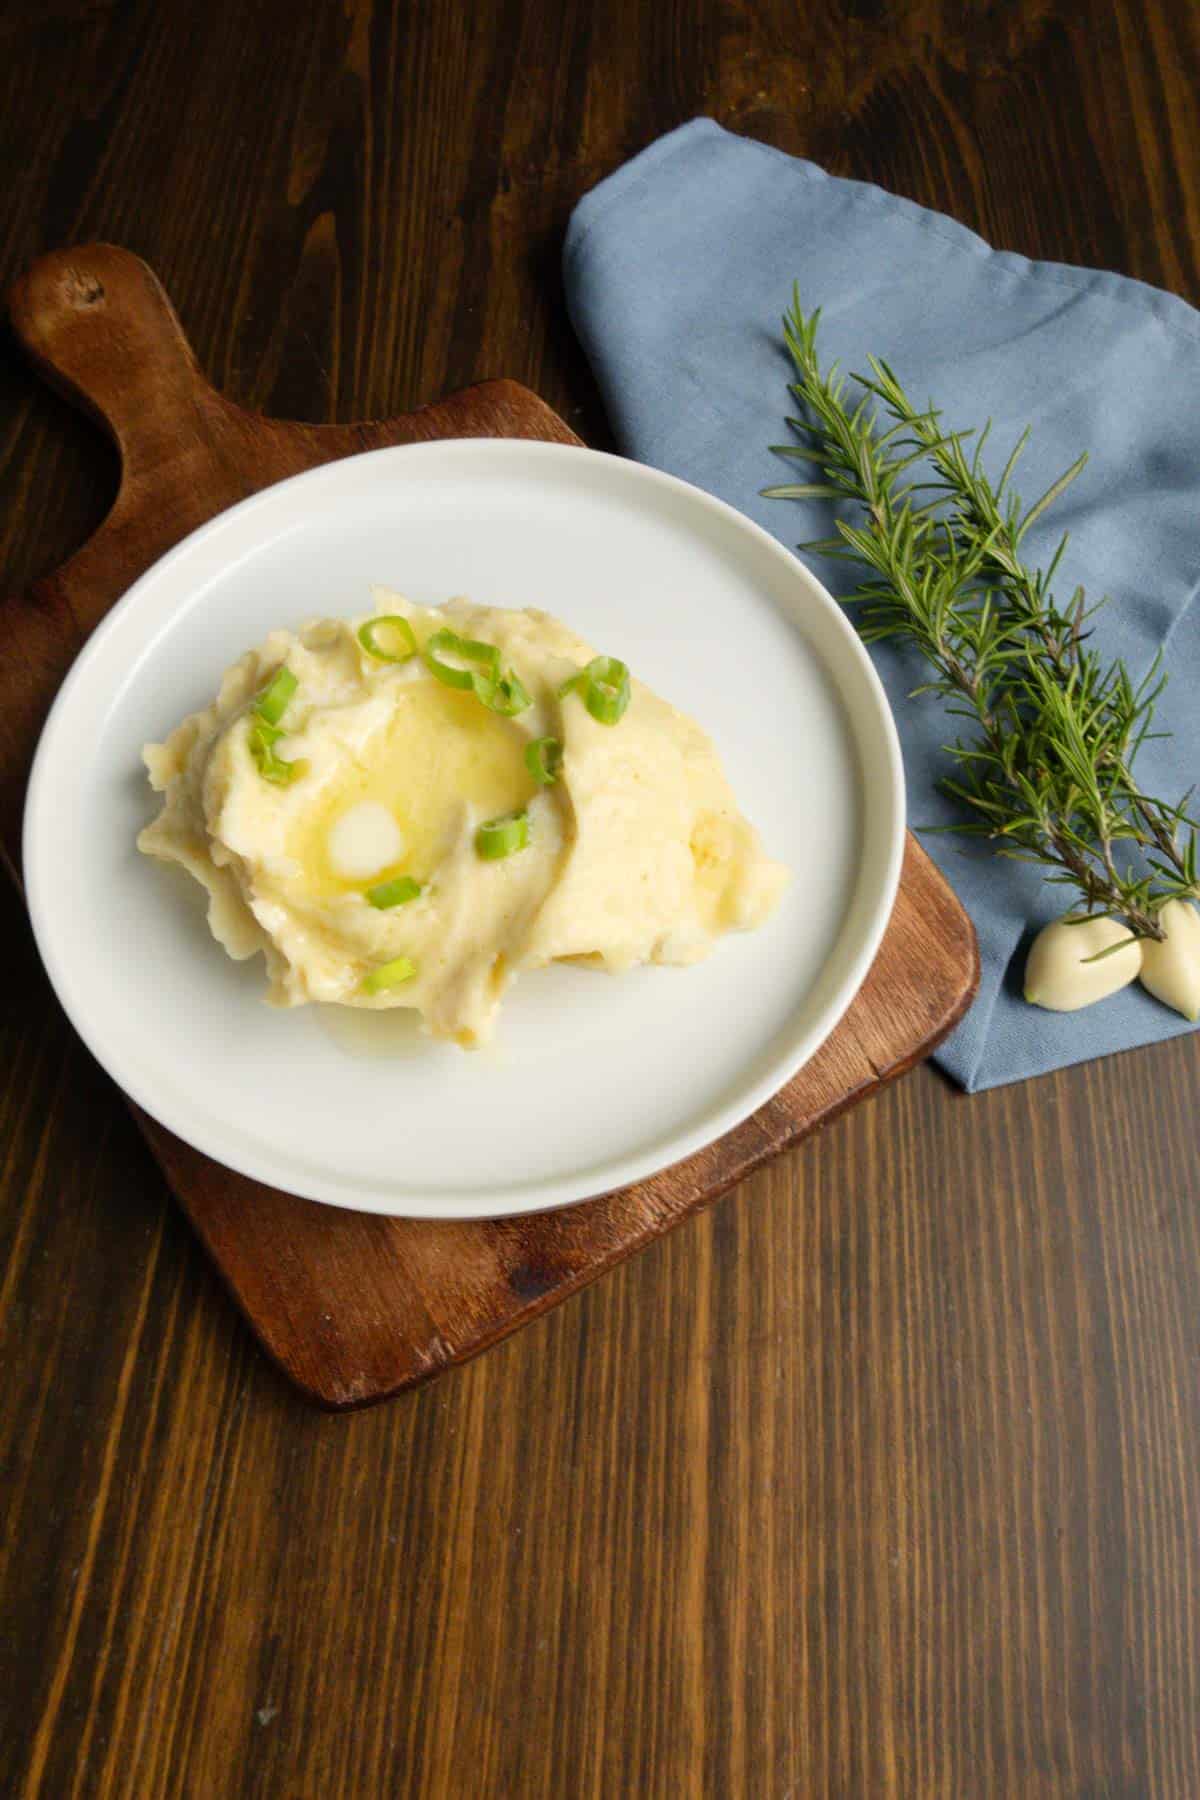
Rosemary Garlic Mashed Potatoes
Creamy mashed potatoes are a natural partner for ham, and the rosemary and garlic echo the savory herbs used throughout the curing process.
The potatoes are velvety and rich, soaking up every drop of ham juices while rosemary adds a fragrant, woodsy note that makes the meal feel especially cozy.
Cheesy Garlic Mashed Potatoes
The creamy cheese and roasted garlic create a rich side dish that stands up beautifully to the bold flavor of homemade ham.
The melted cheese stretches through every spoonful while the garlic adds warmth and depth. Together they transform a simple ham dinner into pure comfort food.
Extra Crispy Roasted Potatoes
Their crunchy exterior and fluffy interior provide a welcome textural contrast to the tender slices of ham.
Each bite delivers a satisfying crackle before giving way to a soft, steamy center. They’re especially delicious when dipped into the savory juices left on the plate.
Roasted Radishes
Roasting transforms radishes from sharp and peppery into something mellow, slightly sweet, and surprisingly buttery.
Their delicate flavor helps balance the richness of the ham while adding color and freshness to the meal. They’re a wonderful choice when you’re looking for something a little different from traditional potato sides.
Potatoes Gratin Without Cream
This lighter take on potatoes gratin delivers all the comfort of the classic dish while allowing the flavor of the ham to remain the star.
Tender layers of potatoes bake into a golden, bubbling casserole with crisp edges and a soft center. Every bite feels indulgent without becoming overly heavy.
Roasted Romanesco
Romanesco brings a slightly nutty, earthy flavor that pairs beautifully with cured pork.
Its caramelized edges develop a delicate sweetness in the oven while the vibrant green florets brighten the plate. The combination feels elegant enough for a holiday gathering yet simple enough for an everyday dinner.

FAQs
While traditional hams come from the hind leg of the pig, a pork shoulder can also be cured and cooked to create a delicious homemade ham. The curing process is what gives the meat its characteristic flavor, color, and texture.
Yes. A boneless pork shoulder can be cured successfully, though bone-in roasts tend to retain moisture well during cooking and often develop a slightly richer flavor.
Yes. Prague Powder #1 is what makes this a cured ham rather than simply a brined pork roast. It helps create the characteristic cured flavor, color, and texture associated with ham.
Adding meat to warm brine can raise the temperature of the pork into the food safety danger zone. Always cool the brine completely before submerging the roast.
A few extra days generally won’t hurt a properly refrigerated ham, but excessively long curing times can lead to a saltier finished product. Follow the recommended curing schedule for the best balance of flavor and texture.
A properly cured ham should have a consistent rosy-pink color from edge to center. Small gray areas near the bone or in particularly thick sections may indicate that the cure did not fully penetrate that portion of the meat.
If the ham was properly refrigerated during curing and cooked to a safe internal temperature, a small gray area is usually a quality issue rather than a safety concern. Large gray areas suggest the ham needed additional curing time
Absolutely. After curing, the ham can be smoked until it reaches a safe internal temperature. Smoking adds another layer of flavor while preserving the benefits of the cure.
If you enjoyed learning how to cure a ham at home, I’d love to invite you to join my newsletter.
Each week, I share restaurant-quality recipes, cooking techniques, kitchen experiments, and ideas to help you create memorable meals without stress or chaos. Whether you’re mastering a new skill or simply looking for inspiration for your next dinner, you’ll find plenty of delicious reasons to pull up a chair.
Sign up below and let’s keep cooking together.
The Bluster and the Burrow

Home Cured Ham
Equipment
- Large Container holds the brine and pork shoulder
Ingredients
- 5-10 pound pork shoulder or picnic roast
- 1 gallon water
- 1 cup salt
- ¾ cup dark brown sugar
- ¼ cup molasses
- Prague Powder #1 Premium Pink Curing Salt 1 teaspoon per 5 lbs of meat
- 1 tablespoon allspice berries
- 1 tablespoon black peppercorns
- 1 teaspoon whole coriander
- 3 bay leaves
- 5 garlic cloves smashed
- ½ cup shallots sliced or onion
- 1 tablespoon ginger paste
- ½ teaspoon dried thyme
- 1 teaspoon Worcestershire
Instructions
Cure the Ham
- Prepare the Pork: Remove the 5-10 pound pork shoulder from its packaging and pat it dry. Record the weight of the roast, as you'll use this to determine the curing time and the amount of Prague Powder #1 needed.
- Toast the Spices: Place 1 tablespoon allspice berries and 1 teaspoon whole coriander in a dry skillet over medium heat. Toast for about 60 seconds, or until fragrant. Lightly crush them with a mortar and pestle or the bottom of a heavy pan.
- Make the Brine: In a large pot, heat 1 quart of the water. Add 1 cup salt, ¾ cup dark brown sugar, and ¼ cup molasses, stirring until completely dissolved. Add the toasted allspice and coriander along with 3 bay leaves, 1 tablespoon black peppercorns, 5 garlic cloves, ½ cup shallots, ½ teaspoon dried thyme, 1 teaspoon Worcestershire, and 1 tablespoon ginger paste. Remove from the heat and allow the mixture to steep for 5 to 10 minutes, like a savory tea.
- Chill the Brine: Add the remaining cold water and ice, if needed, to quickly cool the brine. The brine must be completely cold before it comes into contact with the pork.
- Add the Curing Salt: Once the brine has cooled, stir in the Prague Powder #1 Premium Pink Curing Salt until fully dissolved. Adding it after cooling helps ensure accurate measurements and prevents unnecessary heat exposure.
- Cure the Ham: Place the pork shoulder into a large food-safe container and pour the brine over the top. The meat should be completely submerged. If needed, place a plate or food-safe weight on top to keep it beneath the surface. Cover and refrigerate.
- Allow Time for the Cure to Work: A common recommendation is to cure pork for approximately 1 day per 2 pounds of meat. For the ham pictured here, I chose to cure it for 1 day per pound.
- Every 2 to 3 days, flip the ham over in the brine. This helps ensure all sides receive equal exposure to the curing liquid and promotes a more even cure.
- Rinse and Cook: Once the curing period is complete, remove the ham from the brine and rinse it under cold water. Pat dry and proceed with your preferred cooking method.
Cook the Ham
- Roast the Ham: Remove the cured ham from the refrigerator and place it in a roasting pan fat-side up. Add 3 cups of water to the bottom of the pan and cover with a lid or tightly with foil.
- Roast at 325°F for approximately 22 minutes per pound. My 9-pound ham took about 3½ hours, but cooking time can vary depending on the size and shape of your roast.
- Insert an instant-read thermometer into the thickest part of the ham, avoiding the bone. You're looking for an internal temperature of 150°F.
- Crisp the Exterior: Once the ham reaches 150°F, increase the oven temperature to 400°F and continue roasting for about 20 minutes, or until the exterior develops a beautiful deep golden-brown color.
- Rest Before Slicing: Remove the ham from the oven and allow it to rest for 15 to 20 minutes before slicing. Resting gives the juices time to redistribute throughout the meat, resulting in cleaner slices and a juicier finished ham.


Whether for Christmas, Easter, or just to make homemade ham sandwiches, this ham is easy, impressive, and full of flavor!