Dry Brined Roasted Duck
As an Amazon Associate, I earn from qualifying purchases. This post may contain affiliate links. If you purchase through them, I may earn a small commission at no extra cost to you.
Roasting a whole duck feels like something reserved for restaurants or holiday tables. But the truth is this: duck is not difficult. It is simply different.
What makes duck extraordinary is its fat; what makes it disappointing is mishandling that fat.
This dry brined whole roasted duck is built around control. A long salt cure dries the skin and seasons the meat all the way through. A brief blast of high heat jump-starts fat rendering. A steady, moderate roast finishes the job without tightening the breast into leather. Cooking on a rack allows fat to drip away instead of pooling beneath the bird, so you get what you actually want: deeply rendered, crisp skin and tender legs.
This is a foundational duck recipe. Master it once and you can dress it up endlessly; citrus glaze, berry reduction, black garlic jus, or nothing at all. The technique carries everything else.
Why You’ll Love this Recipe
- Crisp, shattering skin without flipping or fuss
- Deep seasoning throughout from a simple salt cure
- A foundational technique you can dress up endlessly
- Restaurant-level results from an intentionally simple method
What You’ll Walk Away Knowing
- Why and how to dry brine
- How duck fat renders and why airflow matters
- How to balance high heat and steady roasting
Why Dry Brine a Duck
Dry brining a whole duck does two important things at once: it seasons the meat from within and it prepares the skin to crisp properly.
When you salt the duck, the salt begins pulling moisture to the surface through osmosis. Those tiny beads of moisture dissolve the salt, and over time that seasoned liquid is drawn back into the meat. The result is deeper, more even flavor throughout; not just salt sitting on the surface.
With duck, there is a second benefit. Leaving the bird uncovered in the refrigerator allows circulating air to dry the skin thoroughly. Duck has a thick layer of fat beneath the skin; if the surface is damp, that fat steams instead of rendering cleanly. A dry surface leads to better fat rendering, and better rendering leads to shattering, crisp skin.
Dry brining is also simple and low-mess. There is no liquid brine, no large container, and no rearranging your refrigerator to fit a bucket. Just salt, air, and time.
For duck, I strongly prefer dry brining uncovered on a rack set over a baking sheet. Place it on the bottom shelf of your refrigerator so any drips stay contained. The open air is what creates the dry exterior that makes roasted duck exceptional.
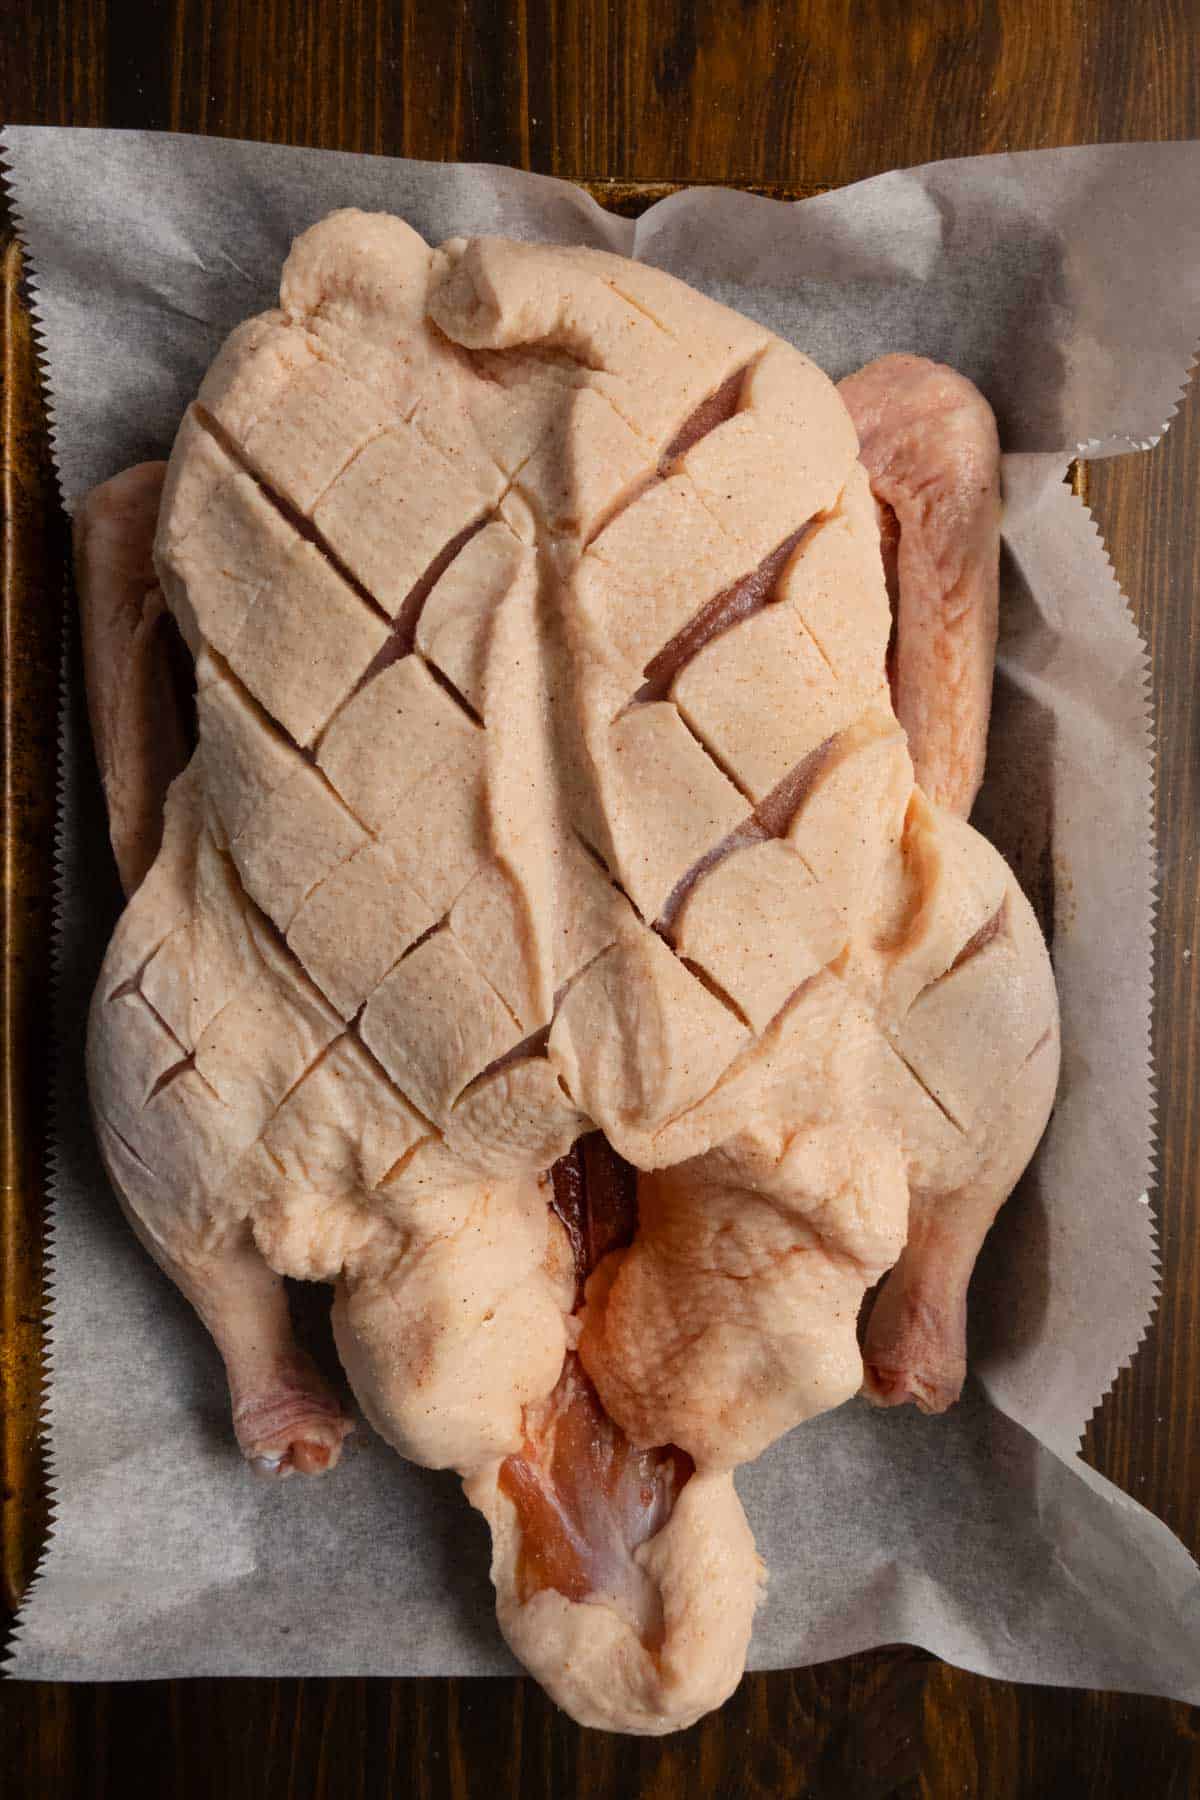
As for salt quantity, use roughly 1 teaspoon of kosher salt per pound of duck. If you do not measure, season generously and evenly over the entire surface and inside the cavity. The duck should look well-seasoned but not crusted in salt.
Twenty-four hours is ideal. Forty-eight hours is excellent. Up to seventy-two hours is still safe and will produce a slightly firmer, more cured texture.
Dry brining is not complicated. It is simply patience working in your favor.
Ingredient List
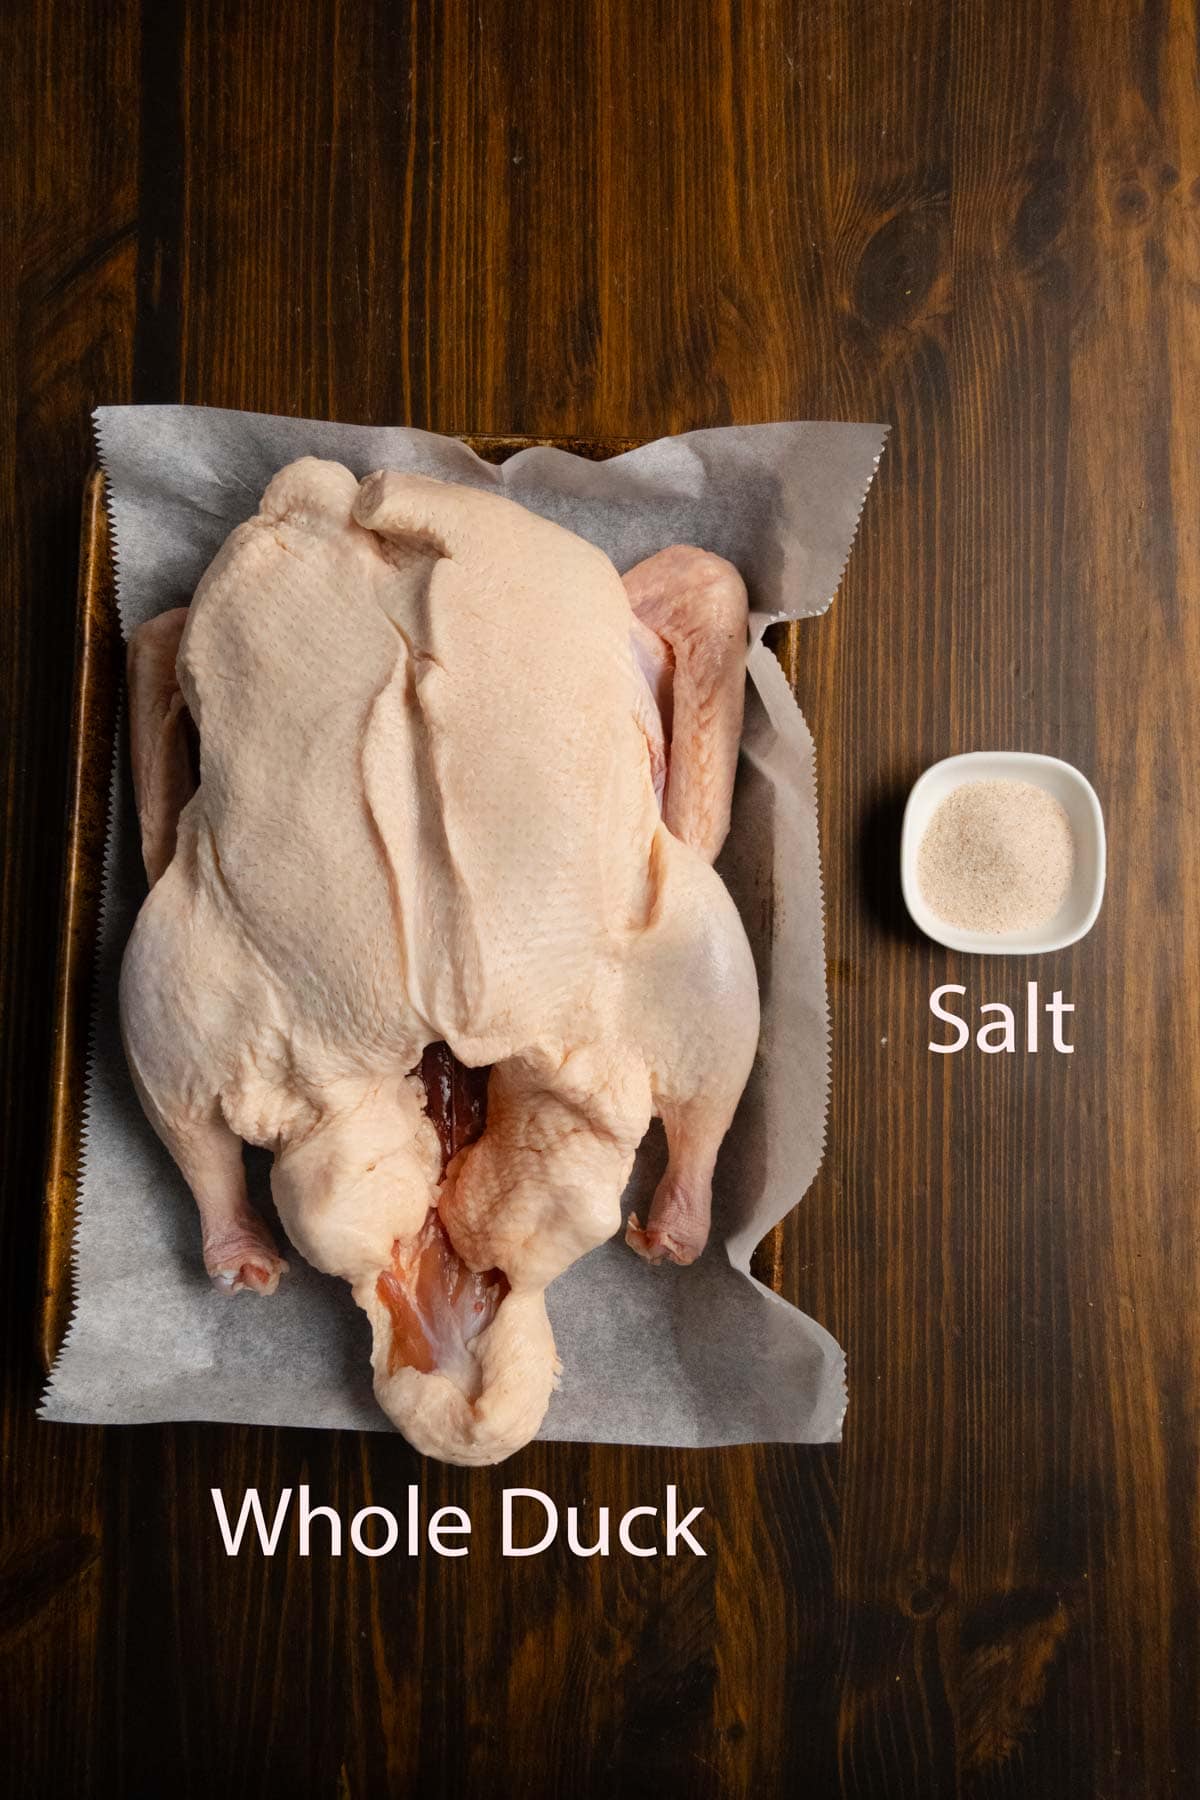
Whole Duck: 5.5–6 pound Pekin (Long Island) duck, fully thawed if previously frozen. These are the most common ducks found in grocery stores.
Salt: Use kosher salt, sea salt, Himalayan salt, or Redmond Real Salt. Avoid iodized table salt, which can taste harsh.
Optional Aromatics (for cavity): Garlic cloves, thyme, bay leaf, orange peel, or lemon peel.
Equipment
Roasting a duck is about technique and finesse. To do it properly, you need the right tools.
Roasting Rack: Essential. Duck renders a significant amount of fat. Elevating the bird prevents soggy skin and allows true roasting instead of shallow frying.
Rimmed Baking Sheet: Large enough to hold the rack and catch rendered fat.
Instant-Read Thermometer: Non-negotiable. Internal temperature, not time, determines doneness.
How to Make Dry Brined Whole Roasted Duck
Dry Brine (24-48 Hours Before Cooking)
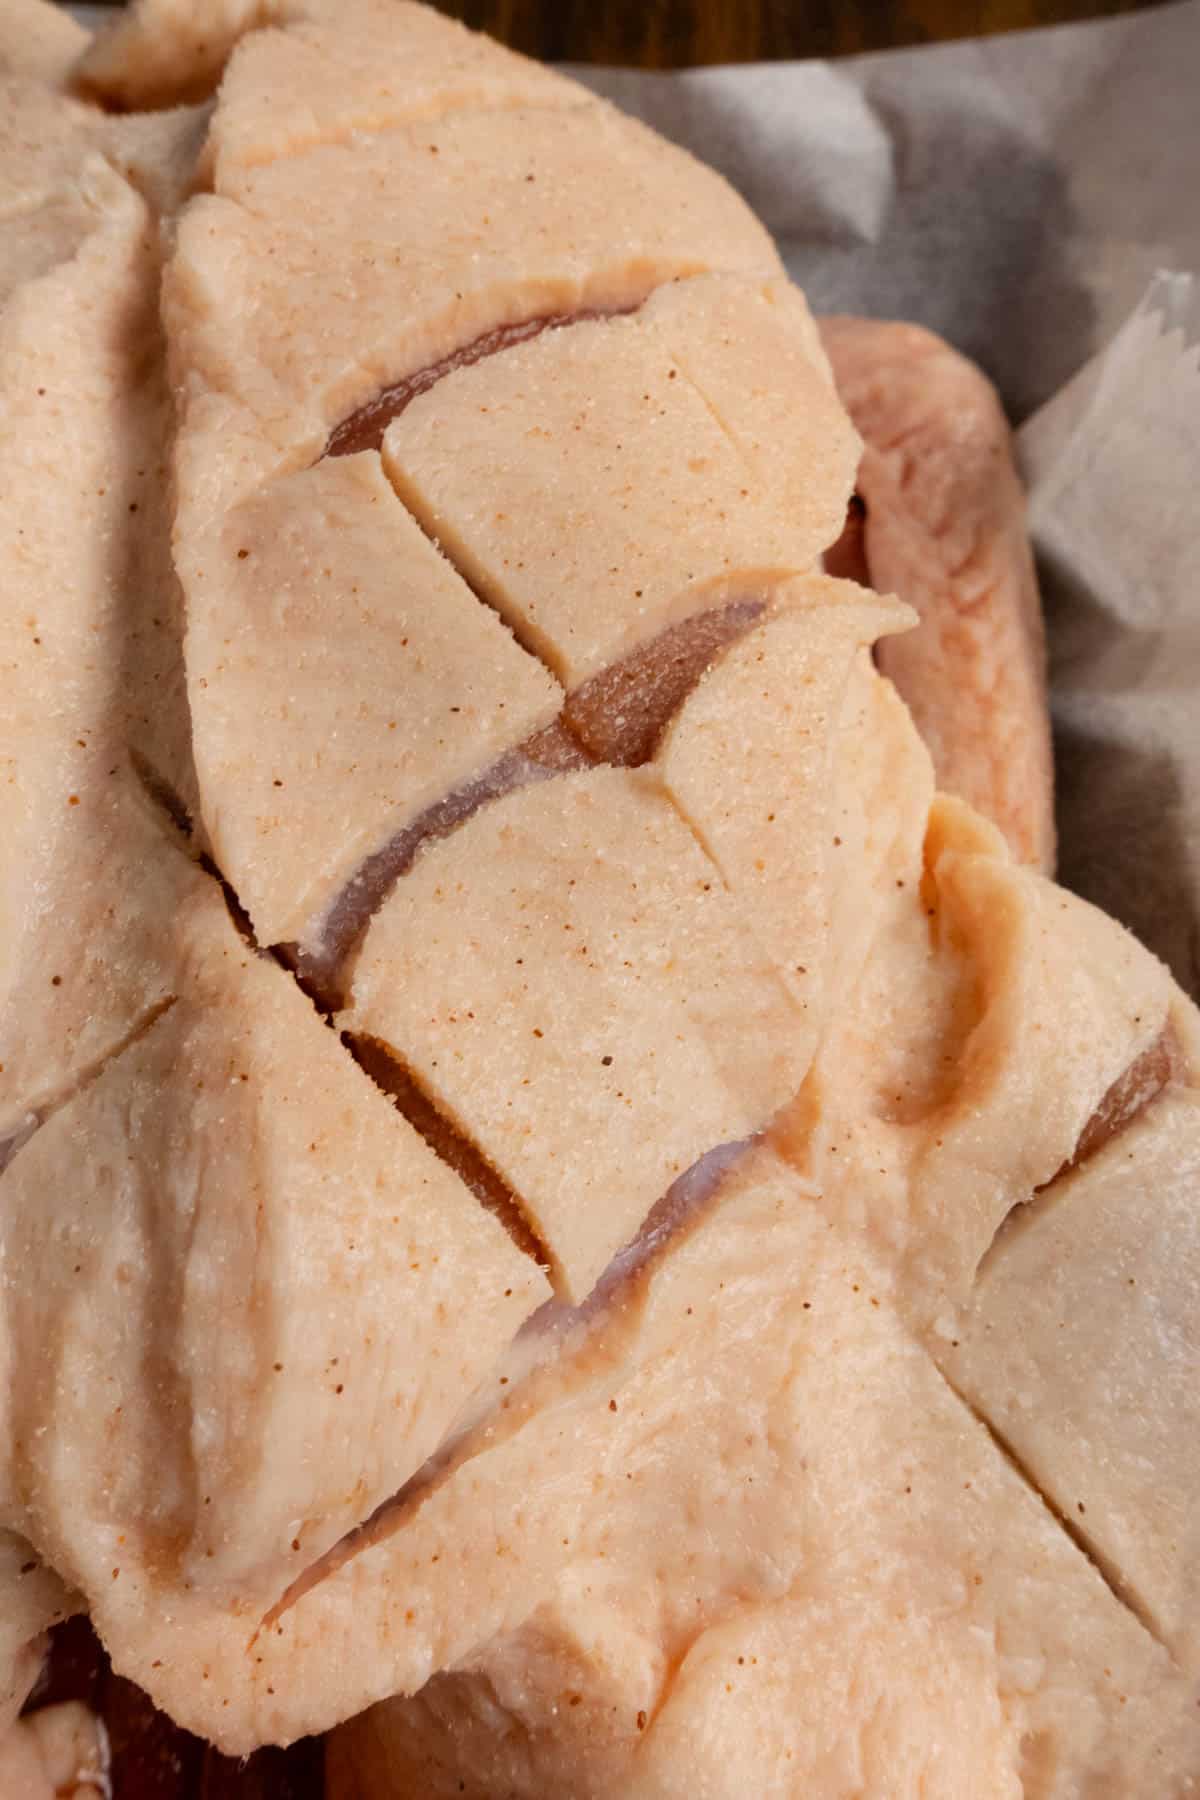
- Pat the duck completely dry with paper towels. Moisture is the enemy of crisp skin.
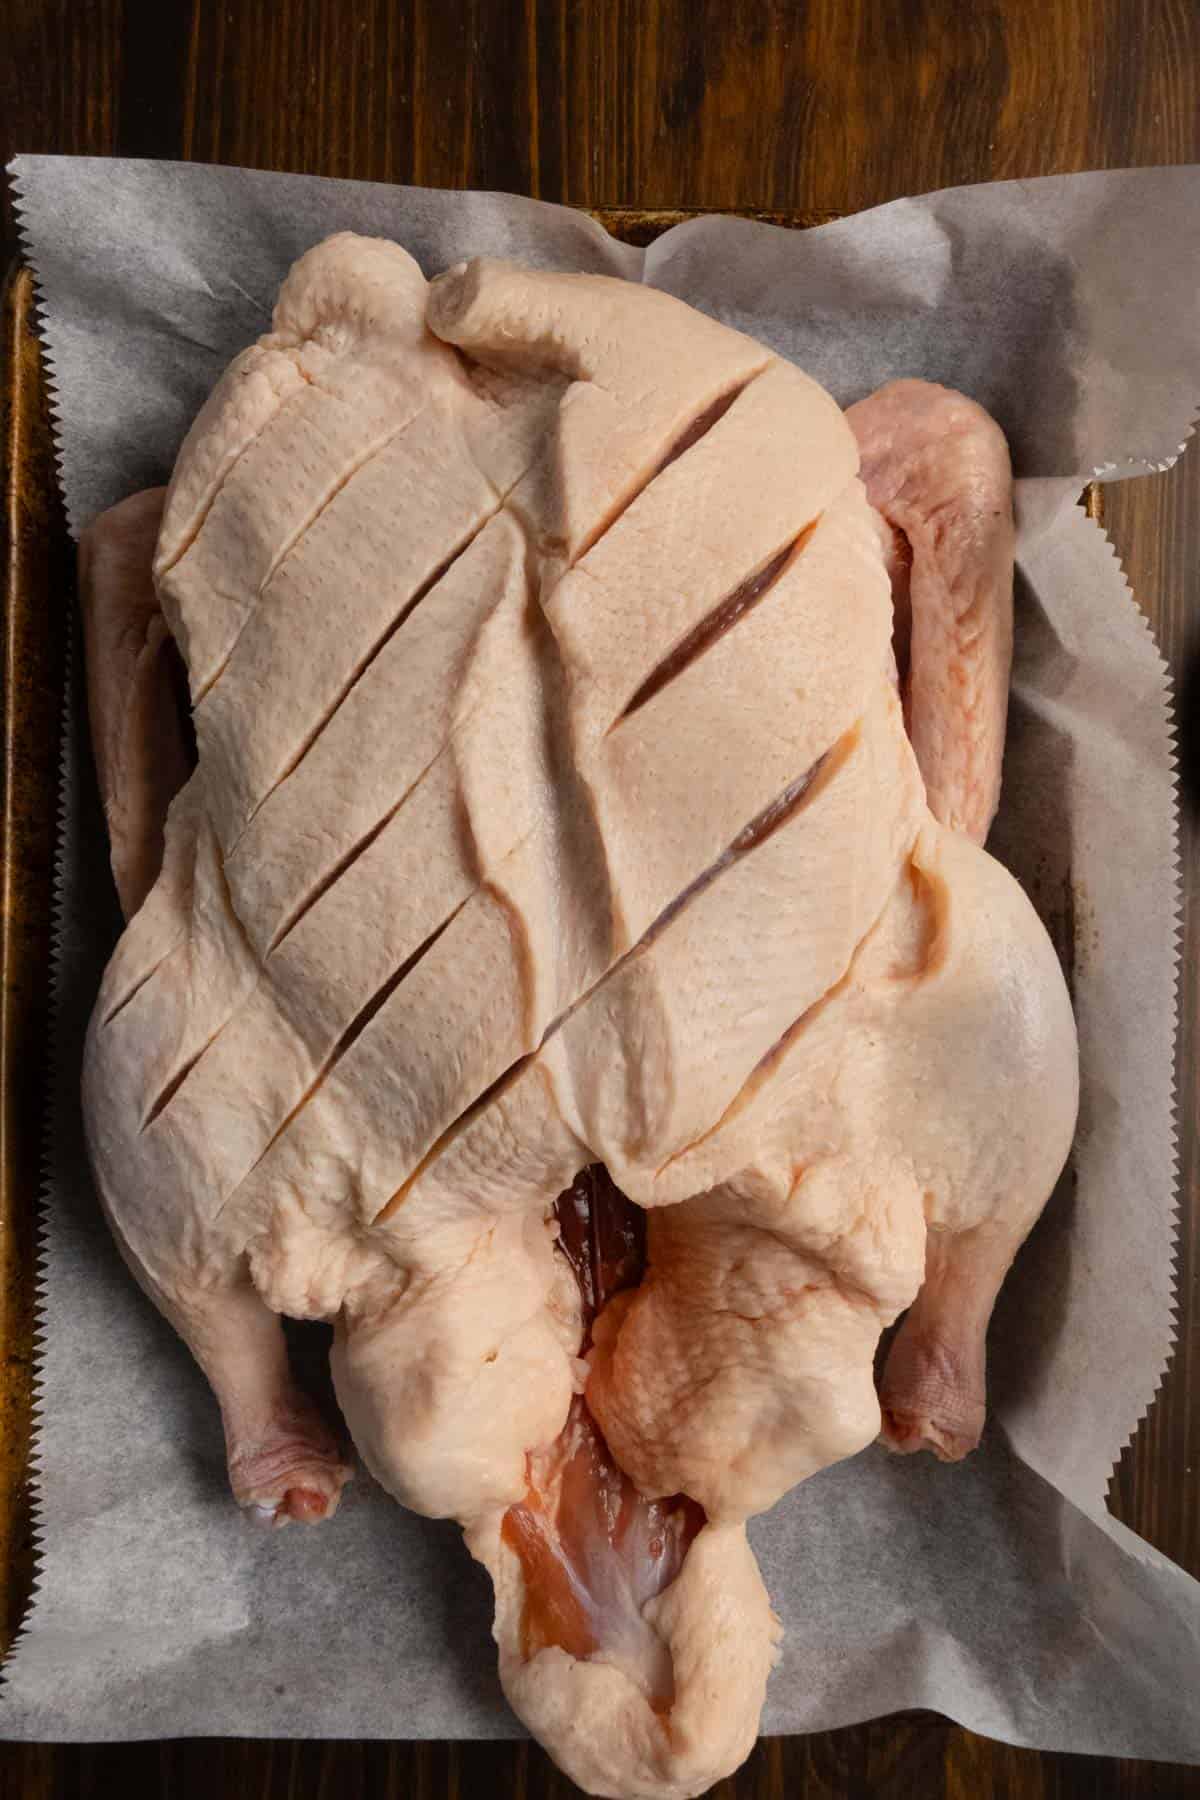
- Score the skin in a shallow crosshatch pattern, cutting through the fat but not into the meat.
- Season generously with salt on all sides and inside the cavity.
- Place the duck uncovered on a rack set over a rimmed baking sheet.
- Refrigerate 24–48 hours to dry the skin and season the meat throughout.
Roast the Duck
- Remove the duck from the refrigerator 30 minutes before roasting.
- Preheat the oven to 425°F.
- Place the duck breast-side up on a roasting rack set over a rimmed baking sheet.
- Roast at 425°F for 15 minutes to jump-start fat rendering and tighten the skin.
- Reduce the oven temperature to 350°F and continue roasting for 70–90 minutes. Begin checking internal temperature around the 75-minute mark; time varies depending on size.
- Carefully pour off rendered fat once or twice during roasting to prevent pooling beneath the bird.
- Continue roasting until internal temperatures reach:
• Breast: 160–165°F
• Thigh and Leg: 175–185°F
If the breast reaches temperature before the legs, loosely shield just the breast with foil and continue roasting until the legs are tender. - If the skin needs additional crisping, increase oven temperature to 425°F for 5–8 minutes at the end, watching closely.
- Rest the duck uncovered for 15–20 minutes before carving. Resting uncovered preserves crisp skin while allowing juices to redistribute.

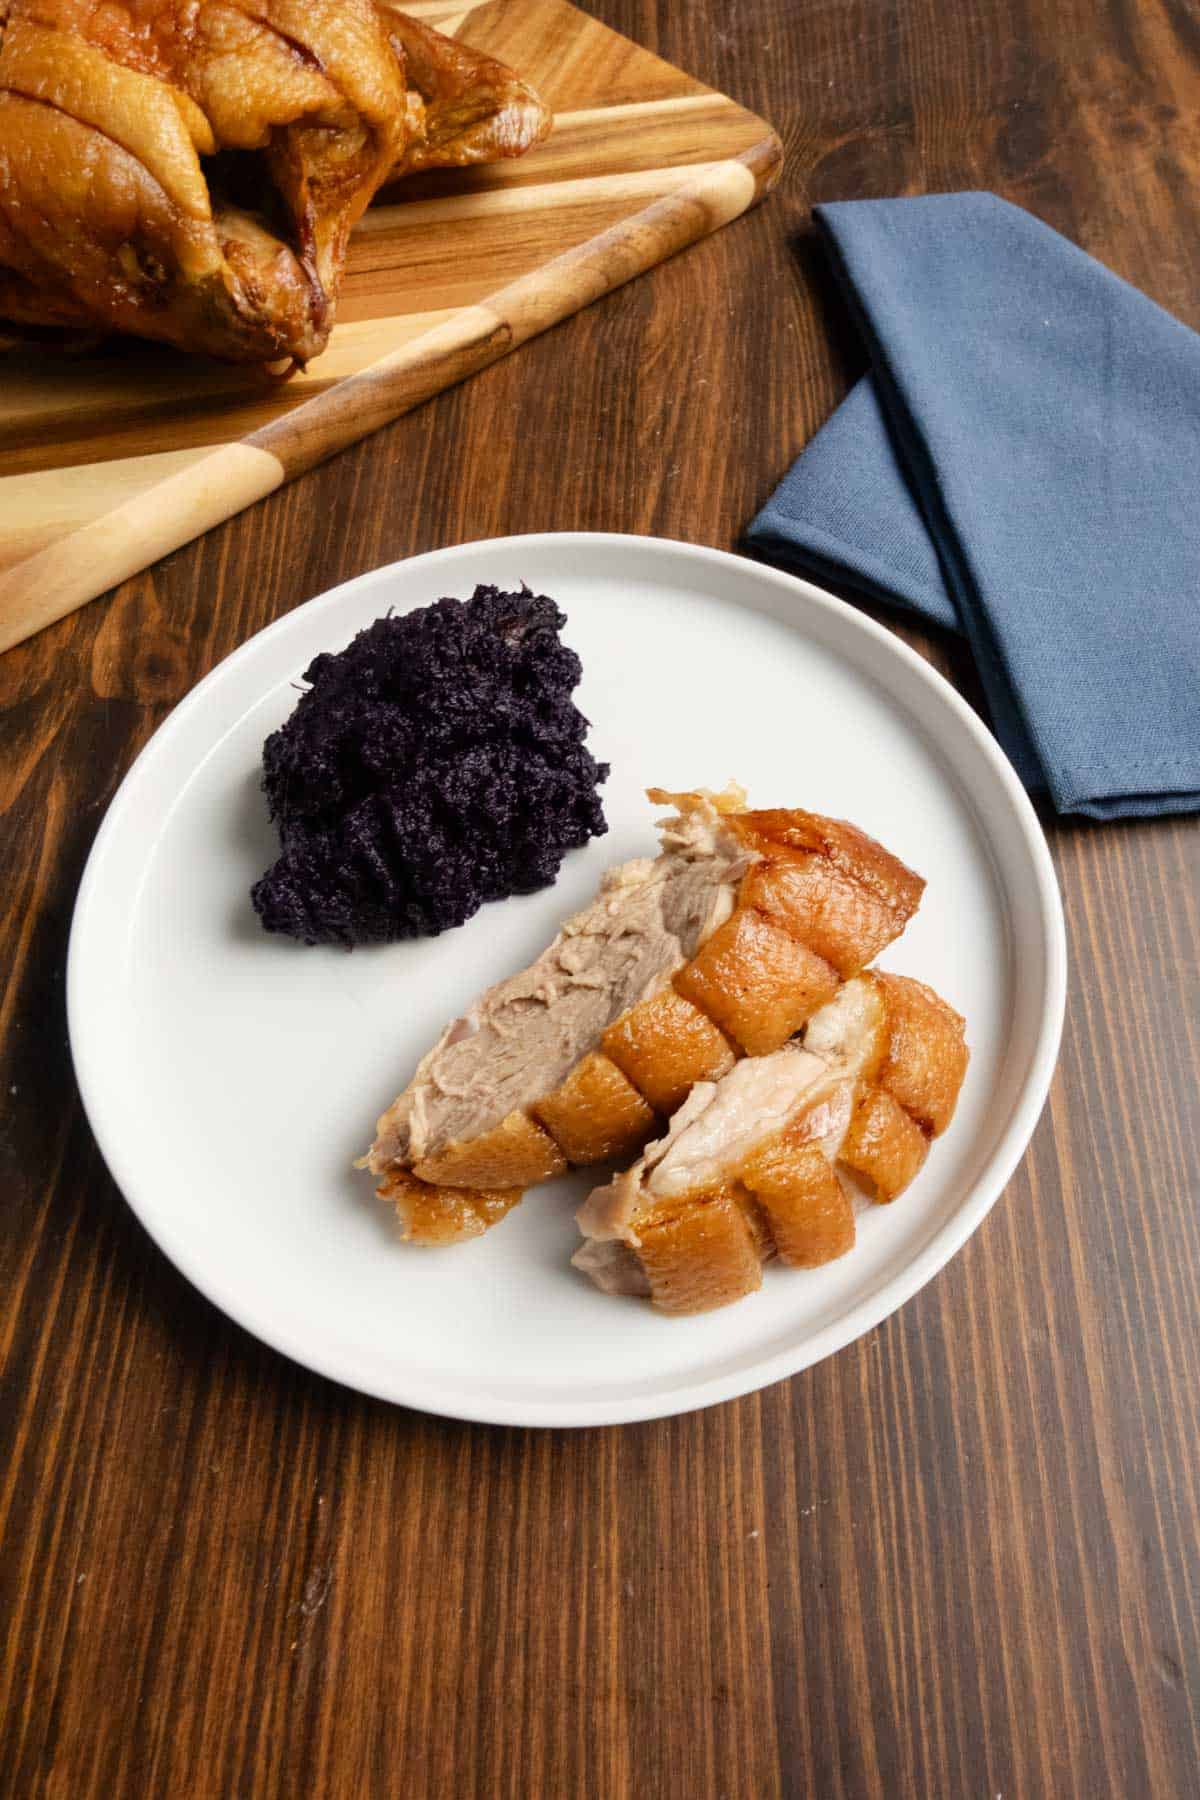
How to Carve a Whole Roasted Duck
Let the duck rest at least 15 minutes before carving so the juices settle and the skin stays crisp.
- Remove the legs. Place the duck breast-side up. Gently pull one leg away from the body and slice through the skin between the leg and breast. Bend the leg back until you feel the joint loosen, then cut through the joint to remove the entire leg and thigh in one piece. Repeat on the other side.
- Separate drumstick and thigh (optional). If desired, cut through the natural joint between the drumstick and thigh to portion them separately.
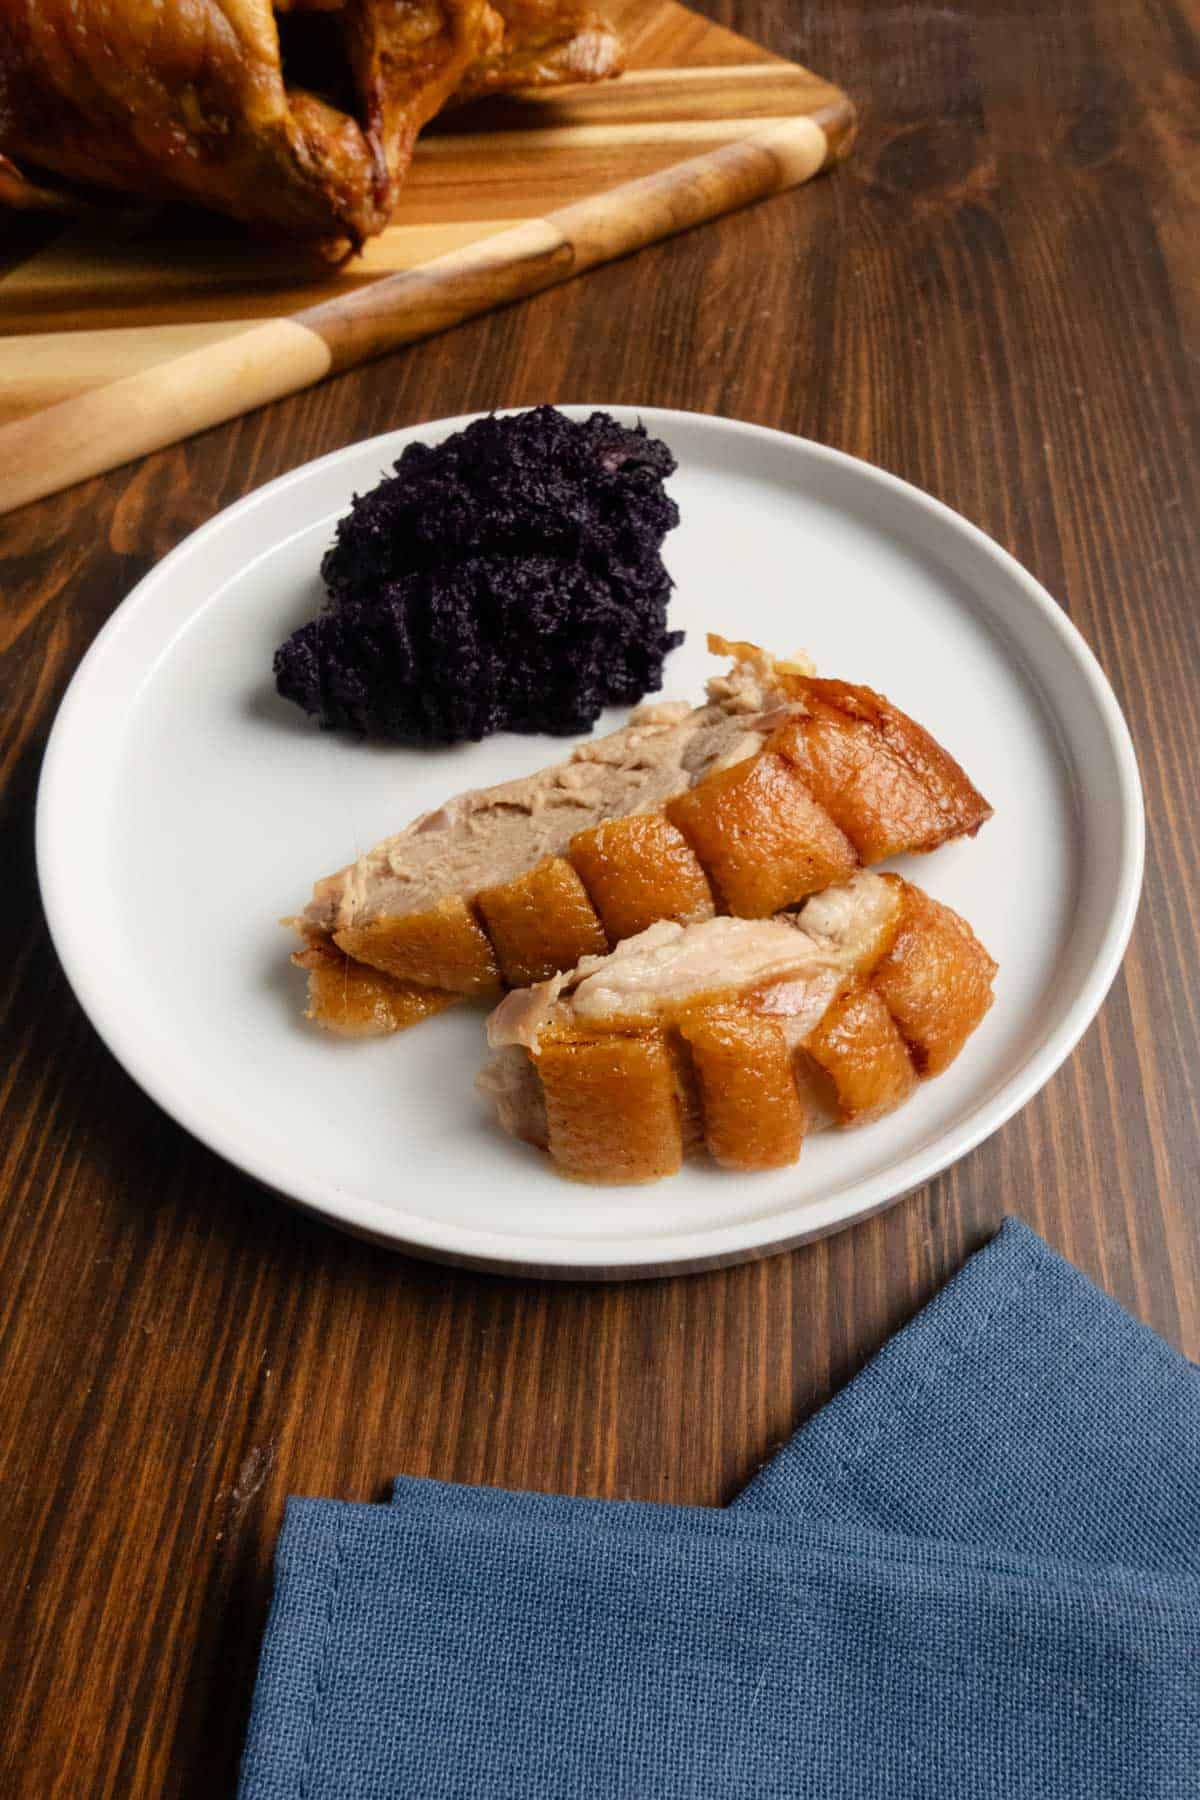
- Remove the breasts. Using a sharp knife, make a long cut down one side of the breastbone, right along the center. Keep your knife close to the bone and follow the curve of the ribcage, gently lifting the breast meat away in one piece. Repeat on the other side.
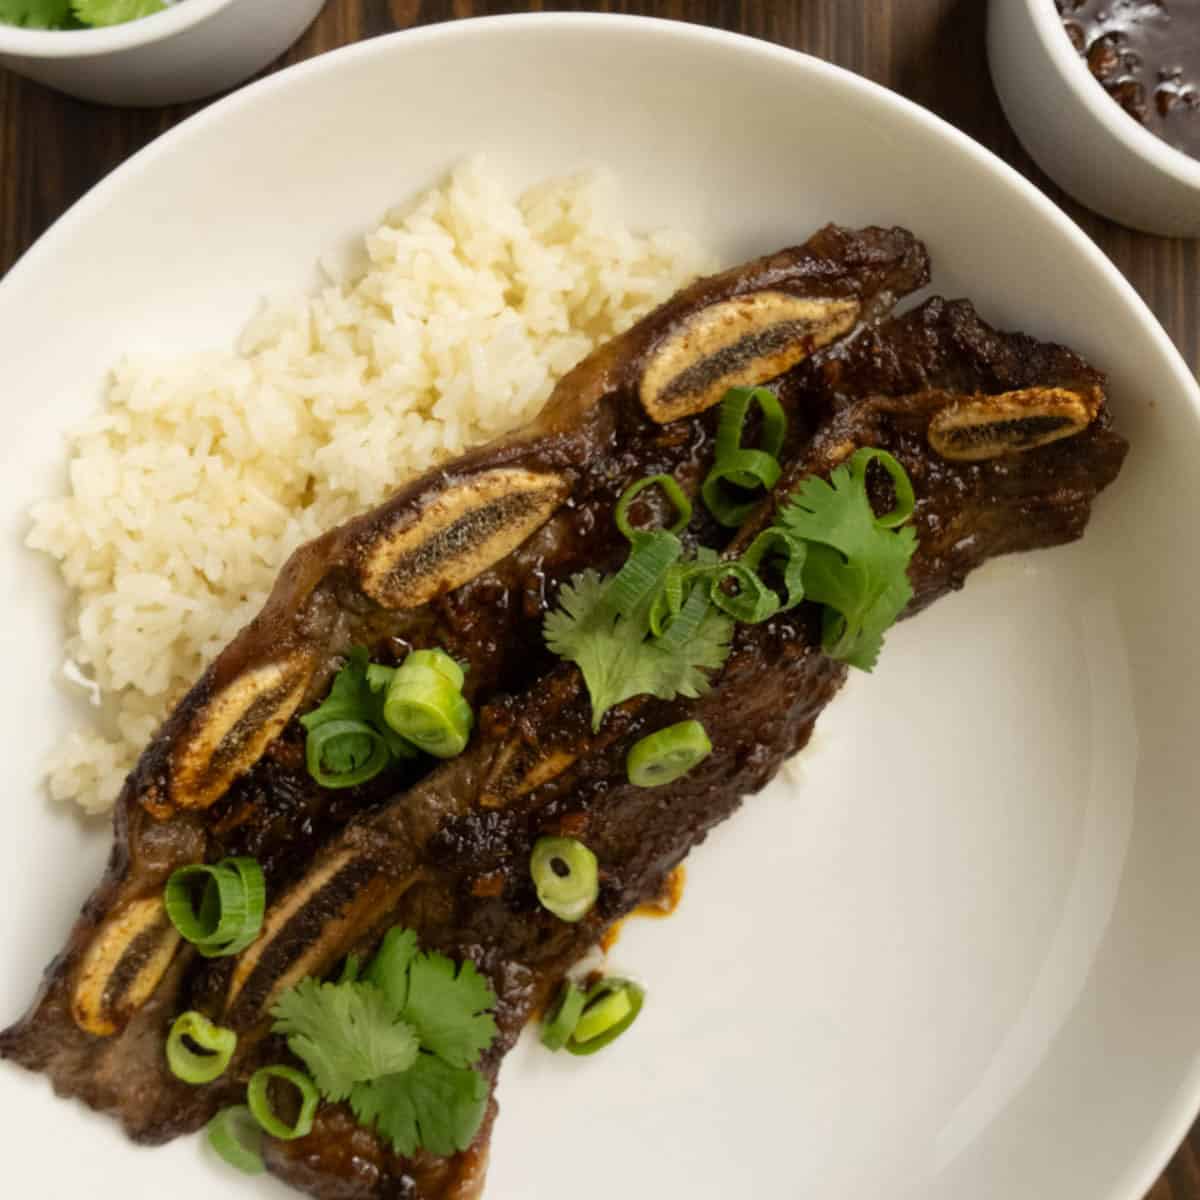
- Slice the breast for serving. Place each breast skin-side up and slice crosswise into thick slices. Keep the skin intact on each piece for maximum crispness.
If any juices collect on the board, spoon them lightly over the sliced meat before serving.
Expert Tips
- Score only the fat; if you see red meat, you’ve gone too deep.
- Prick thicker fat deposits near the thighs with a needle to encourage even rendering.
- You should see steady dripping during roasting; if fat pools beneath the duck, airflow is blocked.
- Do not baste; added moisture softens the skin.
- Do not flip; flipping tears skin and interrupts rendering.
- If browning too quickly, lower the oven temperature slightly rather than tenting immediately; foil traps steam.
- Rest uncovered; tenting softens crisp skin.
- Save the duck fat. Carefully strain rendered fat through a fine sieve into a heatproof jar. Refrigerate for up to 3 months. Use for roasting potatoes, vegetables, searing meats, or confit. Duck fat is liquid gold; do not discard it.
- Save the carcass. After carving, use the bones to make duck stock just as you would chicken stock. It produces a rich, deeply savory broth ideal for sauces and soups.
Storage: Refrigerate leftovers uncovered for the first few hours to preserve skin texture, then loosely cover. Reheat at 375°F on a rack until the skin re-crispens.
Duck rewards restraint. Intervene only when necessary.
Plating and Finishing Touches
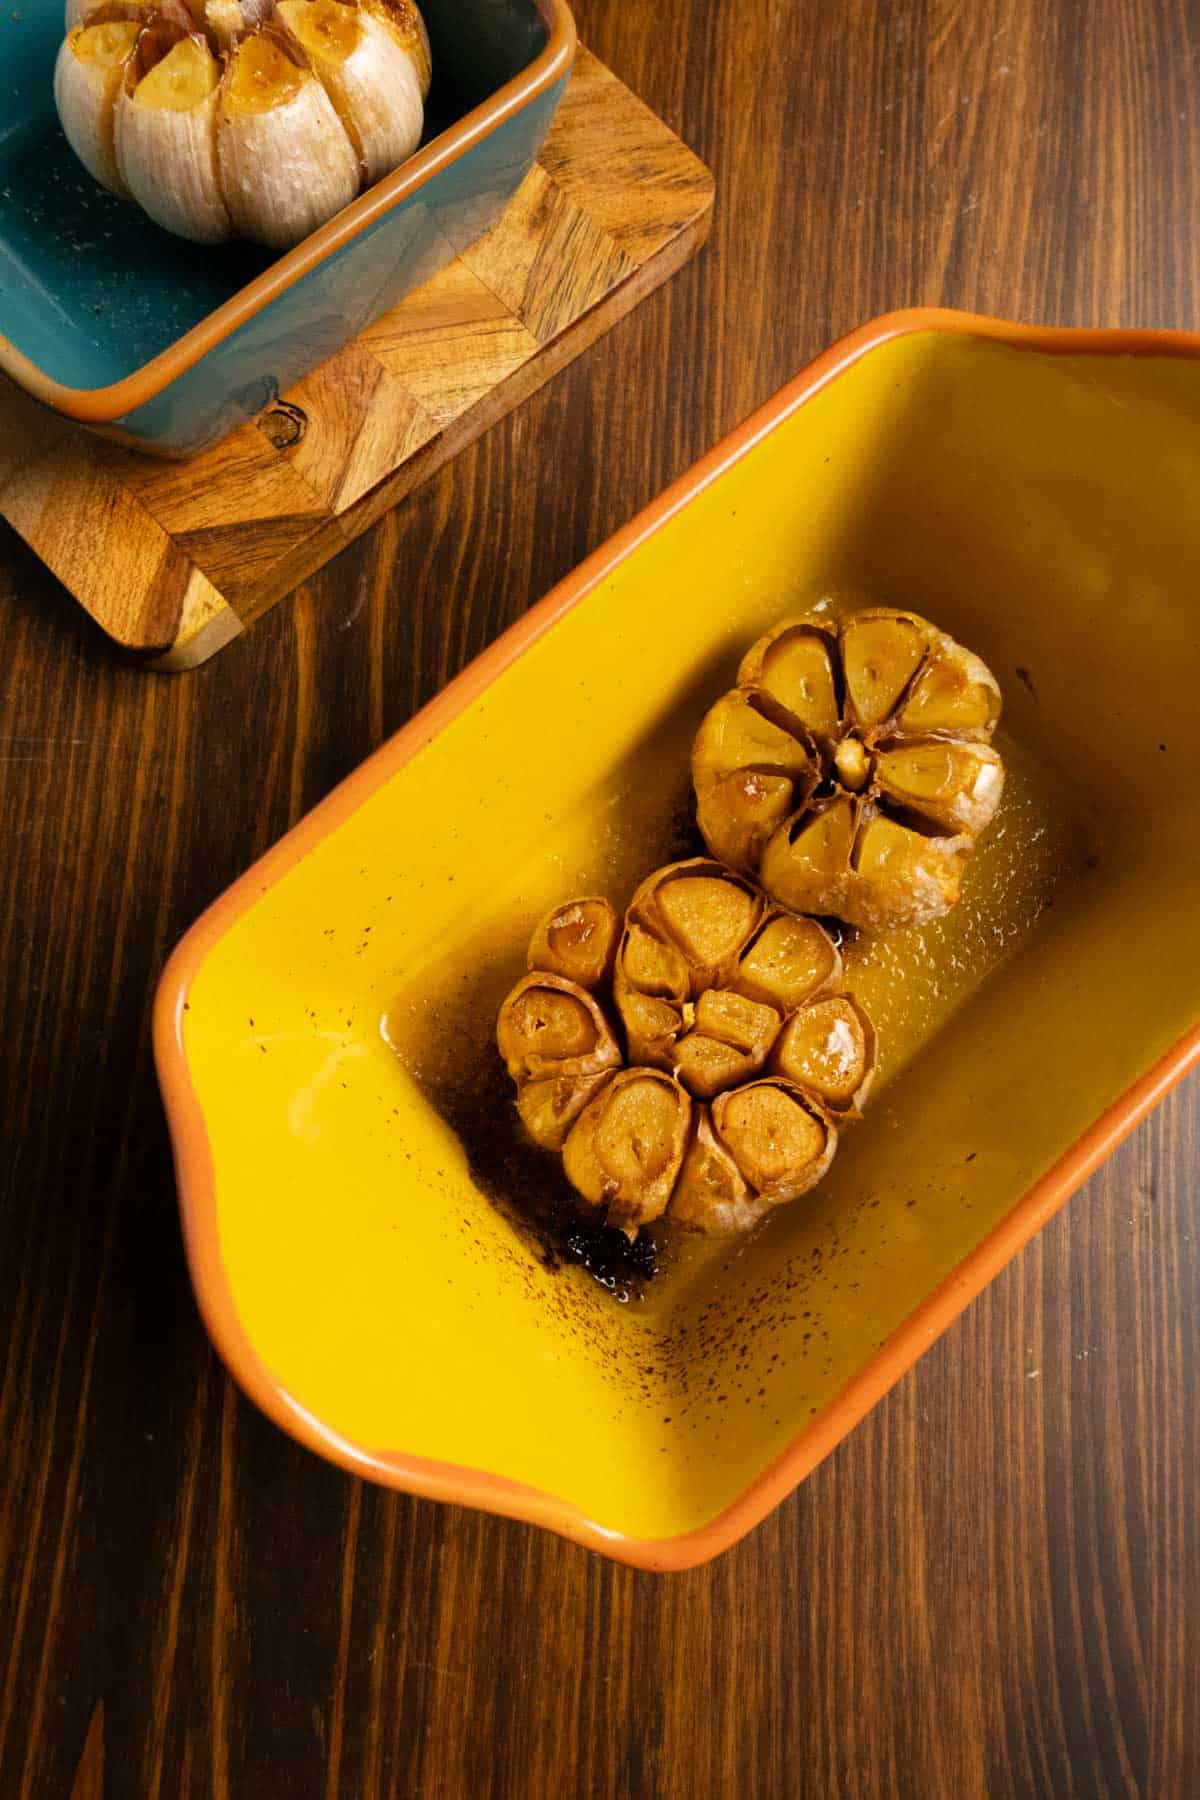
Roasted Garlic Bowl Smear: Before plating, smear a spoonful of roasted garlic across the warm serving platter. As the carved duck rests over it, the fat mingles with the garlic and becomes its own sauce.
Black Garlic Paste: Mash black garlic with a pinch of salt and a drop of duck fat. Brush lightly over sliced breast for a lacquered, savory gloss.
Citrus Zest Finish: Microplane orange or blood orange zest over the carved duck right before serving. The volatile oils cut the richness instantly.
Salt-Cured Egg Yolk: Finely grate over sliced breast or over duck-fat potatoes served alongside. It deepens savoriness without adding heaviness.
Duck Fat Warm Spoon: Heat a spoonful of strained duck fat and drizzle lightly over sliced breast just before serving. This restores sheen and amplifies flavor.
Fresh Herbs at the Last Second: A shower of thyme leaves or chopped parsley added at the table; not baked on, keeps it alive.

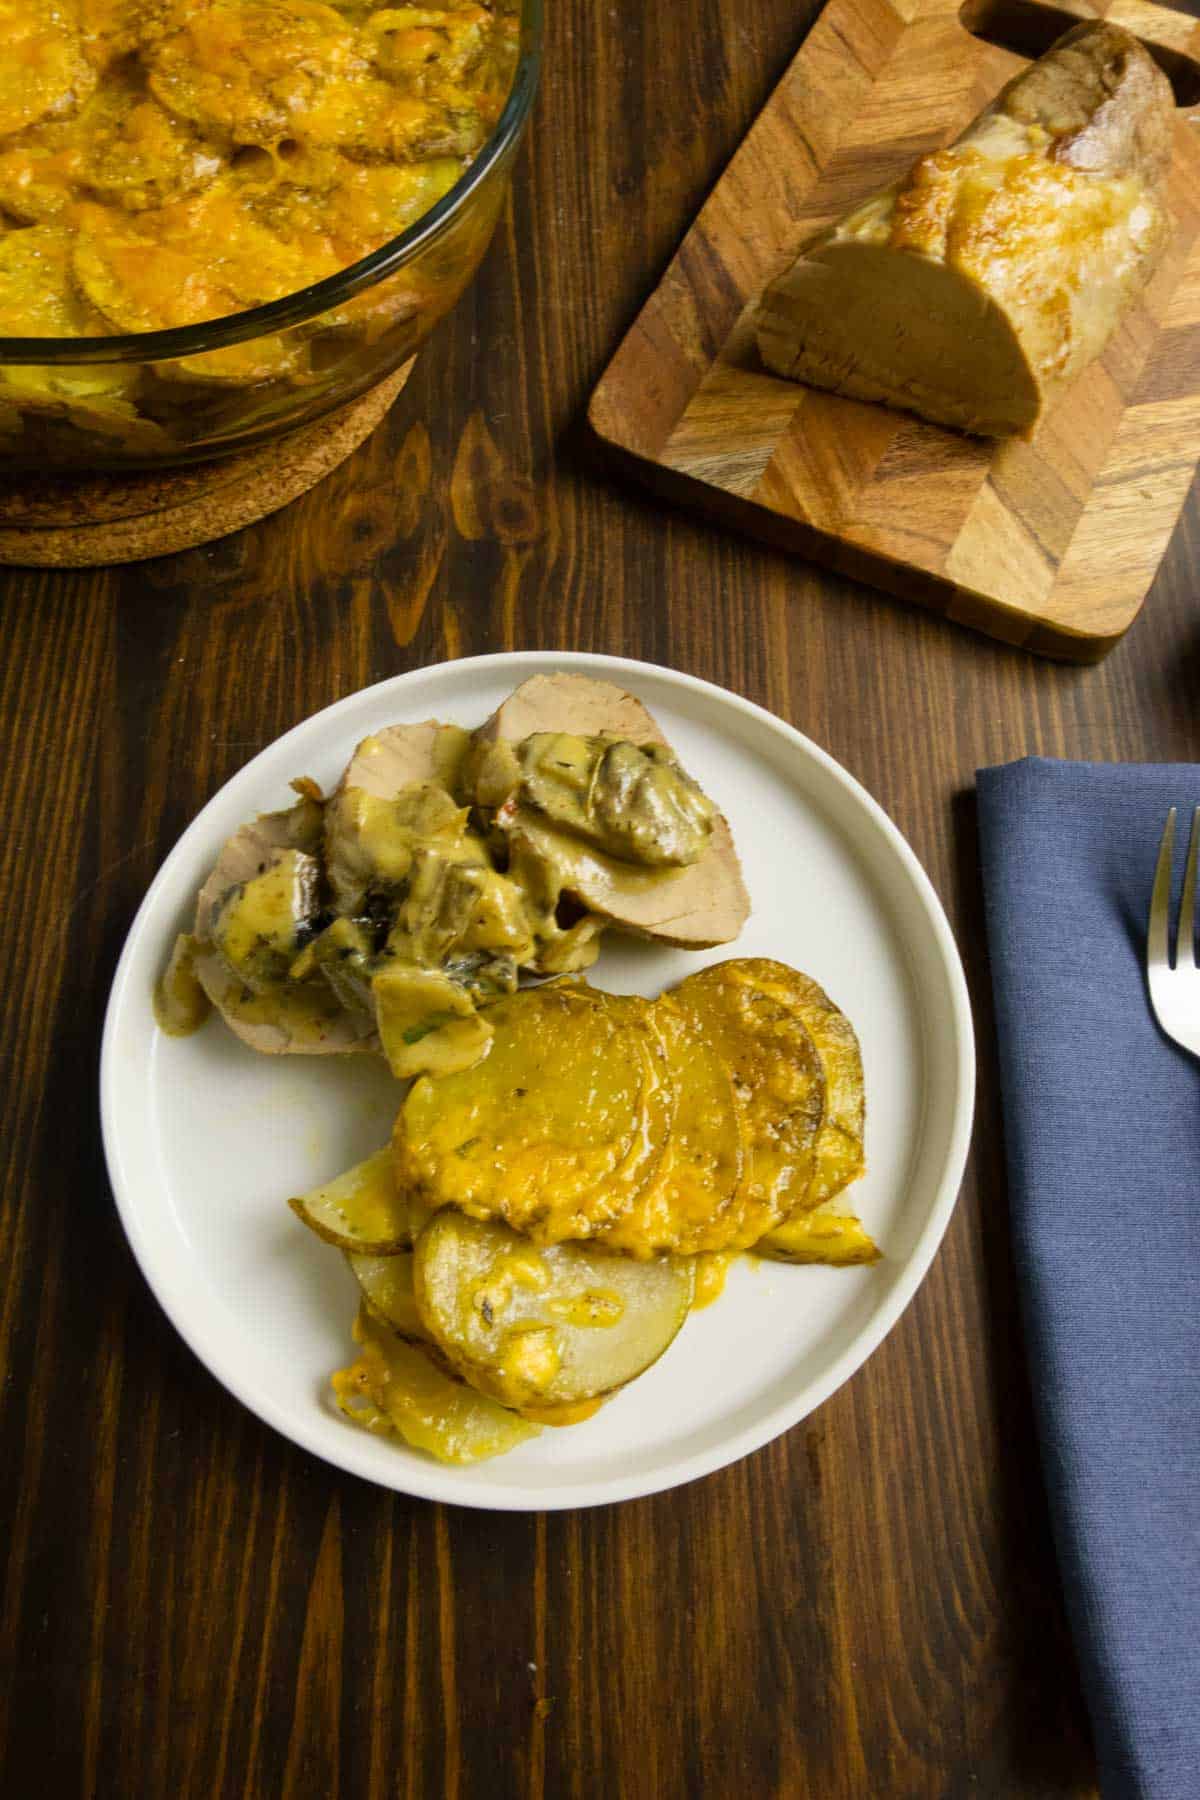
Serving Suggestions
Duck is rich and decadent and deserves bold accompaniments. Duck pairs beautifully with bitterness, citrus, and gentle sweetness.
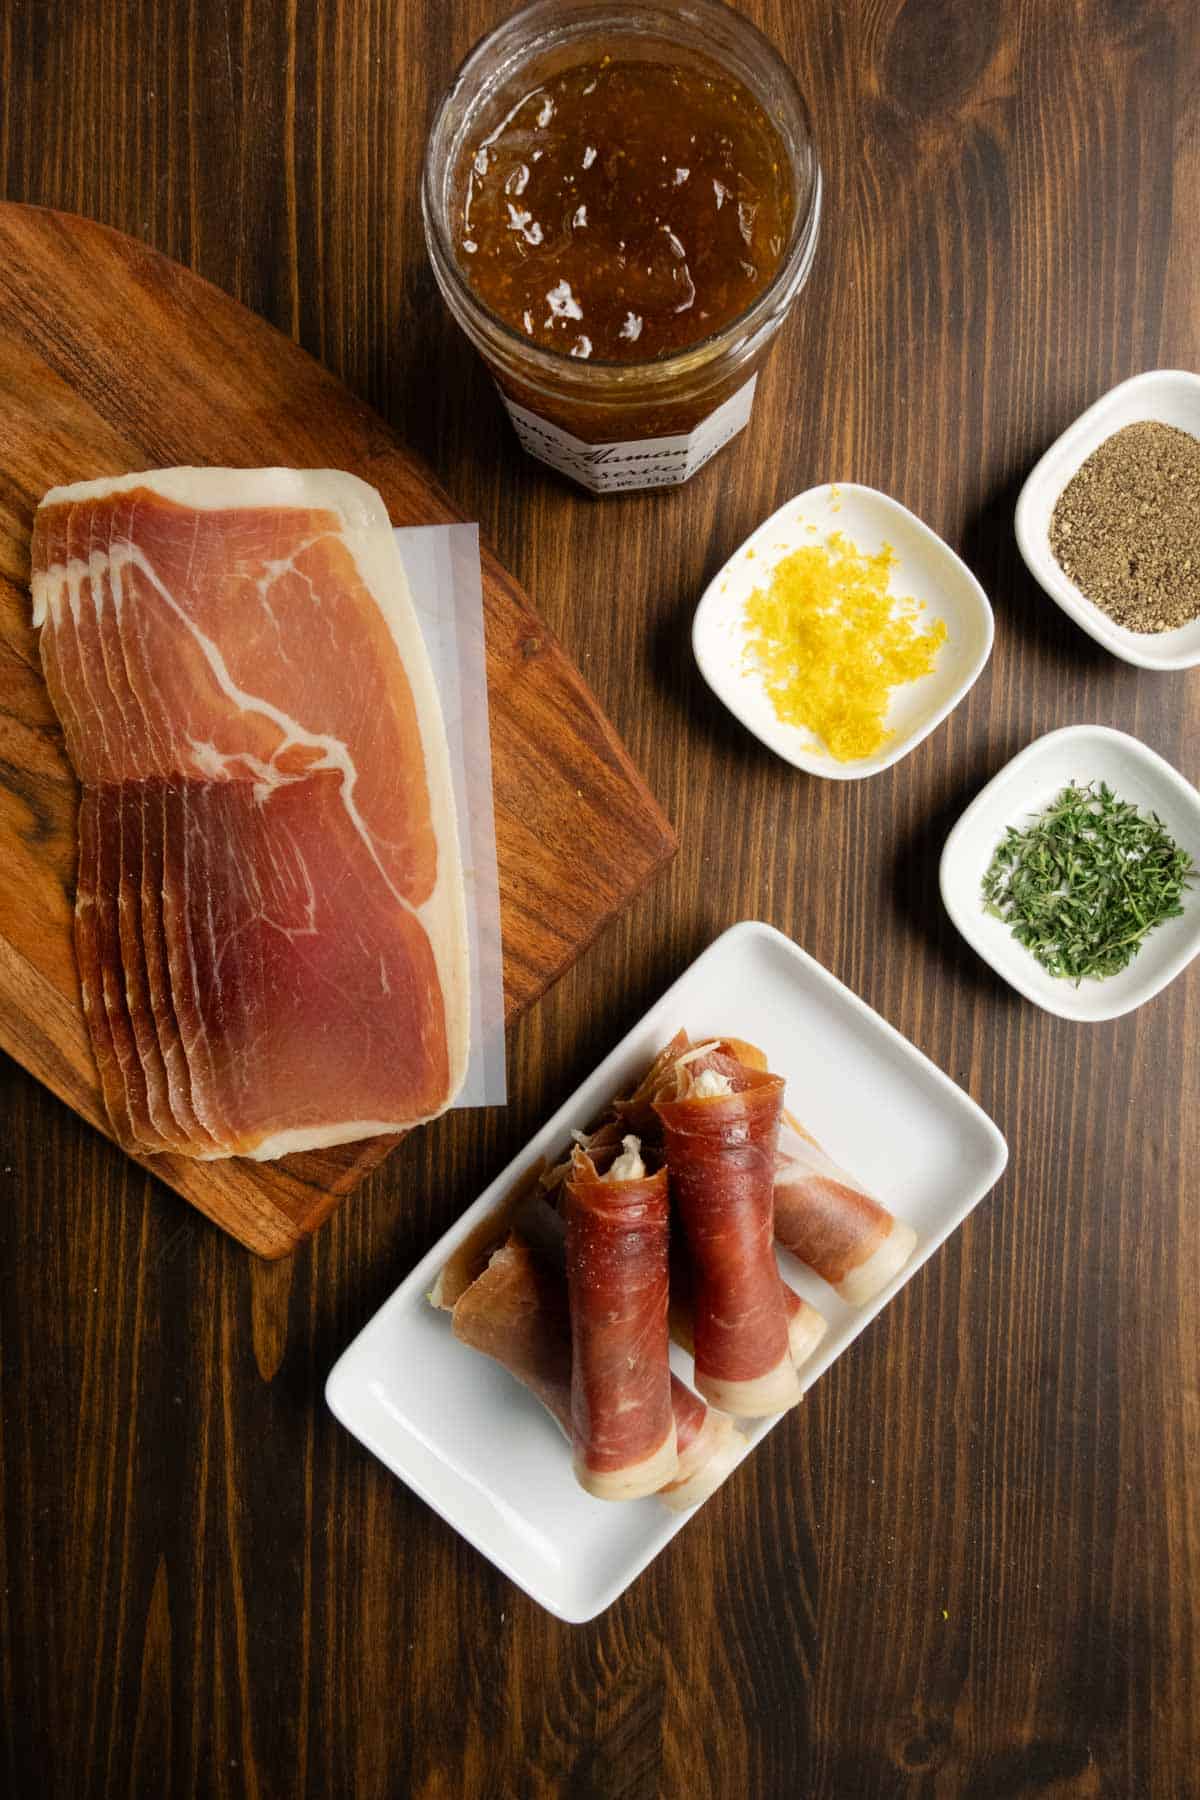
• Prosciutto and cheese rolls with fig jam and thyme
• Bread with garlic and herb oil
• Potatoes Gratin without Cream

FAQs
Dry brining removes surface moisture and concentrates flavor, which is essential for crisp skin. A wet brine adds moisture; that is helpful for lean poultry but works against duck’s natural fat rendering.
Rubbery skin means the fat did not fully render. Either the duck was not dry enough before roasting, the oven temperature was too low, or fat pooled beneath the bird. Make sure the duck is elevated and fully air-dried before roasting.
You should see steady dripping throughout the roast. When the dripping slows significantly and the skin appears evenly golden and taut, most of the surface fat has rendered.
Yes, up to 72 hours is fine in most refrigerators if the duck remains uncovered. Beyond that, texture may begin to firm slightly; still safe, just more cured in character.
Duck legs require higher finishing temperatures to become tender; 175–185°F is ideal. The breast can remain slightly lower and still be juicy. Use foil to shield the breast if needed while the legs finish.
Let the duck sit out briefly to take the chill off; but don’t bring it fully to room temperature. As the bird warms, the fat softens and the skin loses the tight dryness that helps it roast up crisp.
USDA recommends 165°F for poultry. Duck breast is often preferred at 160–165°F, while legs benefit from 175–185°F for tenderness.
If this duck makes its way to your table, I want to hear about it. Did you keep it simple or dress it up with something unexpected?
If you love learning techniques like this; the kind that make cooking feel grounded instead of chaotic; you’ll love my weekly newsletter. Every Wednesday I share what I’m cooking, what I’m testing, and what I’m learning in my own kitchen.
Join me there. It feels a little like pulling up a chair while something good roasts in the oven.
The Bluster and the Burrow

Dry Brined Roasted Duck
Ingredients
- 6 pound whole duck
- 2 tablespoons salt sea, Himalayan, or Redmond Real
Instructions
Dry Brine the Duck (24-48 Hours Before Cooking)
- Pat the duck completely dry with paper towels. Moisture is the enemy of crisp skin.
- Score the skin in a shallow crosshatch pattern, cutting through the fat but not into the meat.
- Season generously with salt on all sides and inside the cavity.
- Place the duck uncovered on a rack set over a rimmed baking sheet.
- Refrigerate 24–48 hours to dry the skin and season the meat throughout.
Roast the Duck
- Remove the duck from the refrigerator 30 minutes before roasting.
- Preheat the oven to 425°F.
- Place the duck breast-side up on a roasting rack set over a rimmed baking sheet.
- Roast at 425°F for 15 minutes to jump-start fat rendering and tighten the skin.
- Reduce the oven temperature to 350°F and continue roasting for 70–90 minutes.
- Begin checking internal temperature around the 75-minute mark; time varies depending on size.
- Carefully pour off rendered fat once or twice during roasting to prevent pooling beneath the bird.
- Continue roasting until internal temperatures reach:
- Breast: 160–165°F
- Thigh and Leg: 175–185°F
- If the breast reaches temperature before the legs, loosely shield just the breast with foil and continue roasting until the legs are tender.
- If the skin needs additional crisping, increase oven temperature to 425°F for 5–8 minutes at the end, watching closely.
- Rest the duck uncovered for 15–20 minutes before carving. Resting uncovered preserves crisp skin while allowing juices to redistribute.
Carving a Duck
- Remove the legs. Place the duck breast-side up. Gently pull one leg away from the body and slice through the skin between the leg and breast. Bend the leg back until you feel the joint loosen, then cut through the joint to remove the entire leg and thigh in one piece. Repeat on the other side.
- Separate drumstick and thigh (optional). If desired, cut through the natural joint between the drumstick and thigh to portion them separately.
- Remove the breasts. Using a sharp knife, make a long cut down one side of the breastbone, right along the center. Keep your knife close to the bone and follow the curve of the ribcage, gently lifting the breast meat away in one piece. Repeat on the other side.
- Slice the breast for serving. Place each breast skin-side up and slice crosswise into thick slices. Keep the skin intact on each piece for maximum crispness.
- If any juices collect on the board, spoon them lightly over the sliced meat before serving.
Notes
-
- Score only the fat; if you see red meat, you’ve gone too deep.
- Prick thicker fat deposits near the thighs with a needle to encourage even rendering.
- You should see steady dripping during roasting; if fat pools beneath the duck, airflow is blocked.
- Do not baste; added moisture softens the skin.
- Do not flip; flipping tears skin and interrupts rendering.
- If browning too quickly, lower the oven temperature slightly rather than tenting immediately; foil traps steam.
- Rest uncovered; tenting softens crisp skin.
- Save the duck fat. Carefully strain rendered fat through a fine sieve into a heatproof jar. Refrigerate up to 3 months. Use for roasting potatoes, vegetables, searing meats, or confit. Duck fat is liquid gold; do not discard it.
- Save the carcass. After carving, use the bones to make duck stock just as you would chicken stock. It produces a rich, deeply savory broth ideal for sauces and soups.


My favorite protein. This is restaurant quality or better
This recipe is one that impresses without being more difficult to cook than a chicken. Let me know how you liked it and if you’d roast a duck again.